Creating a Custom Pillar Pod - Step by step instructions
#1
 09-10-2010, 03:01 PM


Join Date: May 2009
Location: Rocklin, Ca
Posts: 2,702
Likes: 0
Received 0 Likes
on
0 Posts
Creating a Custom Pillar Pod
I have been hit up many times by forum users wondering how I created the boost gauge pod on my pillar. I have had to turn down several requests to make them for others. Recently there was a need to create another pod so I took this opportunity to document the process for those who want to do it.
I will list the items I used, your welcome to alter the list any way you want.
Materials:
Tomtom GPS window mount
Resin and Hardener
Bondo
Sand paper
T-shirt or grill cloth
Color matched paint
Primer (don�t use Krylon)
Misc part found around the home
Time
Here is a before picture:
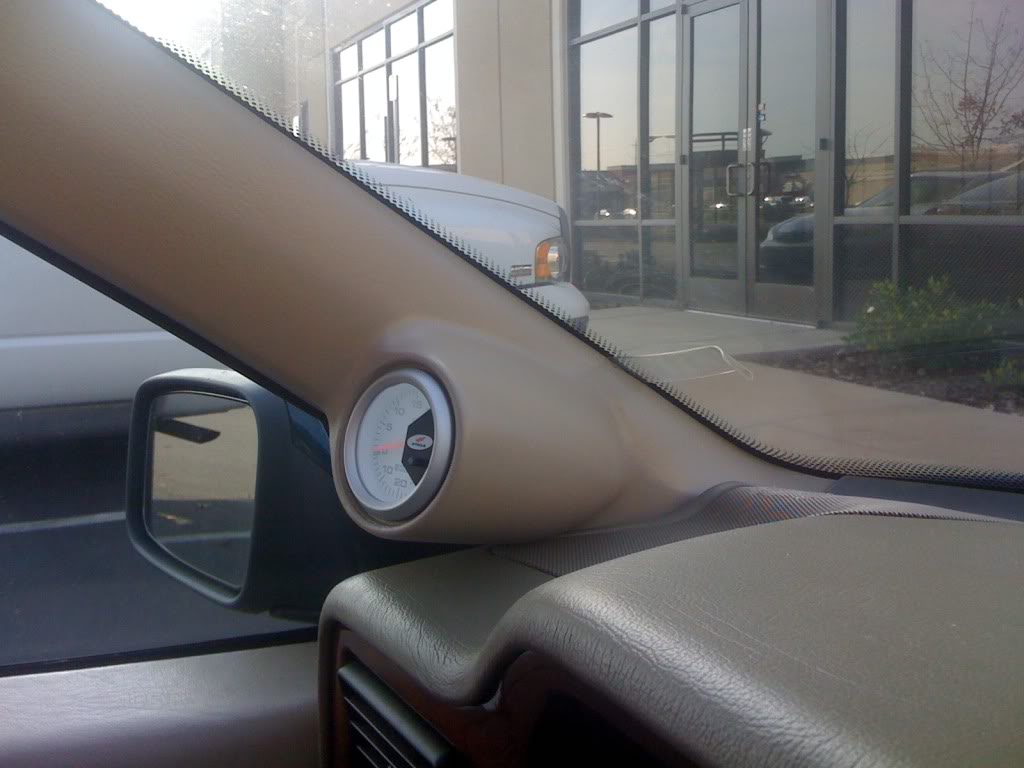
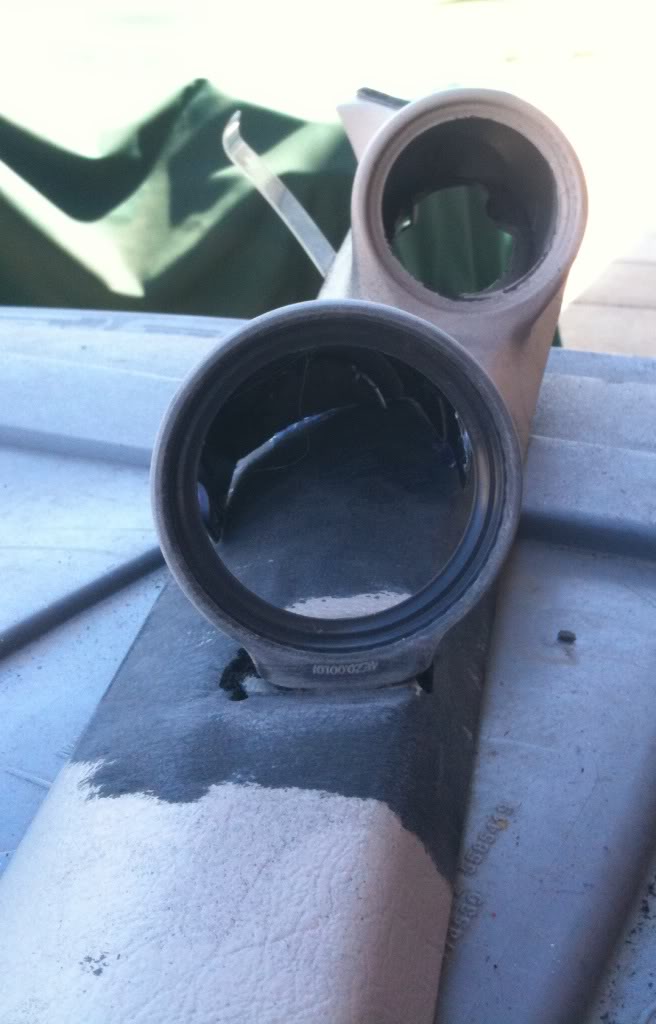
To start, I used a TomTom window mount because it�s a good size for the gauge and round. Plus it actually can mount to the pillar.
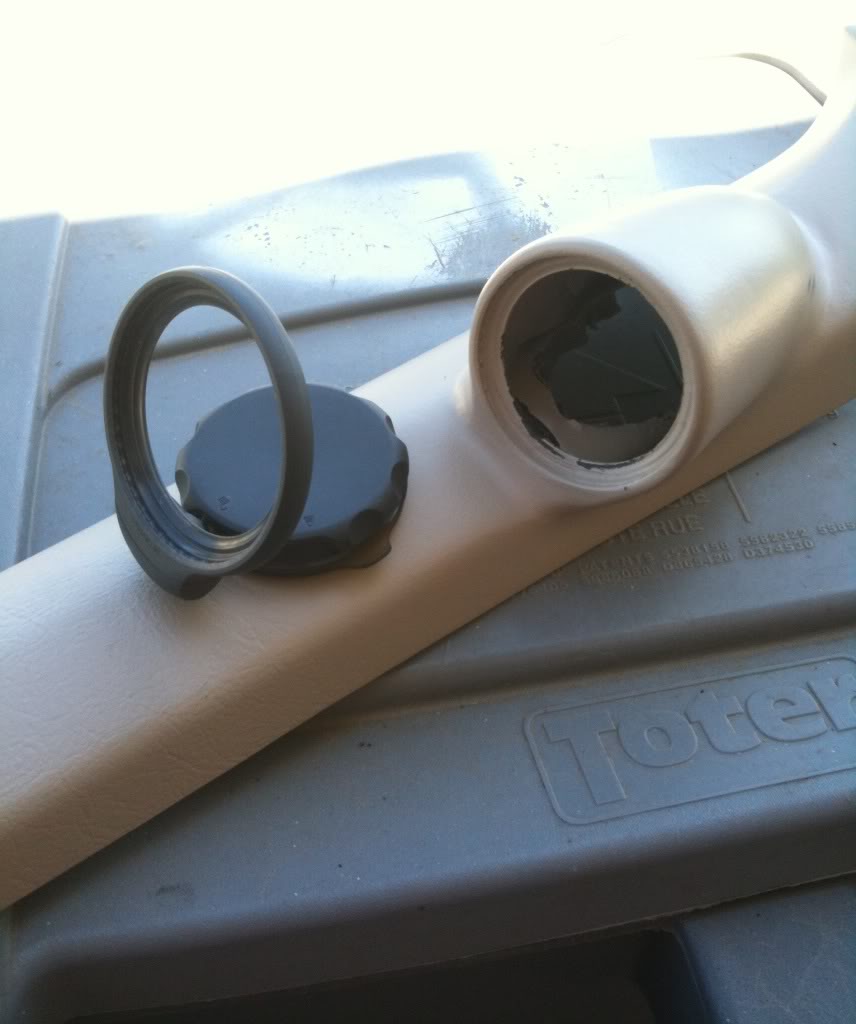
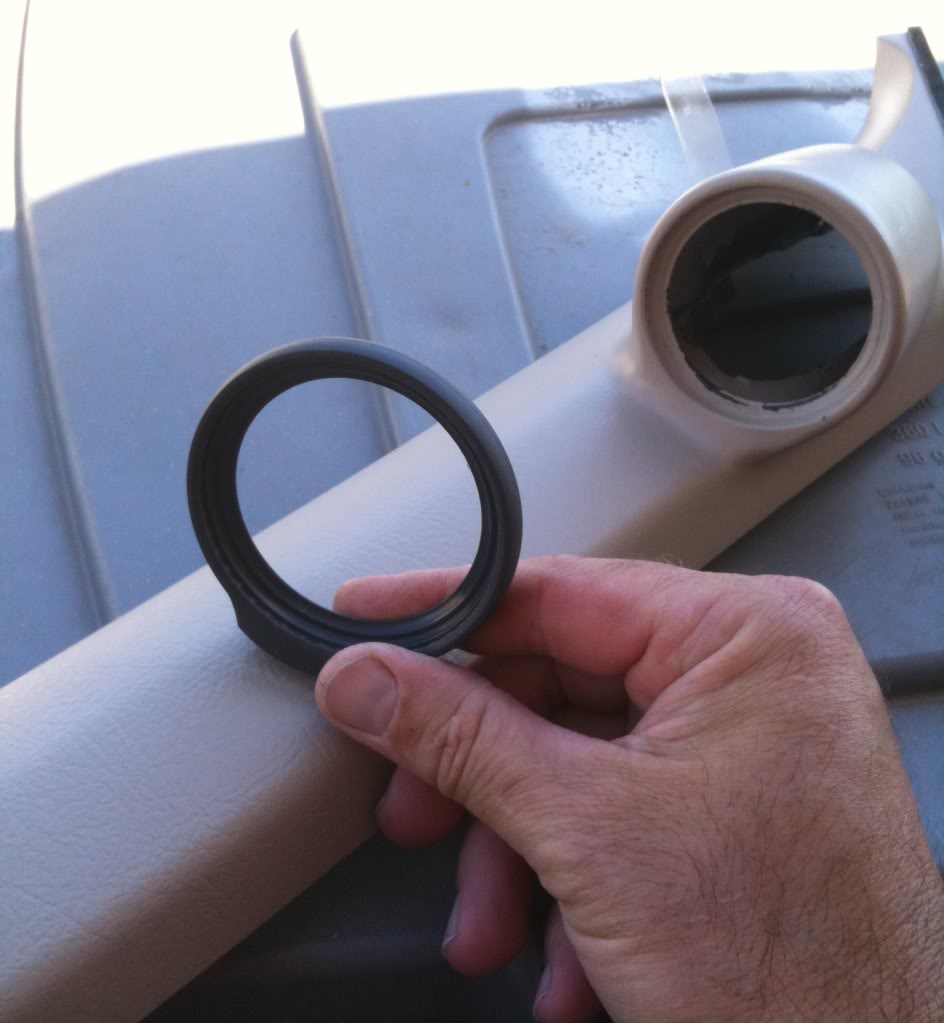
Next take the ring off the mount
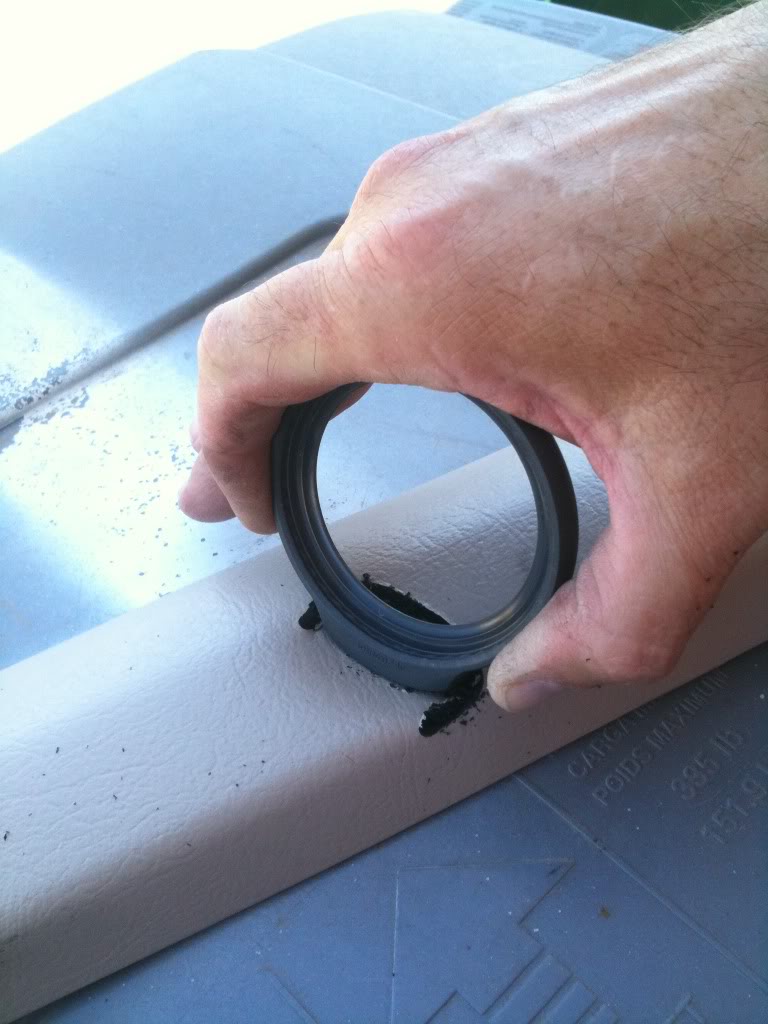
The ring is then mounted with its own screws to the pillar. Notice in the picture I ground around the mount point so I could move the plastic to get the ring in just the right place. I used a heat gun to do this
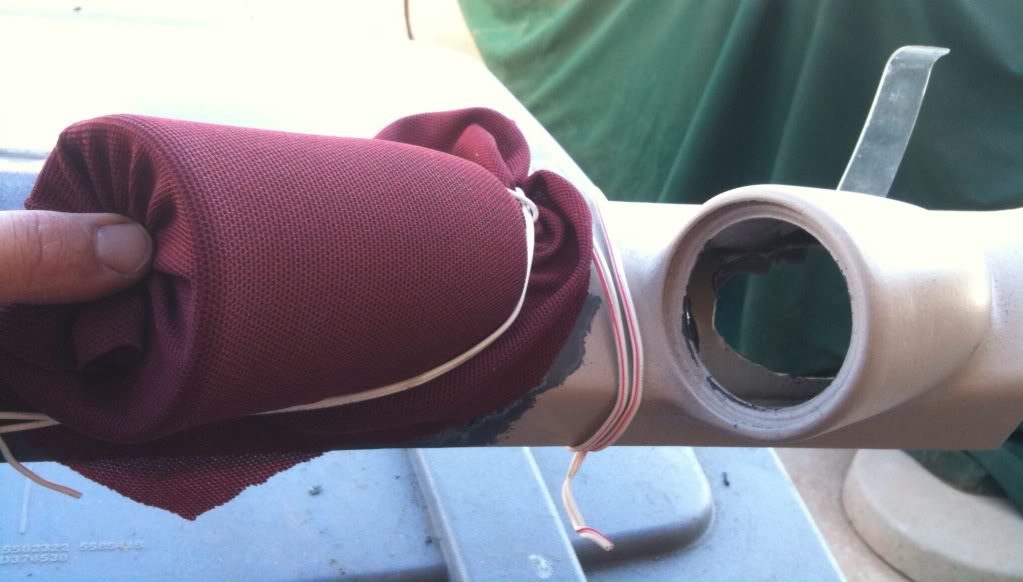
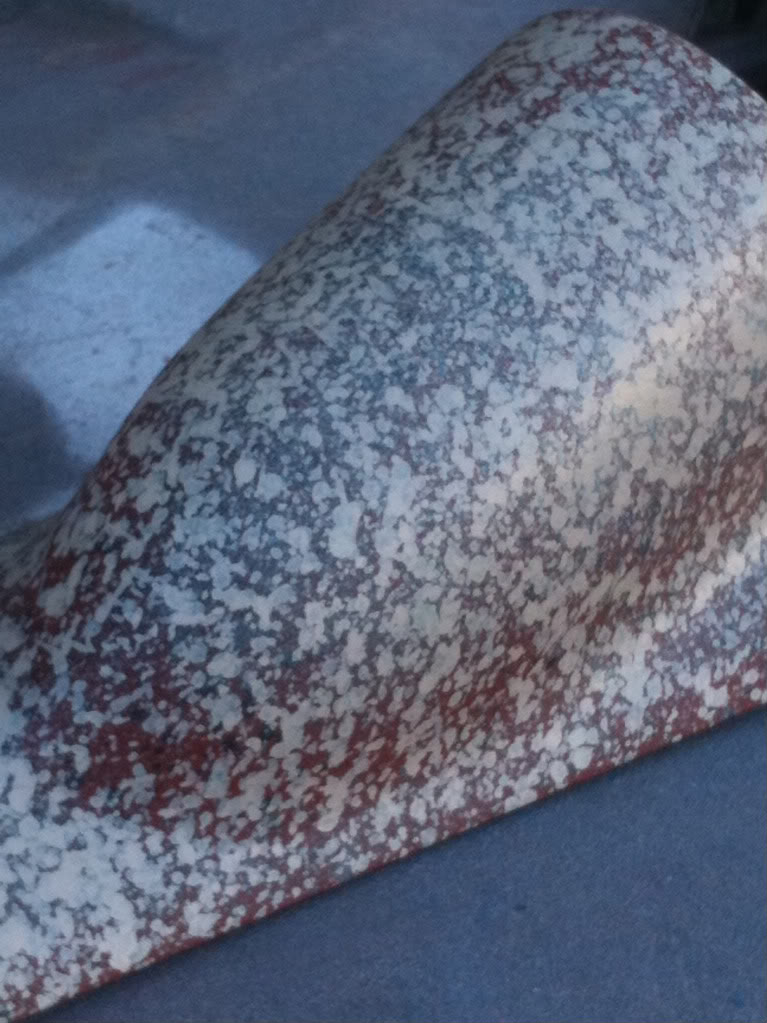
Then I ground away the paint and roughed up the surface for the resin to stick. But, continuing with the shape, I used a Krylon paint cap that is tapered and cut the bottom of it off so it sat on the pillar. This will be the final shape of the pod. Its held on with hot glue.

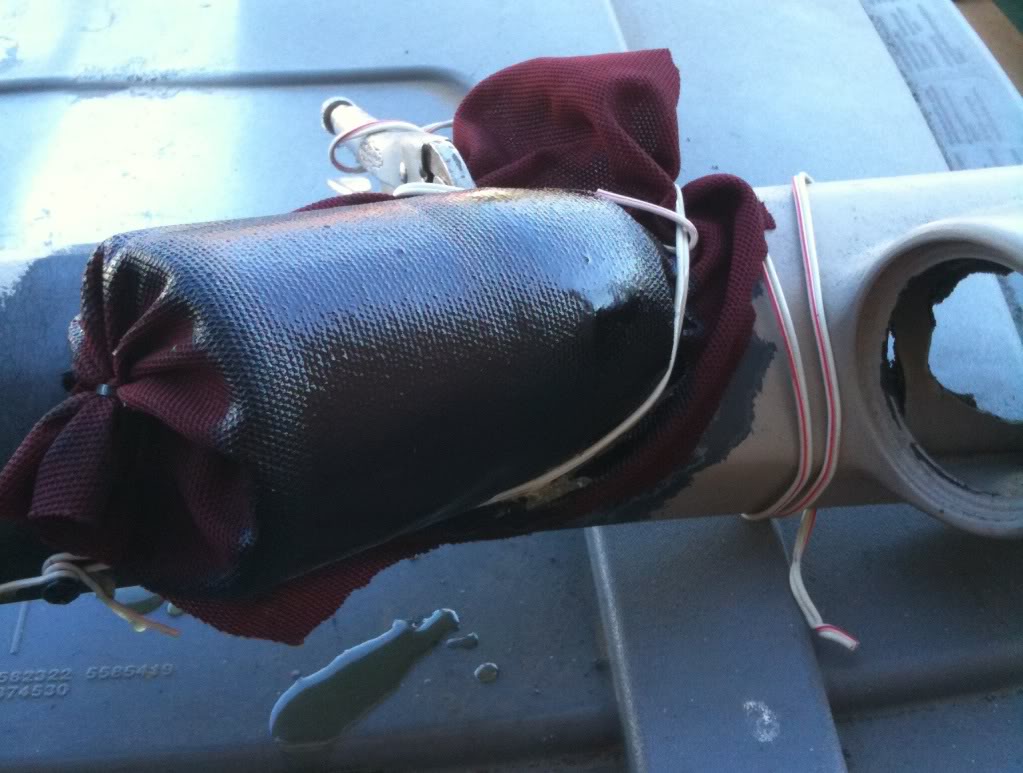
Next, stretch grill cloth or a cotton t shirt over the ring and cap until you get your shape. I used a zip tie and some wire to hold it in place.
Then apply a coat of resin
In my case I had some fiberglass matt and was able to continue on at this point applying another coat of fiberglass for strength. You can again use another coat of grill cloth for this. . The next picture is after it has dried and a rough sanding
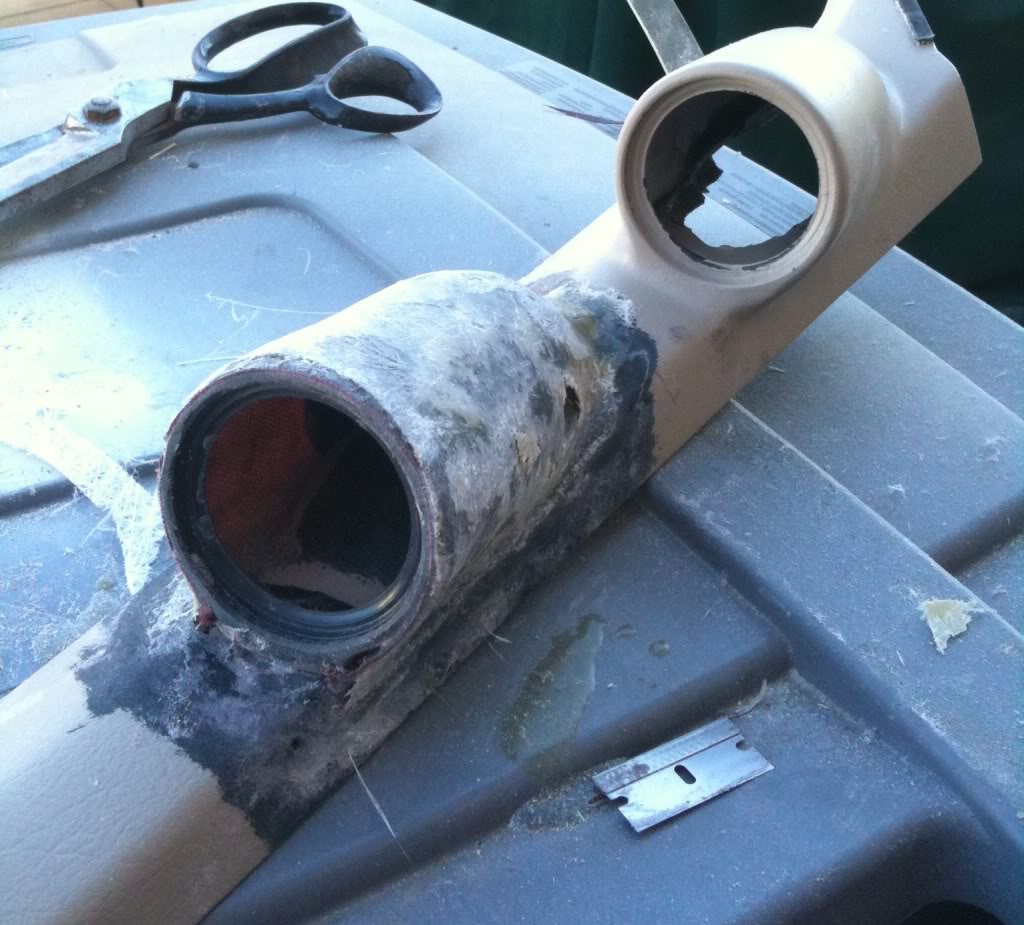
After the sanding, begin to add bondo to smooth out the surface and work your final shape.
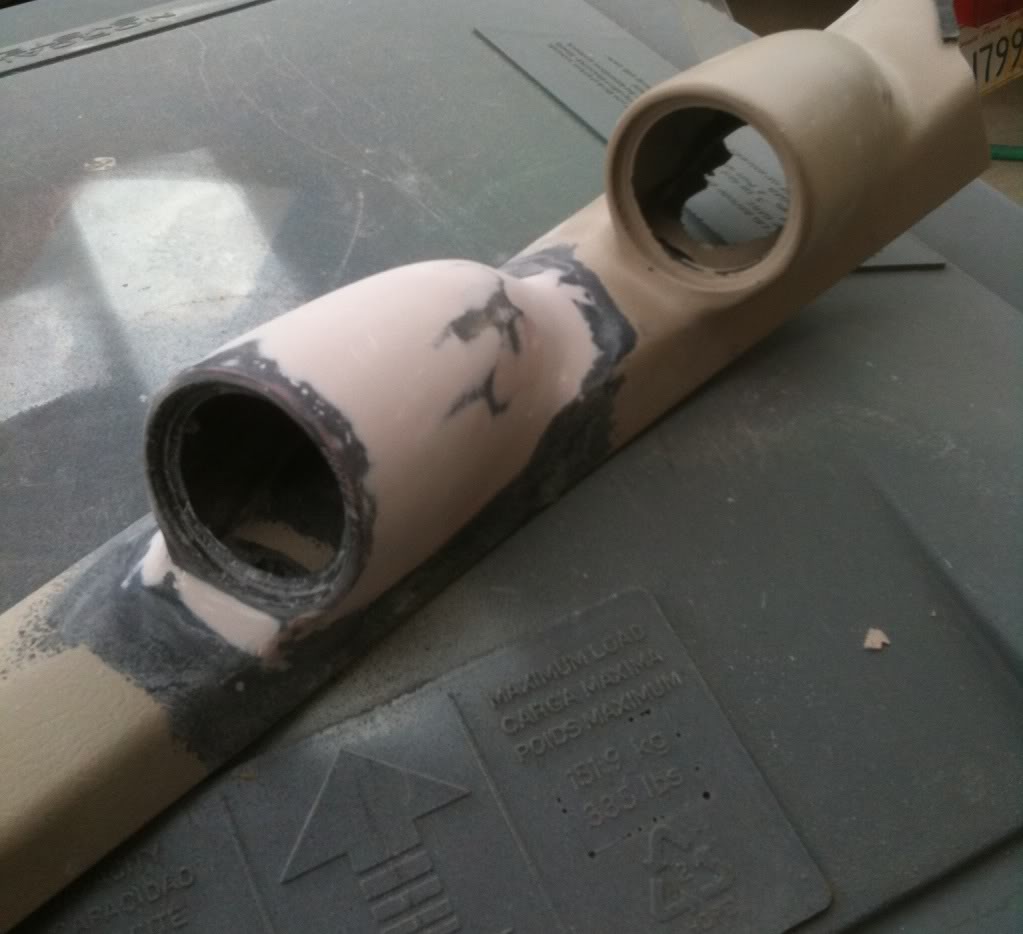

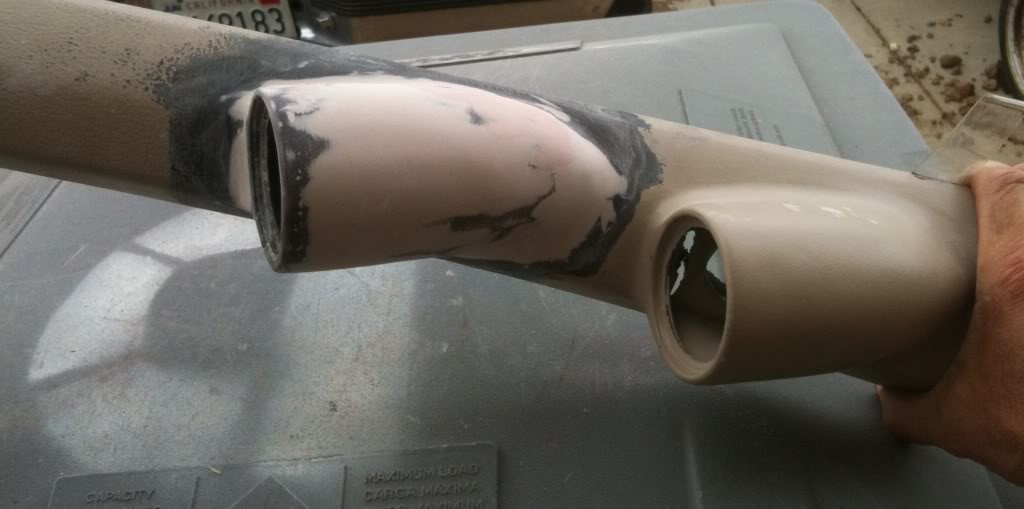
Now add primer to get all those imperfections out.

More sanding

After sanding the entire pillar it was ready for priming
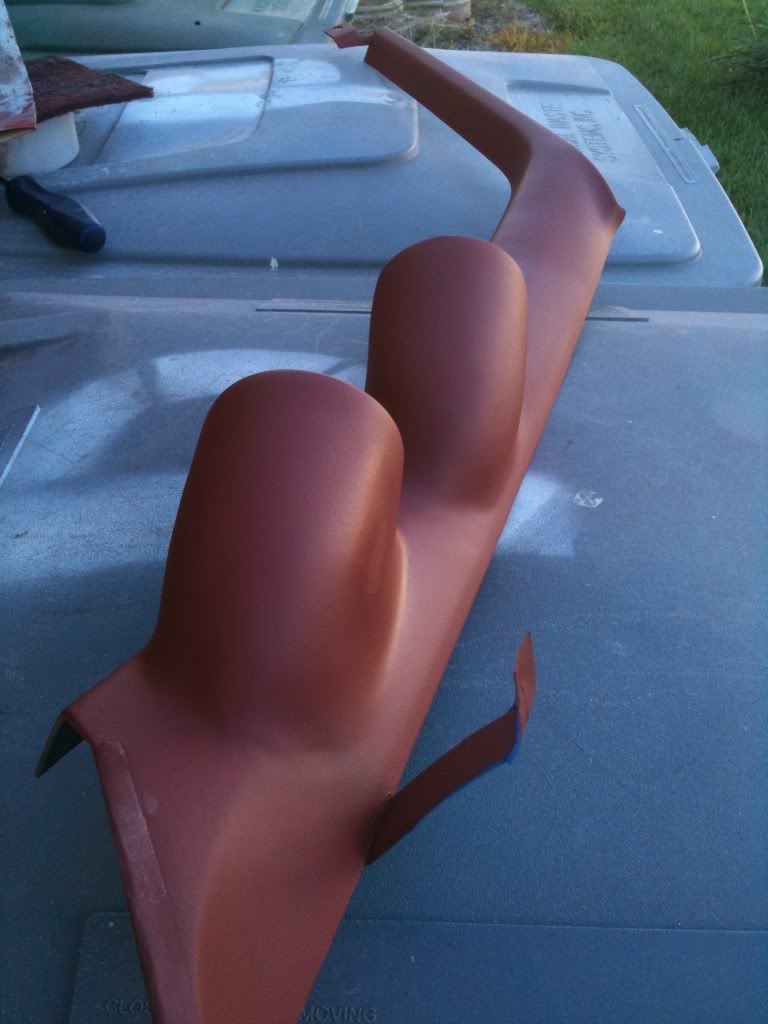
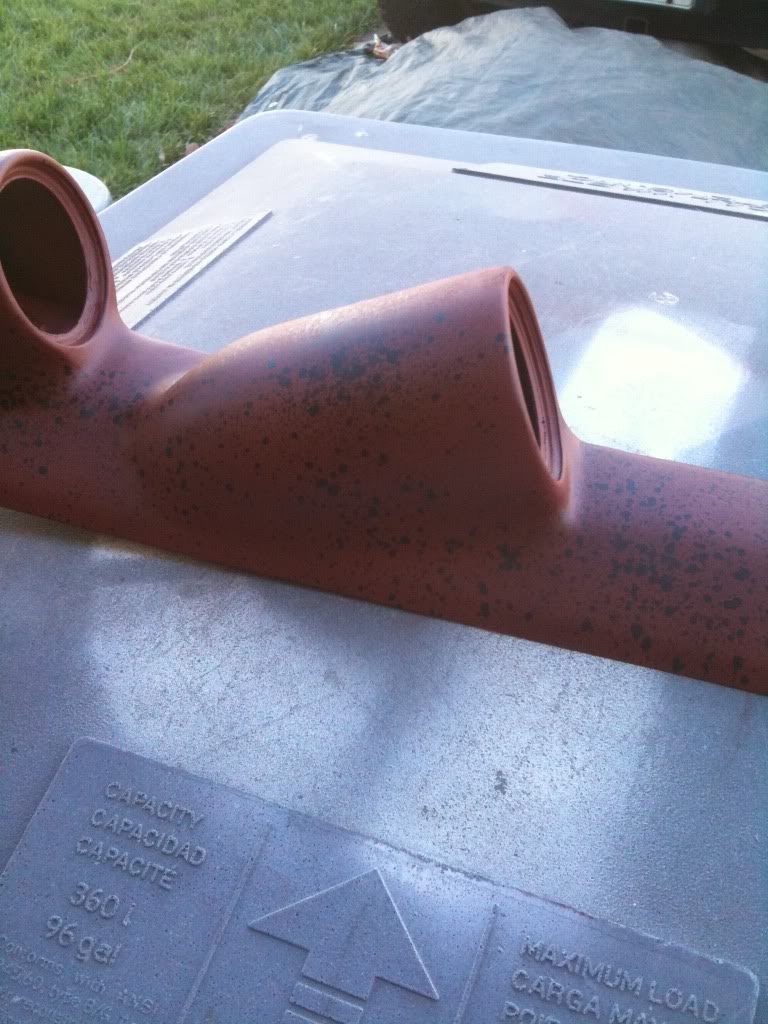
Here comes a very delicate time consuming process. Getting the texture back on the pod. Doing this takes some tricky feathering of the paint can. You want to paint your pod with the spray can spitting. You barely hold it down so it spits out paint in blobs not a mist. Here are a couple pictures of the process. Do this over and over and over and over to get your texture. Let it dry between spittings.
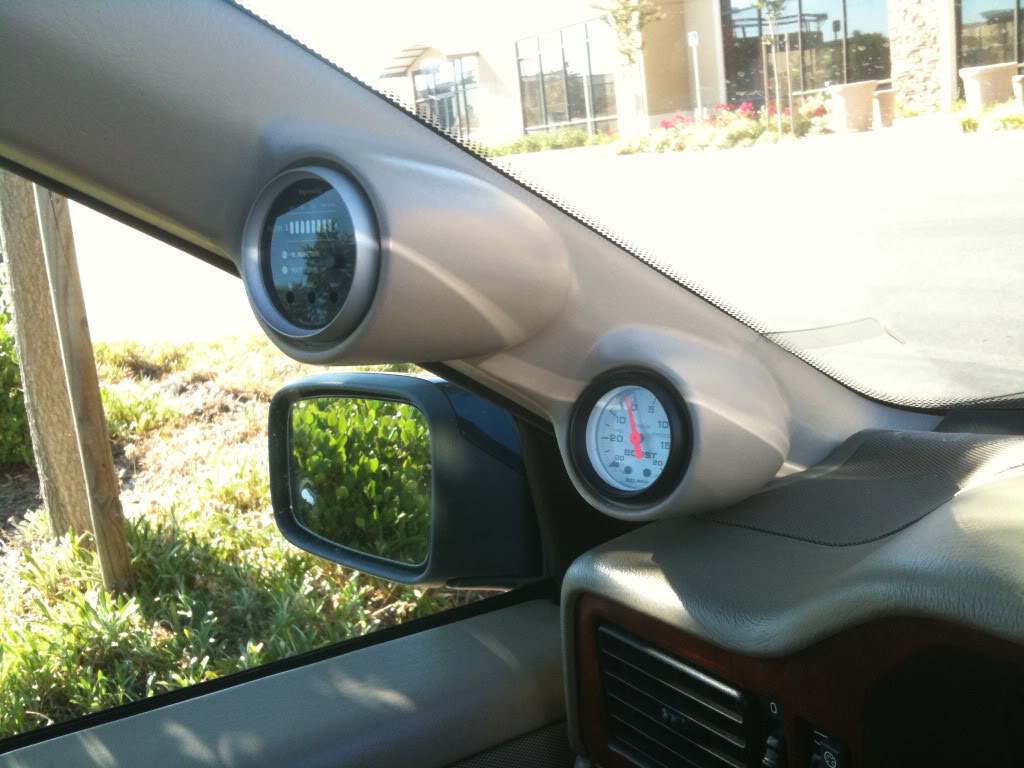
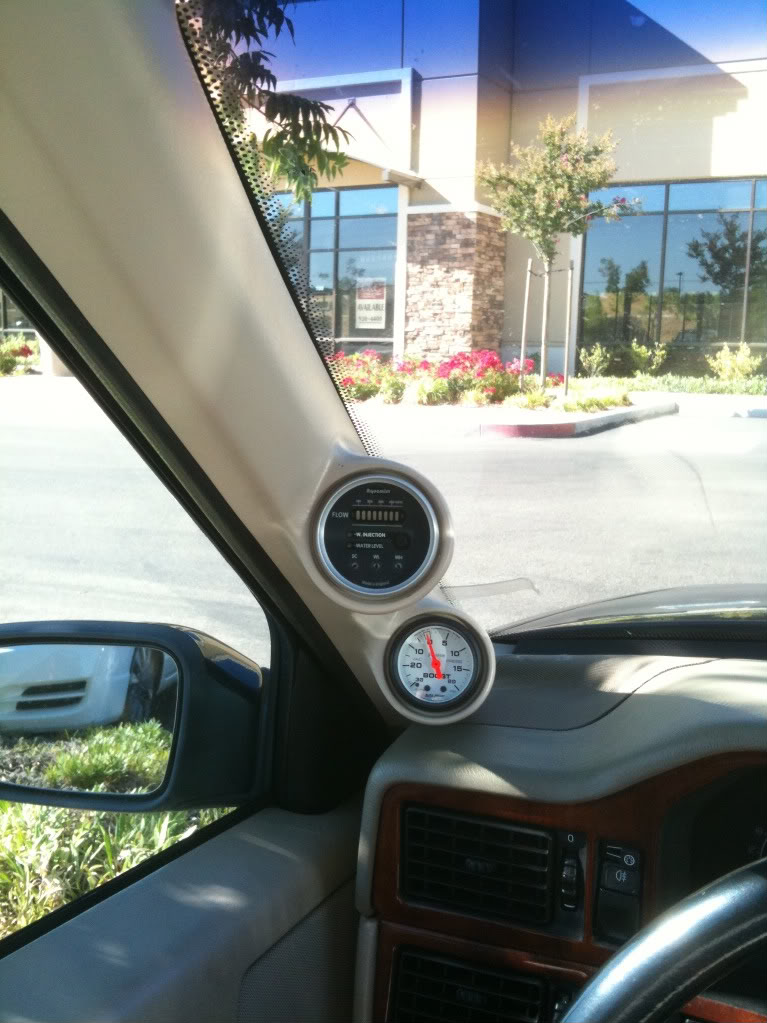
When your done, let it dry then paint your final color, install and enjoy�.
If you have any questions feel free to ask.
Boxpin (John)
I have been hit up many times by forum users wondering how I created the boost gauge pod on my pillar. I have had to turn down several requests to make them for others. Recently there was a need to create another pod so I took this opportunity to document the process for those who want to do it.
I will list the items I used, your welcome to alter the list any way you want.
Materials:
Tomtom GPS window mount
Resin and Hardener
Bondo
Sand paper
T-shirt or grill cloth
Color matched paint
Primer (don�t use Krylon)
Misc part found around the home
Time
Here is a before picture:
To start, I used a TomTom window mount because it�s a good size for the gauge and round. Plus it actually can mount to the pillar.
Next take the ring off the mount
The ring is then mounted with its own screws to the pillar. Notice in the picture I ground around the mount point so I could move the plastic to get the ring in just the right place. I used a heat gun to do this
Then I ground away the paint and roughed up the surface for the resin to stick. But, continuing with the shape, I used a Krylon paint cap that is tapered and cut the bottom of it off so it sat on the pillar. This will be the final shape of the pod. Its held on with hot glue.
Next, stretch grill cloth or a cotton t shirt over the ring and cap until you get your shape. I used a zip tie and some wire to hold it in place.
Then apply a coat of resin
In my case I had some fiberglass matt and was able to continue on at this point applying another coat of fiberglass for strength. You can again use another coat of grill cloth for this. . The next picture is after it has dried and a rough sanding
After the sanding, begin to add bondo to smooth out the surface and work your final shape.
Now add primer to get all those imperfections out.
More sanding
After sanding the entire pillar it was ready for priming
Here comes a very delicate time consuming process. Getting the texture back on the pod. Doing this takes some tricky feathering of the paint can. You want to paint your pod with the spray can spitting. You barely hold it down so it spits out paint in blobs not a mist. Here are a couple pictures of the process. Do this over and over and over and over to get your texture. Let it dry between spittings.
When your done, let it dry then paint your final color, install and enjoy�.
If you have any questions feel free to ask.
Boxpin (John)


#3
08-07-2011, 06:08 PM

Senior Member
#4
08-07-2011, 09:09 PM

Junior Member
Join Date: May 2011
Location: LaGrangeville, N.Y.
Posts: 29
Likes: 0
Received 0 Likes
on
0 Posts


#7
07-05-2012, 12:33 AM


Thread
Thread Starter
Forum
Replies
Last Post
Nicole Lolytte Brown
Volvo 240, 740 & 940
4
12-04-2012 10:00 AM