Volvo 850 Made from 1993 to 1997, this Volvo line was available in both a wagon and a sedan, both with were graced with several trim levels.

Restoring Trim To Original Grey Color

Thread Tools
 
Search this Thread
 
  #1  
Old 03-10-2009, 07:43 PM
JimKW's Avatar
Super Moderator
Thread Starter
Join Date: Mar 2005
Location: Columbus, OH
Posts: 3,579
Likes: 0
Received 2 Likes on 2 Posts
Default Restoring Trim To Original Grey Color

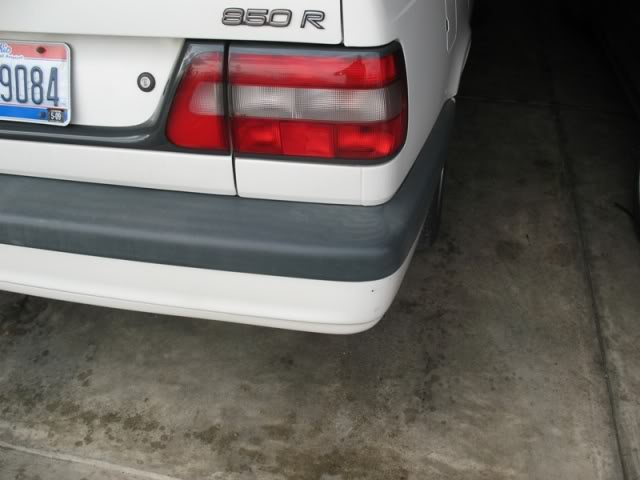
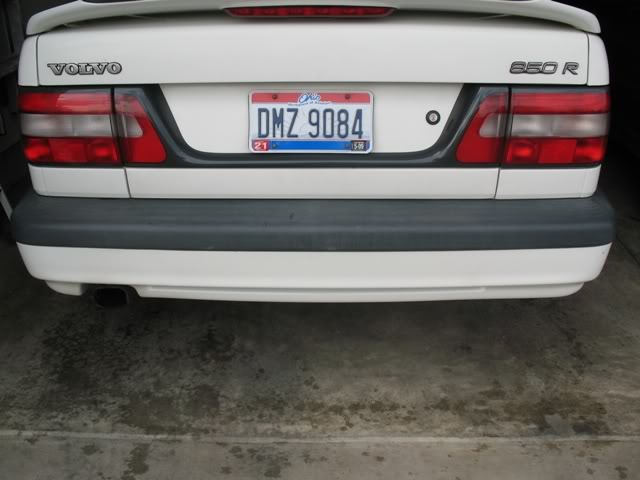
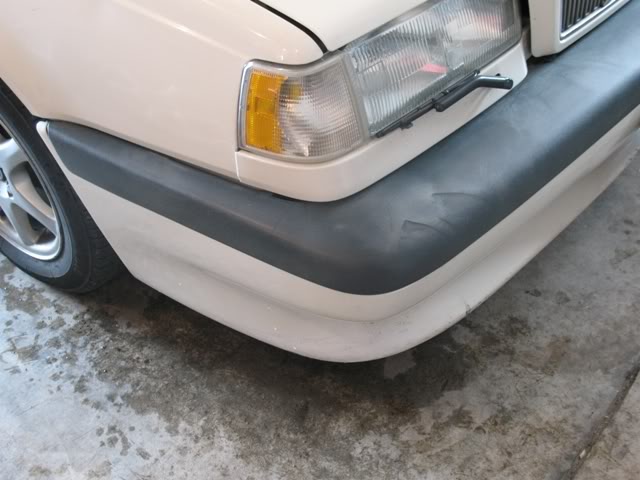
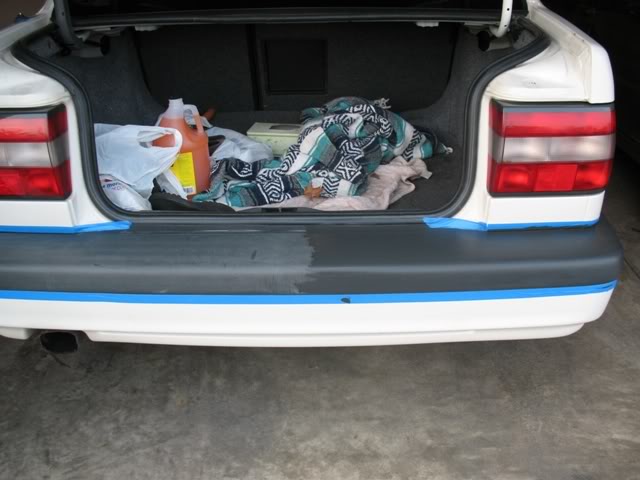
As I have said before I really wanted my grey trim grey instead of black on my White 97 850 R. Mainly because of the lip on the spoiller and the rear trim around the lights. Well I started working on it today, well you tell me what you think.

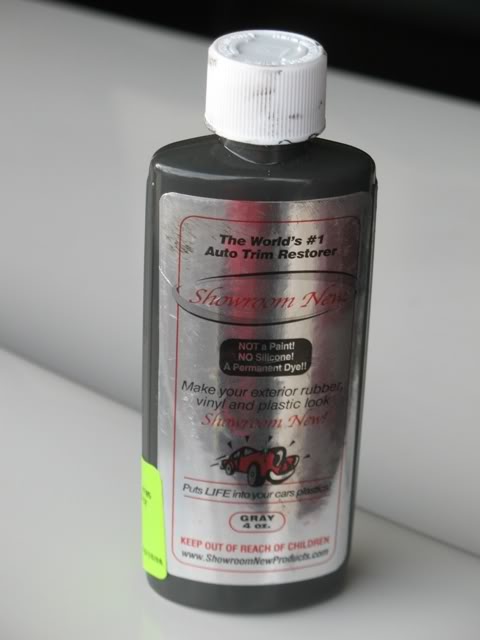
The product I used was called Showroom New in Gray. It came in a 4 oz. bottle from IDP USA and I think it was around $9.00 a bottle plus shipping. I got Forever Black for the Yellow car and this stuff for the White car and the total cose with shipping was $38.00. I used a small foam brush to the dye on the car. Took me longer to mask than anything. I am going to remove the roof strips and the side molding to do them instead of masking. I I have not done those yet.

Before:

Name:  Before-1.jpg
Views: 5658
Size:  36.1 KB

Name:  Before-2.jpg
Views: 5668
Size:  40.2 KB

Name:  Before-3.jpg
Views: 5547
Size:  34.4 KB

Name:  Before-4.jpg
Views: 5526
Size:  46.0 KB

Name:  Before-5.jpg
Views: 5635
Size:  45.5 KB

Name:  Before-7.jpg
Views: 5480
Size:  48.2 KB

Dye I used:

Name:  DyeIUsed.jpg
Views: 5520
Size:  30.3 KB

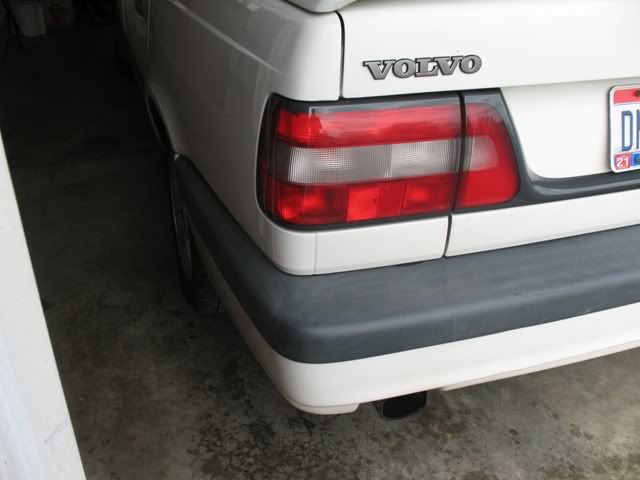
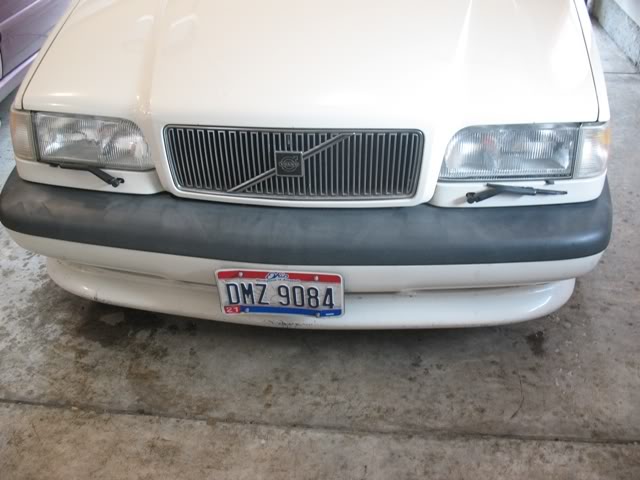
In Progress Picture (I may do another coat, but not sure yet)

Name:  InProgress-1.jpg
Views: 5489
Size:  47.3 KB

Name:  InProgress-3.jpg
Views: 5589
Size:  52.9 KB

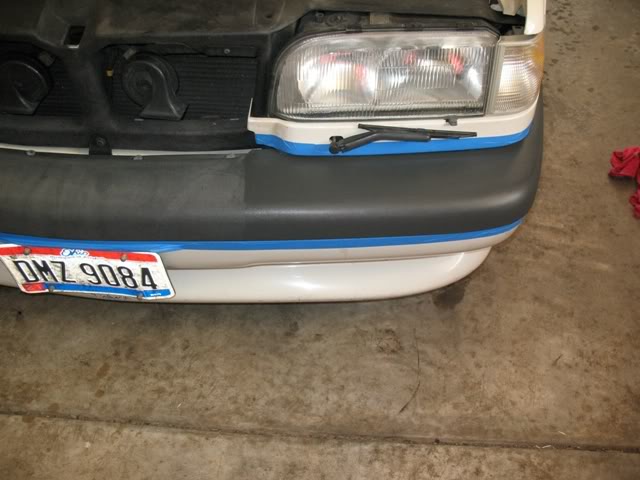
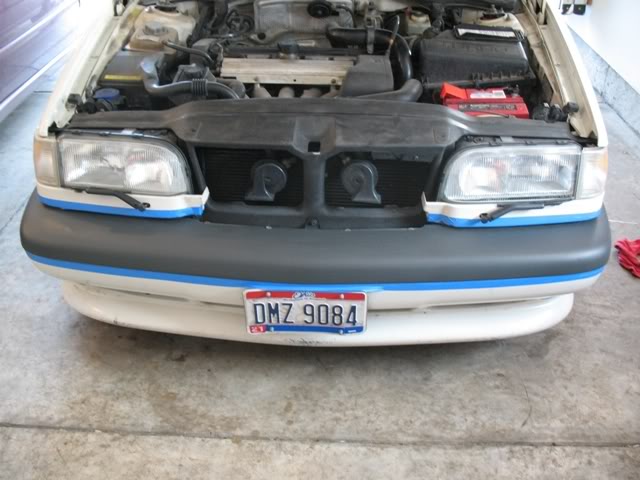
Dye is still wet in the next two pictures
Name:  InProgress-4.jpg
Views: 5459
Size:  44.9 KB

Name:  InProgress-5.jpg
Views: 5510
Size:  26.0 KB

Name:  InProgress-7.jpg
Views: 5648
Size:  36.4 KB

Name:  InProgress-6.jpg
Views: 5453
Size:  33.0 KB


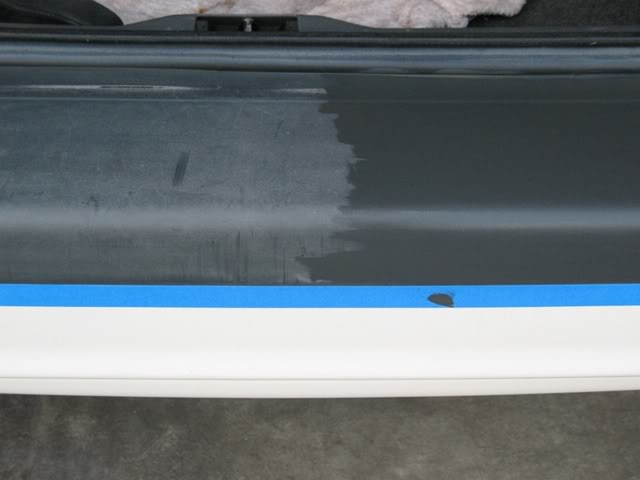
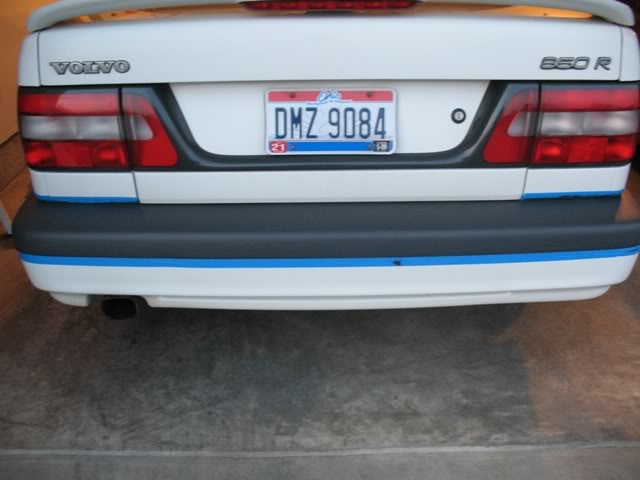
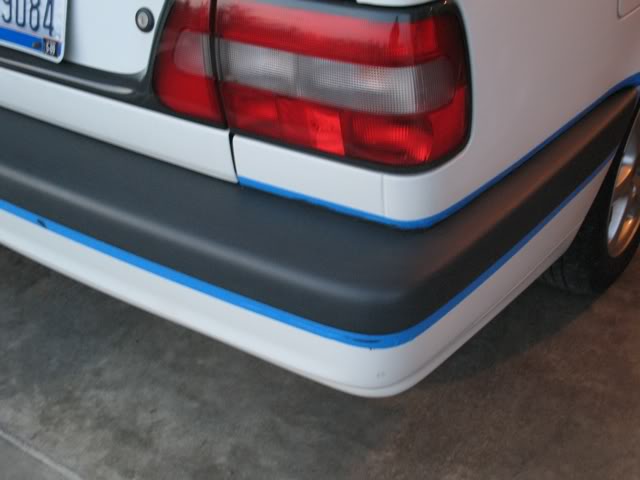
So far I think it's looking damn good!
 
  #2  
Old 03-10-2009, 07:45 PM
tech's Avatar
Administrator
Join Date: Sep 2004
Location: Orlando, Florida
Posts: 36,351
Likes: 0
Received 40 Likes on 38 Posts
Default

Looking really good!!!
 
  #3  
Old 03-10-2009, 07:50 PM
Somthngfrce's Avatar
Senior Member
Join Date: Sep 2008
Location: Orlando, Florida
Posts: 2,168
Likes: 0
Received 0 Likes on 0 Posts
Default

Oh WOW!!! I am all over that stuff.. My bumper looks the same as yours and I just apply armor all to make it somewhat better, but WOW! Thanks for sharing. I've seen the black dye but not the grey. BTW, that R sure is Sexy!
 
  #4  
Old 03-10-2009, 07:52 PM
VJZ's Avatar
VJZ
VJZ is offline
Senior Member
Join Date: Oct 2008
Location: Bremen, IN
Posts: 538
Likes: 0
Received 0 Likes on 0 Posts
Default

I've even thought of painting the trim to match my car.

Not sure how well it would stick though.
 
  #5  
Old 03-10-2009, 08:06 PM
Somthngfrce's Avatar
Senior Member
Join Date: Sep 2008
Location: Orlando, Florida
Posts: 2,168
Likes: 0
Received 0 Likes on 0 Posts
Default

Just bought a bottle from "Showroom New" Company. Thanks for the Visual Motivation. If anyones intrested here's a link.http://showroomnewproducts.com/ I know what I am doing as soon as I get my bottle...Good Find JimKW!
 
  #6  
Old 03-10-2009, 09:52 PM
confused_al's Avatar
Member
Join Date: Oct 2008
Location: Northern New Jersey
Posts: 68
Likes: 0
Received 0 Likes on 0 Posts
Default

Looks Great!!!
How long would you think it will last, in compare with the paint?
 
  #7  
Old 03-10-2009, 10:25 PM
nonsense619's Avatar
Senior Member
Join Date: Dec 2008
Location: Bay Area,Cali-San Diego native
Posts: 255
Likes: 0
Received 1 Like on 1 Post
Default

I really wanted my grey trim grey instead of black on my White 97 850 R. Mainly because of the lip on the spoiller and the rear trim around the lights.
Same here...my bumber has a couple deep scratches on that area though..how should i go about fixing that?
 
  #8  
Old 03-12-2009, 06:42 PM
01_fast_ride's Avatar
Senior Member
Join Date: May 2007
Location: West Michigan
Posts: 734
Likes: 0
Received 1 Like on 1 Post
Default

Wow. What a transformation! Thanks for trying that out and sharing the pics.
 
  #9  
Old 03-12-2009, 07:37 PM
Somthngfrce's Avatar
Senior Member
Join Date: Sep 2008
Location: Orlando, Florida
Posts: 2,168
Likes: 0
Received 0 Likes on 0 Posts
Default

Originally Posted by nonsense619
Same here...my bumber has a couple deep scratches on that area though..how should i go about fixing that?
Hey nonsense619, there's a plastic filler for bumpers (called BUMPER FILL) some bodyshops use to fill in gashes, but the problem then is to match the grain or I should say the texture of it.. I would just painted and let the gash be... I have 2 small ones and I'm just going to paint it...
 

Last edited by Somthngfrce; 03-12-2009 at 08:42 PM.
  #10  
Old 03-13-2009, 03:09 PM
jks2's Avatar
Super Moderator
Join Date: Aug 2005
Location: Elizabethtown, Kentucky
Posts: 4,244
Likes: 0
Received 2 Likes on 2 Posts
Default

Your gray looks as good as the black bumper paint on my sons 850. Looks like a brand new bumper. Good job. I like the before, during and after pics. It really allows you to see the difference.
 
  #11  
Old 03-13-2009, 05:16 PM
JimKW's Avatar
Super Moderator
Thread Starter
Join Date: Mar 2005
Location: Columbus, OH
Posts: 3,579
Likes: 0
Received 2 Likes on 2 Posts
Default

Here are some truly after pictures that were just taken today a couple days after I finished.

Name:  After-1.jpg
Views: 5327
Size:  7.0 KB

Look at the befor of the same area:

Name:  Before-4.jpg
Views: 5368
Size:  7.0 KB

Or this one:
After

Name:  After-2.jpg
Views: 5388
Size:  7.0 KB

Before
Name:  Before-6.jpg
Views: 5370
Size:  7.0 KB

Here are some more finished/after pictures:

Name:  After-6.jpg
Views: 5309
Size:  7.0 KB

Name:  After-5.jpg
Views: 5376
Size:  7.0 KB

Name:  After-7.jpg
Views: 5363
Size:  7.0 KB

Name:  After-8.jpg
Views: 5362
Size:  7.0 KB

Name:  After-9.jpg
Views: 5364
Size:  7.0 KB
 
  #12  
Old 03-13-2009, 05:22 PM
TIPSP's Avatar
Got Boost?
Join Date: May 2008
Posts: 3,486
Likes: 0
Received 4 Likes on 4 Posts
Default

Cool!
 
  #13  
Old 03-16-2009, 12:51 AM
nonsense619's Avatar
Senior Member
Join Date: Dec 2008
Location: Bay Area,Cali-San Diego native
Posts: 255
Likes: 0
Received 1 Like on 1 Post
Default

the gashes are pretty deep though..im just gonna try to sand it down as smooth and even as poss. thanks..and jim u have to stop soon..making all our 850s look bad
 
  #14  
Old 03-16-2009, 05:17 PM
JimKW's Avatar
Super Moderator
Thread Starter
Join Date: Mar 2005
Location: Columbus, OH
Posts: 3,579
Likes: 0
Received 2 Likes on 2 Posts
Default

I'm making all 850's look bad? Have you been watching all the stuff tech has done?
 
  #15  
Old 03-16-2009, 07:08 PM
Somthngfrce's Avatar
Senior Member
Join Date: Sep 2008
Location: Orlando, Florida
Posts: 2,168
Likes: 0
Received 0 Likes on 0 Posts
Default

well TECH's yellow is bad ***, but I will say your (JimKW) white one is very nice!
 
  #16  
Old 03-16-2009, 09:32 PM
nonsense619's Avatar
Senior Member
Join Date: Dec 2008
Location: Bay Area,Cali-San Diego native
Posts: 255
Likes: 0
Received 1 Like on 1 Post
Default

well u AND tech are making our 850s look bad...lol.
 
  #17  
Old 03-16-2009, 09:49 PM
Somthngfrce's Avatar
Senior Member
Join Date: Sep 2008
Location: Orlando, Florida
Posts: 2,168
Likes: 0
Received 0 Likes on 0 Posts
Default

Well, I got my bottle of the grey dye in the mail this afternoon! After an hour of masking the molding off, I dyed all the molding but it is dark. Will def. post pics! and hopefully join the glory of the other 2 above.. NOT even close!
 
  #18  
Old 03-19-2009, 08:14 PM
850 Daddy's Avatar
Junior Member
Join Date: Mar 2009
Posts: 7
Likes: 0
Received 0 Likes on 0 Posts
Default

Wow. What a difference that dye made. I did a search here for bumpers, because mine look horrible, and the first thread I came to was this one. I don't think I'll need to go to another!

Nice job, sir, very nice. When I do mine, I'll post pics, too...
 
  #19  
Old 04-26-2009, 05:16 PM
rspi's Avatar
Administrator
Join Date: Mar 2009
Location: Albuquerque, NM
Posts: 15,765
Likes: 0
Received 30 Likes on 29 Posts
Default I tried Back To Black...

I was looking for a quick fix to clean up the '95 850 T-5R that I purchased about 10 days ago. So, I went to the local store and picked up a Mother's product called Back to Black.

It is a milky substance that looks like skim milk but is a little thicker like a fruit smoothy. It goes on easy and made my bumpers and door trim look real good. I just think it's a short term solution like wheel & tire gloss or wax. I'll post back in a month or so to update the results.

Before

After

Before

After


Now I have to get the wheels refinished and I'll be set for a while.
 

Last edited by rspi; 03-27-2011 at 10:10 PM. Reason: Typo
  #20  
Old 04-27-2009, 05:05 AM
ShaginWagon's Avatar
Senior Member
Join Date: Dec 2007
Posts: 184
Likes: 0
Received 2 Likes on 2 Posts
Default

i've tried the mothers, lasts maybe a fortnight if your lucky


Quick Reply: Restoring Trim To Original Grey Color


All times are GMT -5. The time now is 08:14 AM.