
My 1973 144 Restoration and Mods


Thread Starter
|
Super Moderator
Joined: Aug 2008
Posts: 2,580
Likes: 8
From: Dallas, TX
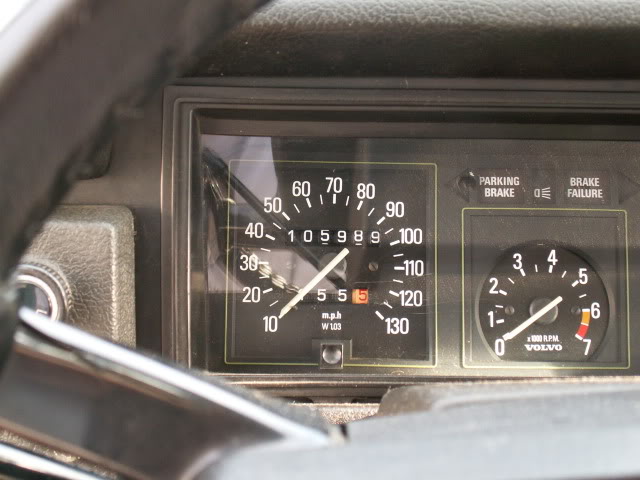
In november of 2008, a good friend of mine was reeling from the economic downturn. He was needing money for his mortgage so I bought his disassembled 144. The motor was toast, the transmission had a mini-ecosystem growing in it. The interior was out...kind of rough. I started in earnest working on the car in January of 2009. Although it wasn't quite finished, in June, with 10 miles (yes, 10) I took off to the VCOA MidSommar meet in Tulsa...about a 600 mile round trip from Dallas. The only gauges that worked were the volt gauge and temp gauge. No speedometer, no tach, no fuel gauge, no a/c. I built the car myself; the motor, the transmission, the brakes and the paint. The seats are from a 91 240. Rear seats fit perfectly. For the front I had to weld the sliders from the 140 to the base of the 240 seats.
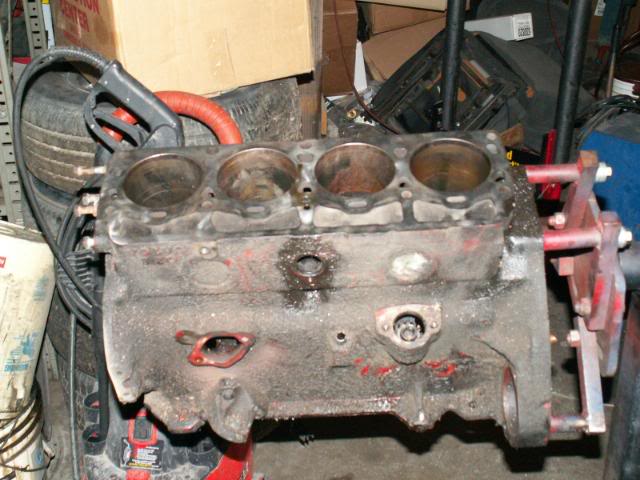
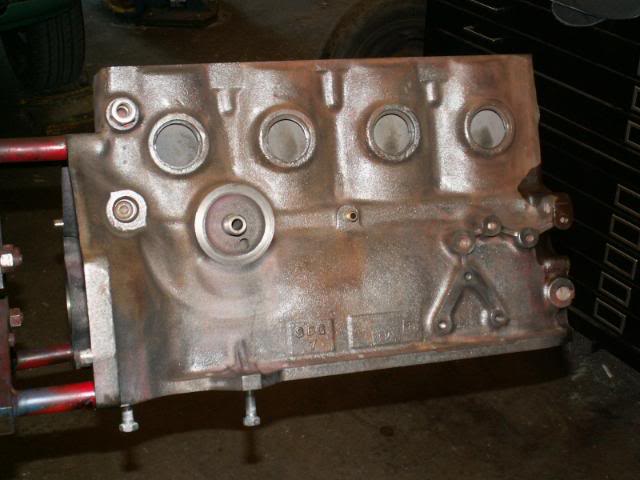
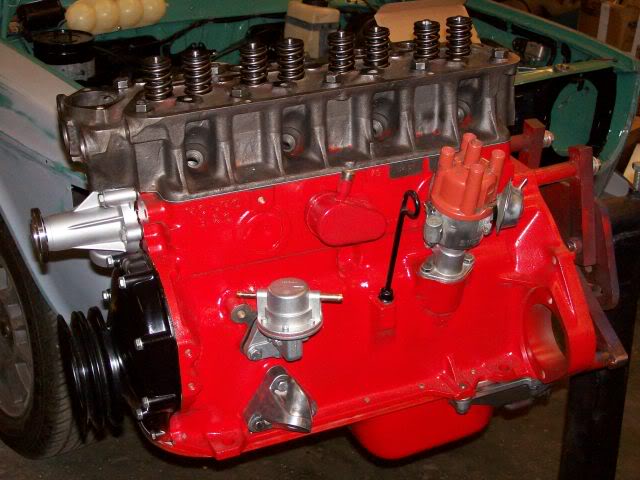
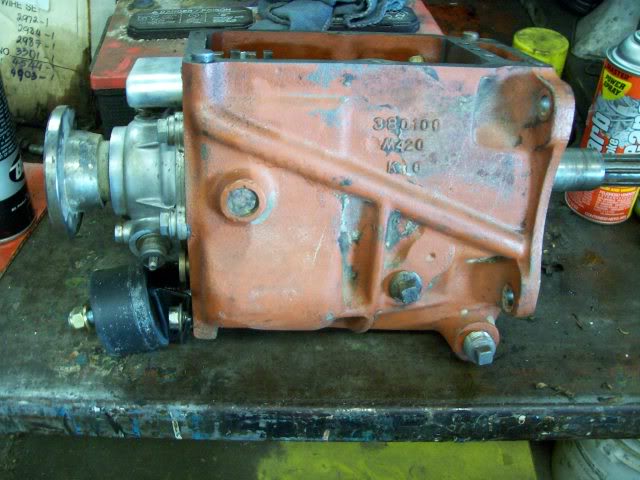
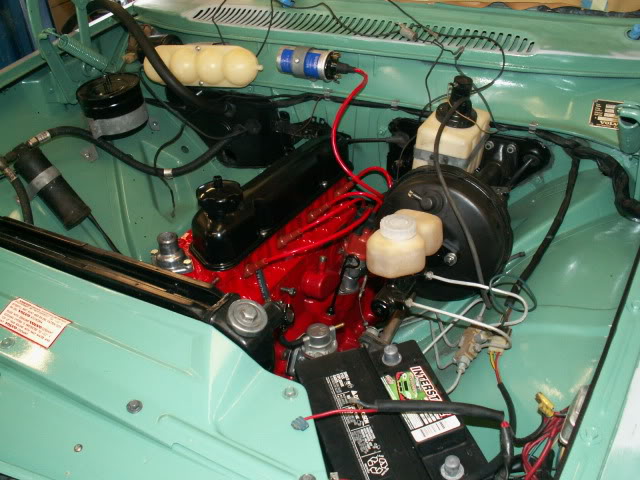
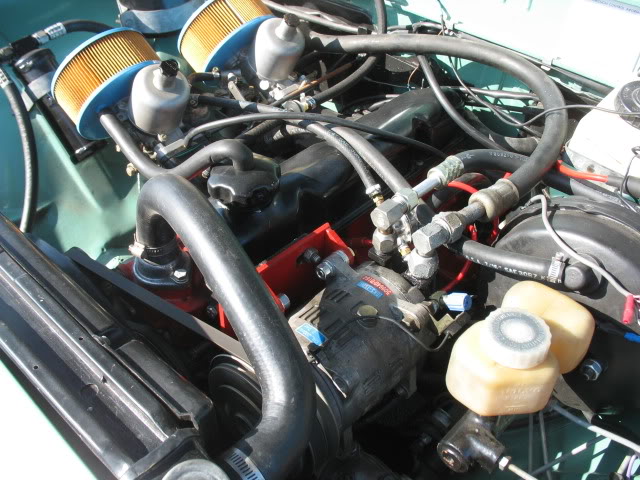
The motor was taken down to the bare block, freeze plugs and galley plugs removed. The good news was the cylinders were flawless other than a little surface rust. I was able to use standard rings, bearings and pistons. The motor and car only had 106k on it. Had been in a barn for 20+ years. I converted from DJet injection to dual SU HS6 carbs, added an Isky VV71 cam, milled the F head .065, used SBC lifters with longer push rods. Had the head fly cut to accept dual heavy duty springs...again from Isky. Steel timing gears. The transmission was totally dismantled and cleaned...new input and output bearings installed. The gears and synchronizers were in great shape. The rear end was fine so I merely cleaned it out and filled it up. Skandix lowering springs with KYB Gas-A-Just shocks. New clutch and pressure plate, throw out and pilot bearings. IPD sway bars. Some pics...
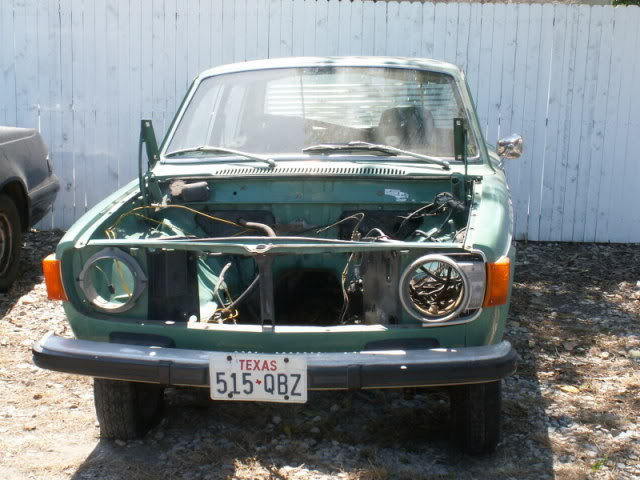
This as the day it was towed in...pretty sad
Brought it inside and started disassembling the motor and transmission. The motor looked bad before cleaning...
After cleaning...
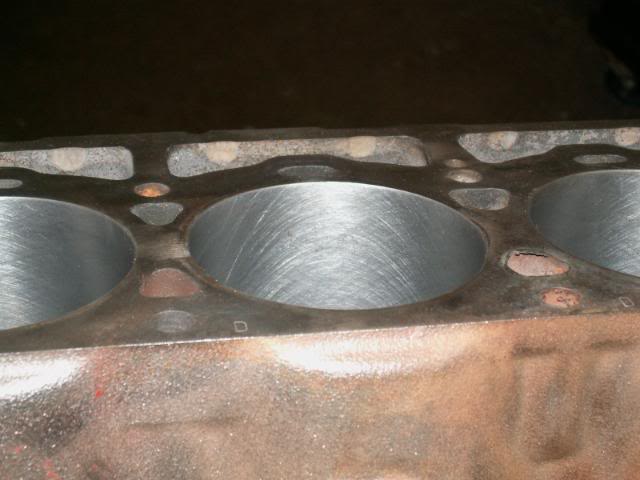
Check that honing job!
Installed the crank
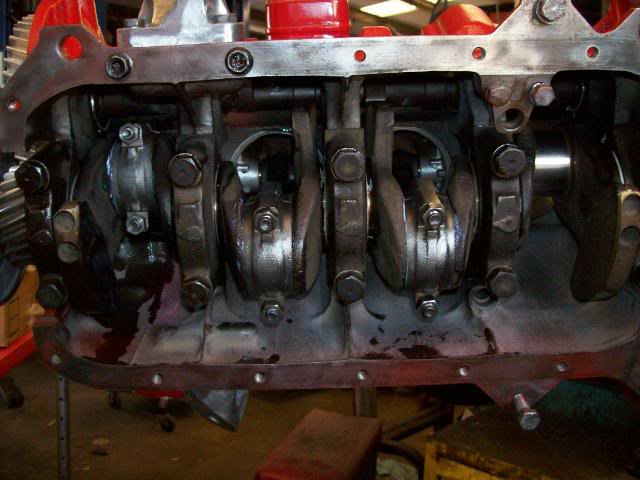
And the oil pump...
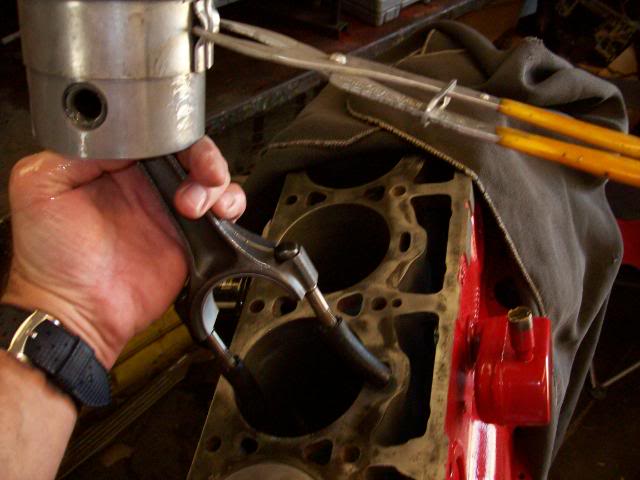
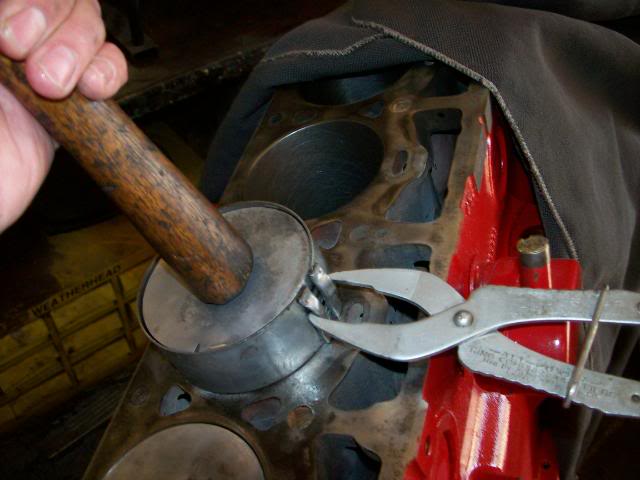
Time for pistons...I use pieces of fuel hose on the rod bolts to keep from scuffing the cylinder walls and crank
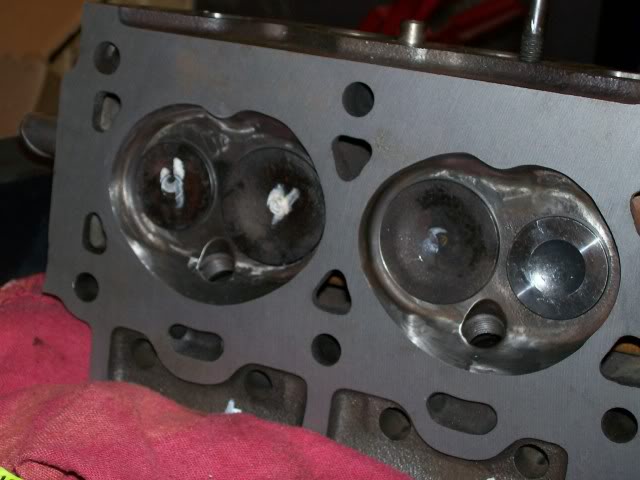
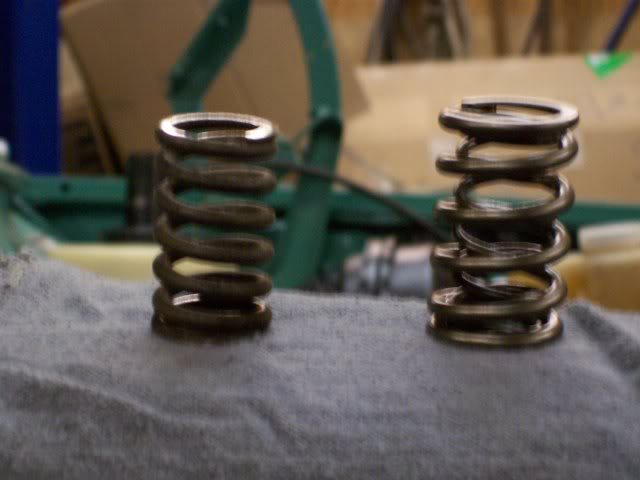
After the head was milled, I did a lot of combustion chamber work. Also, pics of the heavy duty springs...these valves won't float!!
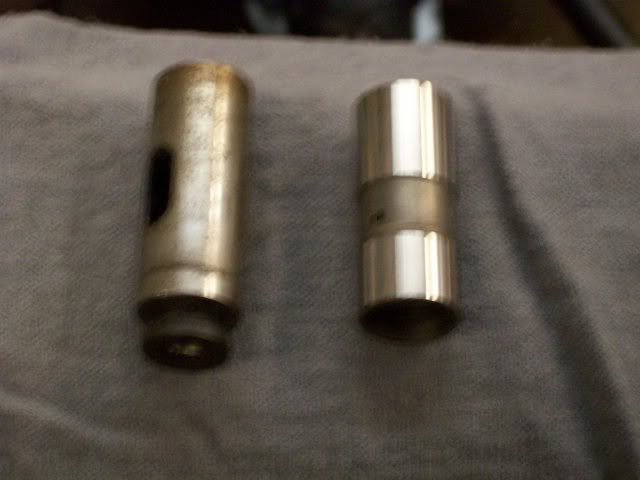
Smaller, lighter valve lifters...
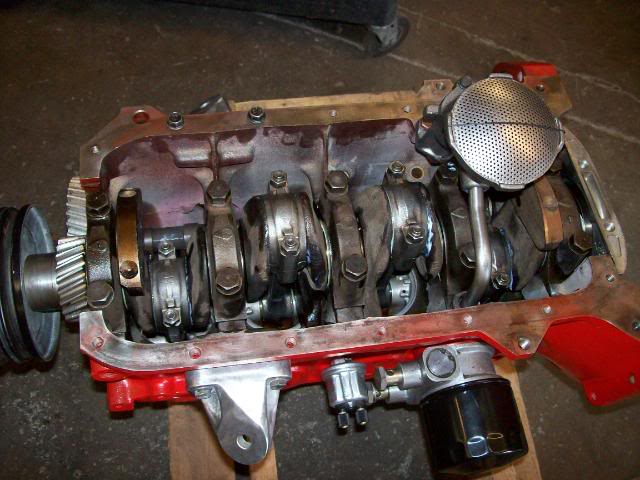
head installed on the painted block, fuel pump installed too...
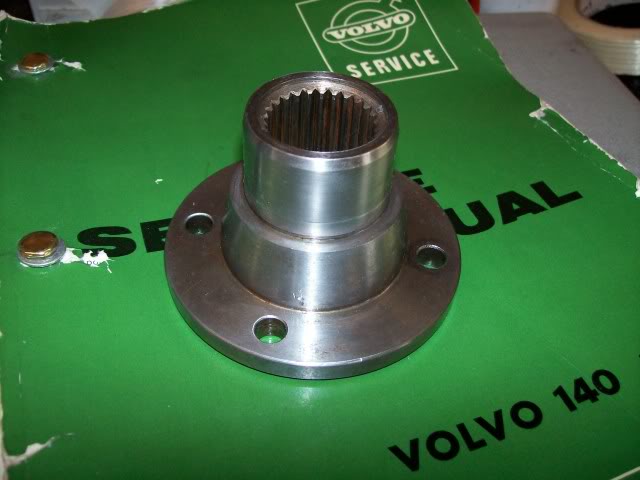
On to the transmission. If you are going to tear down a manual transmission...the M40 is a good one to start with...
That's the whole thing
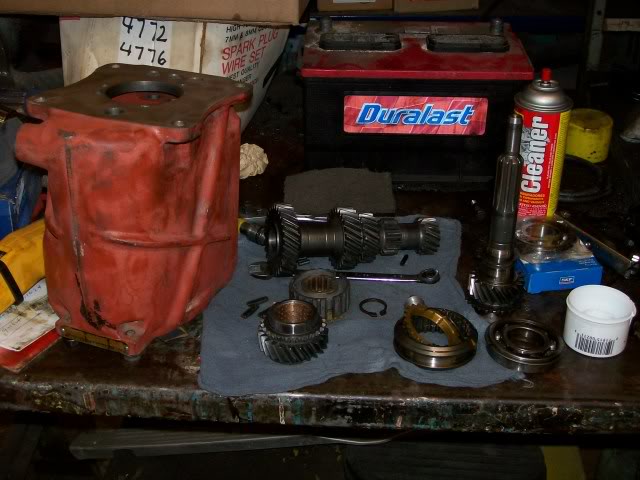
Lots of cleaning needed
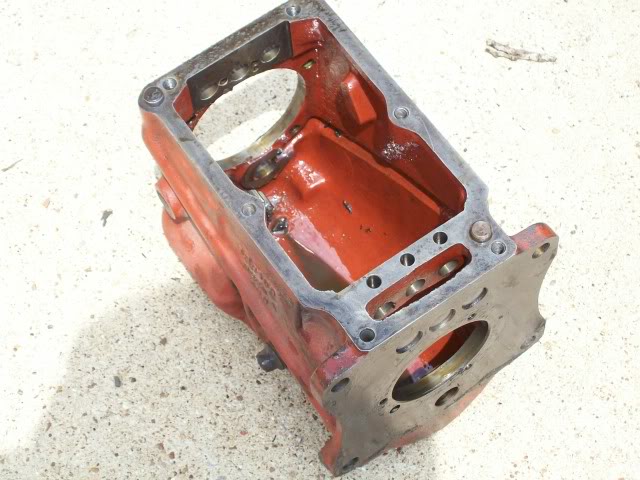
Empty case...
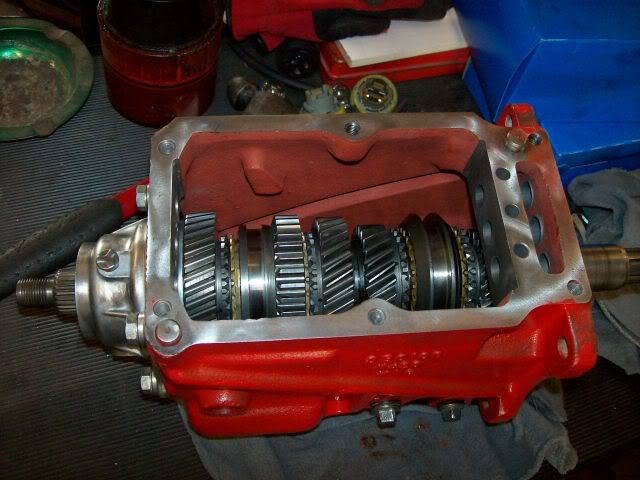
reassemble
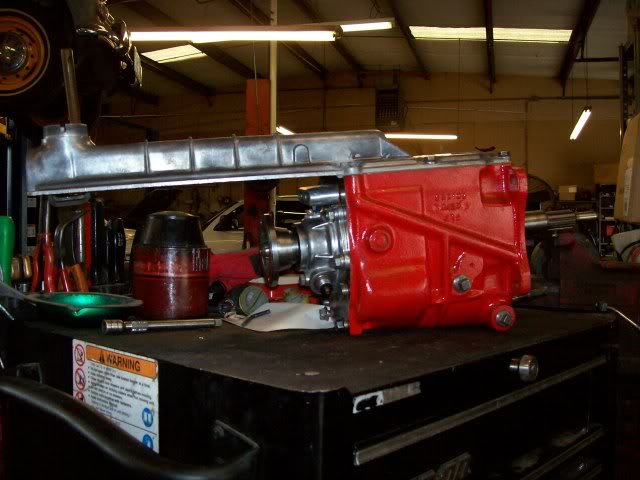
final product
More to come...
The motor was taken down to the bare block, freeze plugs and galley plugs removed. The good news was the cylinders were flawless other than a little surface rust. I was able to use standard rings, bearings and pistons. The motor and car only had 106k on it. Had been in a barn for 20+ years. I converted from DJet injection to dual SU HS6 carbs, added an Isky VV71 cam, milled the F head .065, used SBC lifters with longer push rods. Had the head fly cut to accept dual heavy duty springs...again from Isky. Steel timing gears. The transmission was totally dismantled and cleaned...new input and output bearings installed. The gears and synchronizers were in great shape. The rear end was fine so I merely cleaned it out and filled it up. Skandix lowering springs with KYB Gas-A-Just shocks. New clutch and pressure plate, throw out and pilot bearings. IPD sway bars. Some pics...
This as the day it was towed in...pretty sad
Brought it inside and started disassembling the motor and transmission. The motor looked bad before cleaning...
After cleaning...
Check that honing job!
Installed the crank
And the oil pump...
Time for pistons...I use pieces of fuel hose on the rod bolts to keep from scuffing the cylinder walls and crank
After the head was milled, I did a lot of combustion chamber work. Also, pics of the heavy duty springs...these valves won't float!!
Smaller, lighter valve lifters...
head installed on the painted block, fuel pump installed too...
On to the transmission. If you are going to tear down a manual transmission...the M40 is a good one to start with...
That's the whole thing
Lots of cleaning needed
Empty case...
reassemble
final product
More to come...
Thread Starter
|
Super Moderator
Joined: Aug 2008
Posts: 2,580
Likes: 8
From: Dallas, TX
The easy part...
motor and tranny set in
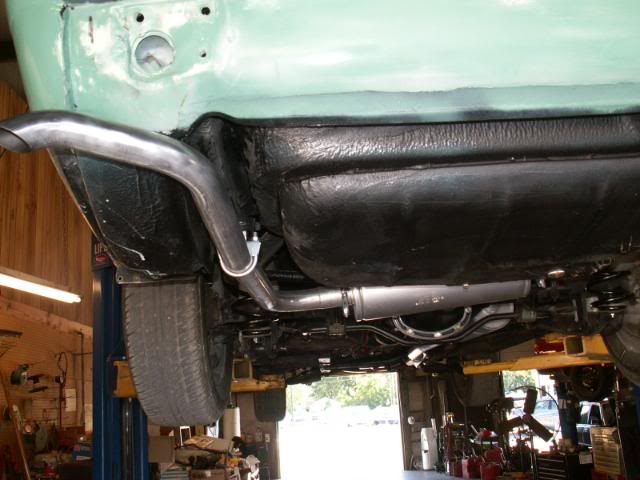
installed Skandix bolt and play exhaust
primer time...
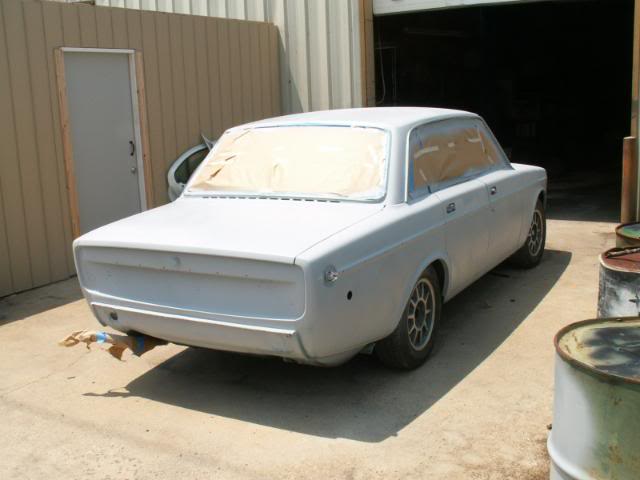
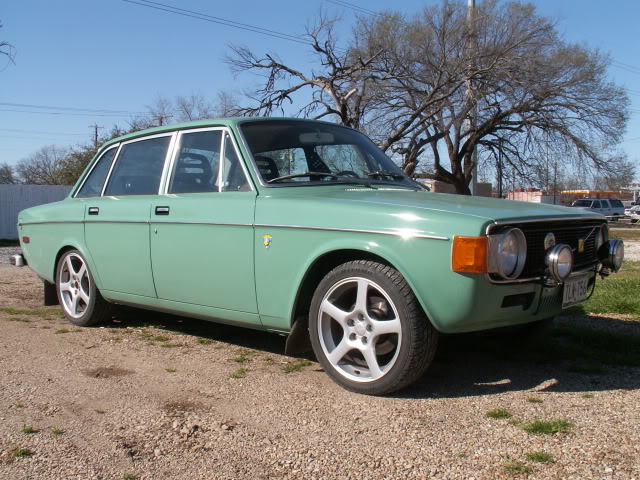
Final color coat
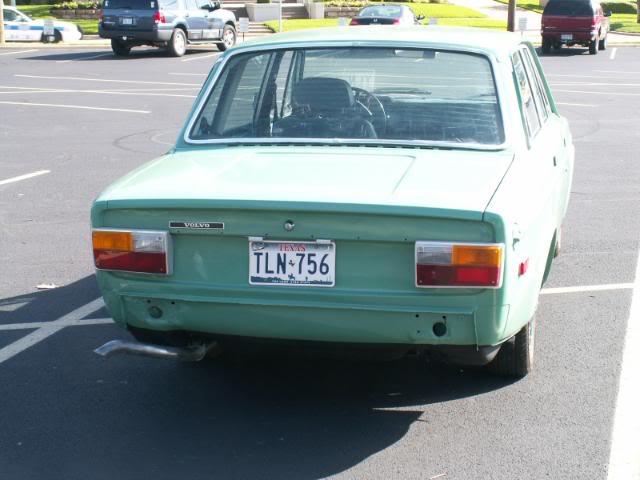

Seafoam green, #109...Locally, the car is referred to as "The Gekco" so I had Dave Barton do me some one off emblems...

The engine bay currently...a/c installed!!
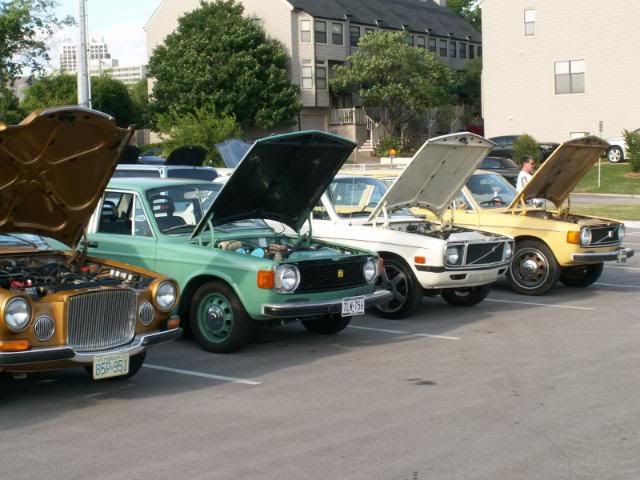
At the meet in Tulsa...
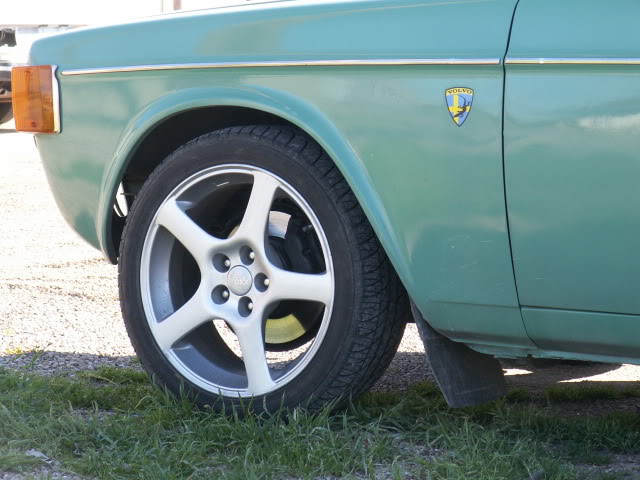
15" DeVino Razor wheels
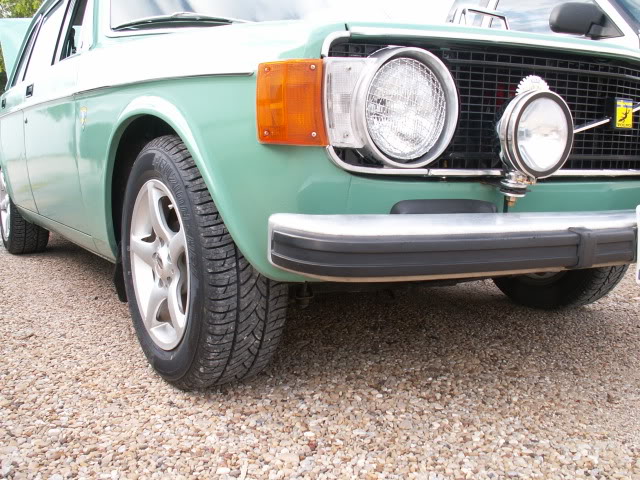
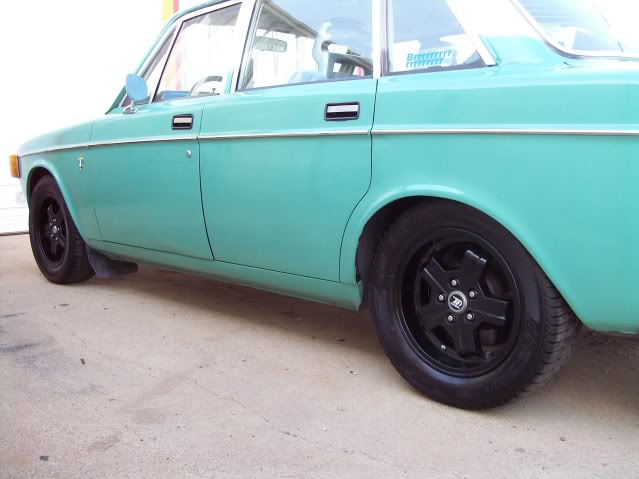
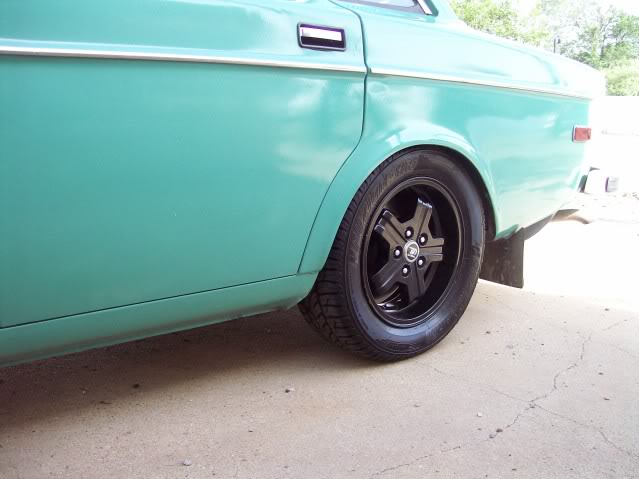
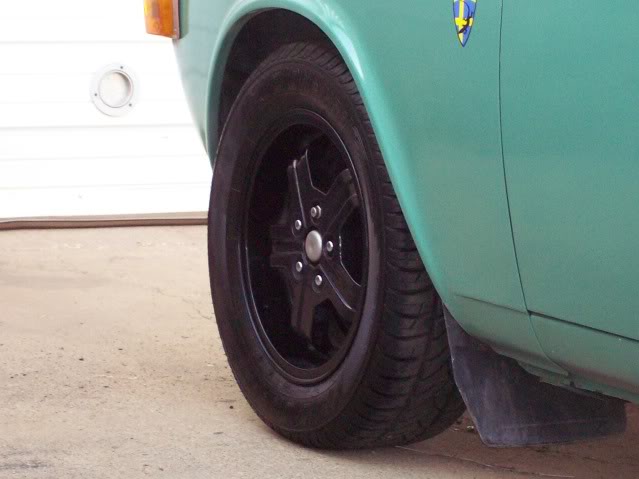
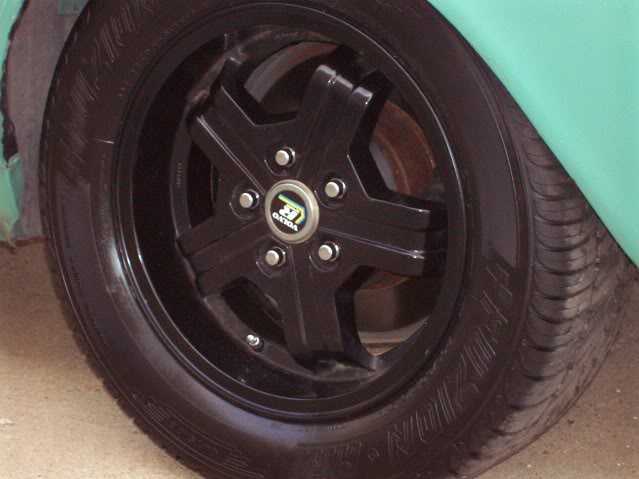
15" Black powder coated Virgos
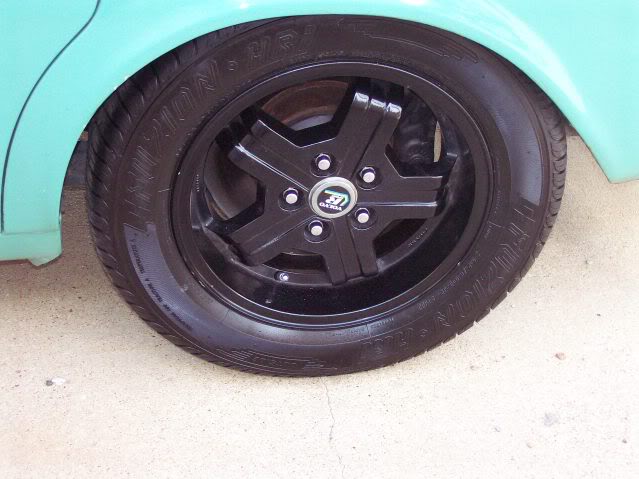
16" Hydras
17" Voxx MGR's
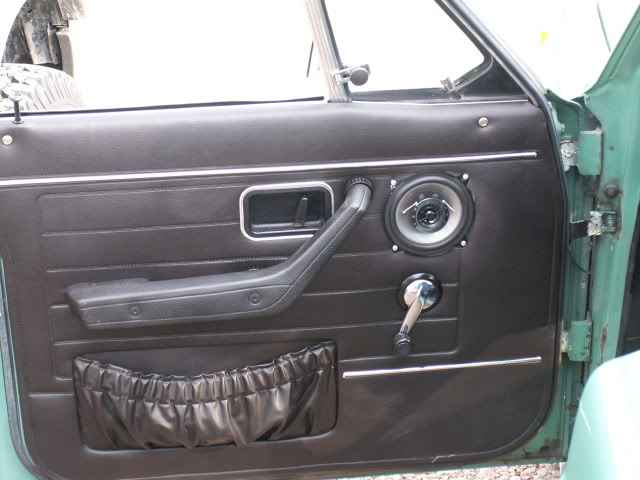
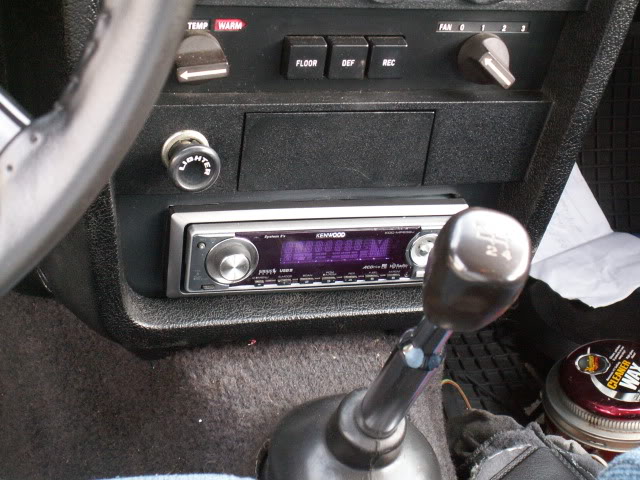
The interior
At the meet in Tulsa...competing against 164's is like cadillacs competing w/ chevy's! I got third place...
Lots of work in 6 months, in between customers!! It's my daily driver currently.
Artsy PS pic...
Full HID lighting, led's in dash...

motor and tranny set in
installed Skandix bolt and play exhaust
primer time...
Final color coat
Seafoam green, #109...Locally, the car is referred to as "The Gekco" so I had Dave Barton do me some one off emblems...
The engine bay currently...a/c installed!!
At the meet in Tulsa...
15" DeVino Razor wheels
15" Black powder coated Virgos
16" Hydras
17" Voxx MGR's
The interior
At the meet in Tulsa...competing against 164's is like cadillacs competing w/ chevy's! I got third place...
Lots of work in 6 months, in between customers!! It's my daily driver currently.
Artsy PS pic...
Full HID lighting, led's in dash...
Last edited by swiftjustice44; May 2, 2011 at 07:12 AM.
Thread Starter
|
Super Moderator
Joined: Aug 2008
Posts: 2,580
Likes: 8
From: Dallas, TX

Thread Starter
|
Super Moderator
Joined: Aug 2008
Posts: 2,580
Likes: 8
From: Dallas, TX
Drove the 144 down to Galveston last weekend. Ran super! Driving a car like this makes you appreciate some things like cruise control, overdrive (car has neither!). Still, I got 25+ mpg pulling 3800 rpm's in 4th!

Senior Member
Joined: Jul 2009
Posts: 459
Likes: 0
From: Sebastian, FLA
Nice Job and it sounds great. If you ever need any upholstery drop me a PM
https://volvoforums.com/forum/album....pictureid=2392
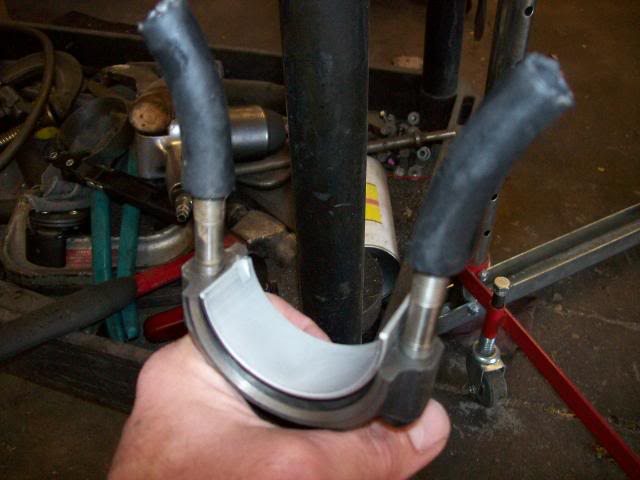
Nice ring compressor too, did you make it. looks easier than the ratchet type that I seem to need just one more click but can't get there.
Last edited by Bobec; Aug 17, 2010 at 04:59 PM.
Thread Starter
|
Super Moderator
Joined: Aug 2008
Posts: 2,580
Likes: 8
From: Dallas, TX
Nah, that's an old school ring compressor...the kind that stays where you put it! I'm no expert with body work...it just take patience. When it looks good enough, just sand and prime it a couple more times!! As for the upholstery, I wish you were closer...GT seats are 30 years old now. I have two complete sets, I'll mix and match to get the best.


Thread Starter
|
Super Moderator
Joined: Aug 2008
Posts: 2,580
Likes: 8
From: Dallas, TX
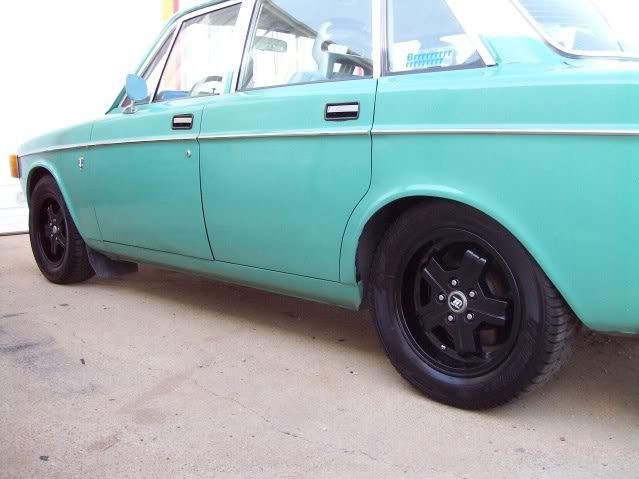
Well, I've been driving the Gekco quite a bit lately with the weather having improved. Swapped on some powder coated Virgo's I picked up last year. Traded a long block turbo motor for 'em. I didn't need an extra engine and he didn't need an extra set of wheels so it worked out well.
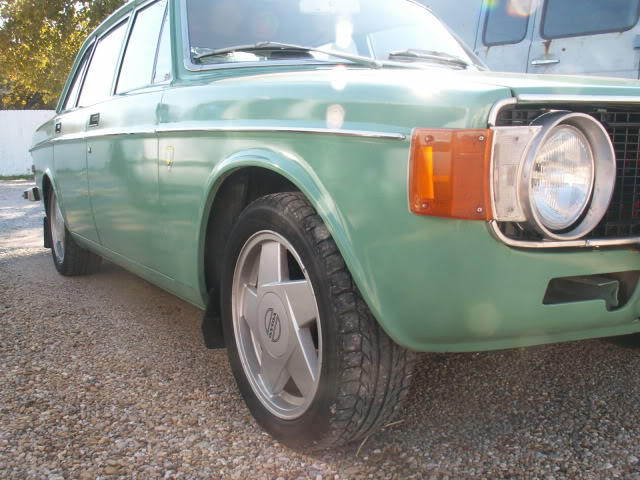
Stock wheels for comparison...
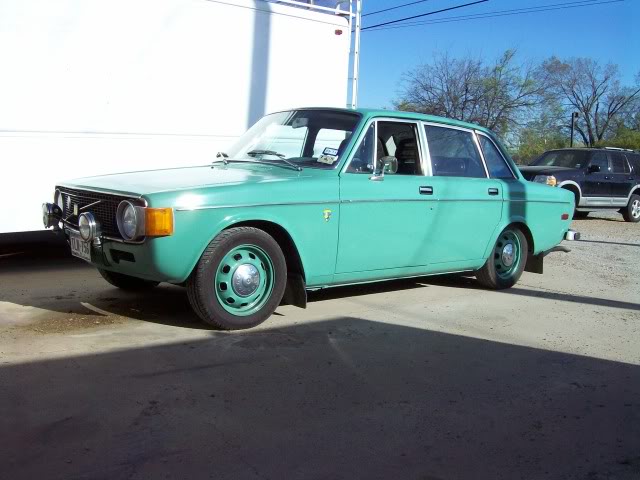
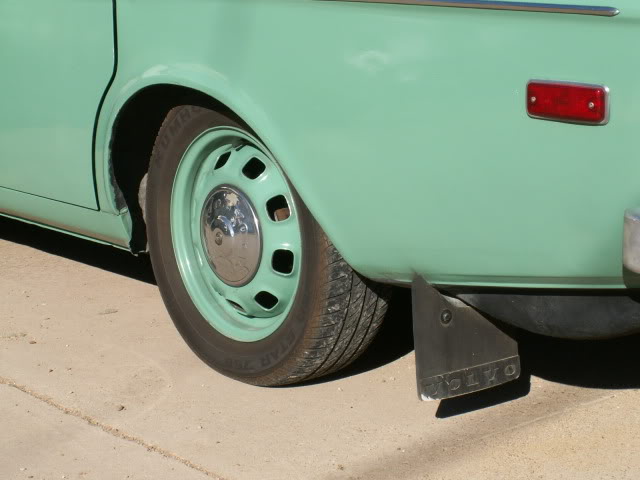
Stock wheels for comparison...


Thread Starter
|
Super Moderator
Joined: Aug 2008
Posts: 2,580
Likes: 8
From: Dallas, TX
Well, I'm not really a big fan of o.e. wheels being painted colors other than the way they came from the factory. I always think the wheels were messed up and somewhat took a rattle can to them because they couldn't afford to do them right. These were powder coated so the color won't be flaking off. I had intended to paint them back silver but I have to admit the black looks pretty good with the green. Old, huh? It has 30,000 less miles than the car in your sig!!
Junior Member
Joined: Feb 2009
Posts: 18
Likes: 0
HI
How did you instal that kind of gauges? What are his dimensions or diameter?
have you photo of the back of the console with the fix system use for the gauges?
May be I will be insterested do that in my 75' 242 DL the console are equal.


How did you instal that kind of gauges? What are his dimensions or diameter?
have you photo of the back of the console with the fix system use for the gauges?
May be I will be insterested do that in my 75' 242 DL the console are equal.
Thread Starter
|
Super Moderator
Joined: Aug 2008
Posts: 2,580
Likes: 8
From: Dallas, TX
Well, I have no pictures of the back side. The gauges are stock 52mm Volvo gauges found as options on turbo 240's and many GLE's. Typically, the toggle switches there are spaced out, with blanks between each toggle. I simply moved the toggles to the left, freeing up space. I reversed the gauge and, using the outside circumference as a template, drew two circles w/ pencil. Then I drew a second circle, approximately 1/4" smaller in diameter, within the original circle. A Dremel took care of the rest. Nothing special about the wiring under dash. The volt gauge wires to any convenient key on power source. A purist would run it to the fuse panel but there are other sources closer. For lighting, I merely piggybacked onto existing dash lighting. All the instrument lights were replaced with LED's with much less current draw than o.e. so the two extra bulbs are negligible. To the right of the gauges I removed the seat belt reminder light and used that space to mount the toggle for the driving lights. No real secret to it...probably one of the simplest tasks I did. On a pre 81 240, your gauge locations are equally limited. Other common locations for your car include removing the center vent/clock unit and locating up to, I believe, 5 52mm gauges there. I've seen people mount a defrost vent above it and connect that to the a/c duct to retain air movement! Another option is a gauge pod that mounts in place of the center radio speaker cut out on top of the dash. That pod was originally an R-Sport option and now occasionally reproduced by a fellow in Puerto Rico. None of those options are particularly simple; that's why on my 80 GT I'm swapping in an 81+ dash with the capacity built in, for 5 52mm gauges.


