When you click on links to various merchants on this site and make a purchase, this can result in this site earning a commission. Affiliate programs and affiliations include, but are not limited to, the eBay Partner Network.
I need to replace the lamda/oxygen sensor in the catalytic converter of my 2002 s40.
The wiring harness goes from the sensor up into the cabin.
Can anyone tell me what I need to remove in the interior to access the end of the harness? It looks like I might need to remove the carpet on the side of footwell, or maybe part of the centre console.
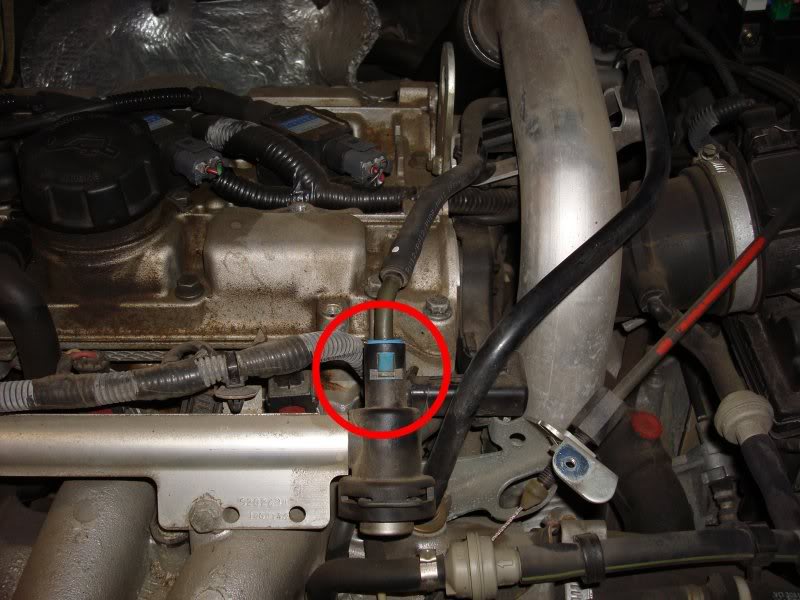
There are two oxygen sensors. One before the cat convertor and one after. Both wiring harnesses connect on the firewall inside the engine bay. The junction is located under a plastic piece on the center(ish) part of the firewall at the top. Above and to the side of the turbo heat shield.
You can just see the yellow mesh wire cover on the two leads at the extreme top left of this photo.
Sorry my original post was not clear - I mean the rear sensor after the catalytic converter.
It seems as though I didn't need to remove any of the console.
The sensor cable comes up through the floor in the cabin just in front of the stereo - underneath the block of foam (green arrow) and plugs into the wiring socket (red arrow).
To get access I removed the carpet panel on the side by:
1. removing the screw (yellow arrow).
2. pulling outward to separate the "sticky" pad (blue arrow) - it is the black square in the photo and is a bit like Velcro.
3. sliding the carpet down (the top of the carpet slips underneath the plastic console at the top).
Step 2 took a lot of force, so I am not sure if this is the correct way to get the black "Velcro"-type tabs to separate - there is one tab on the back of the carpet panel and the other is shown in the photo - they stick together and hold the carpet in place.
Hope this helps someone else with a similar problem.