
Radiator and condenser replacement


Thread Starter
|
Junior Member
Joined: Aug 2018
Posts: 10
Likes: 0
Girlfriends daughter "hit a rock" coming out of her friends driveway cutting the corner too sharp and fast. Ended up shoving the lower radiator support back a ways and shoved the condenser and radiator back as well basically splitting both in half. Both need replaced as well as some other bent parts. Ive been trying to find videos or forum topics on radiator replacement in the xc70 but cant seem to find much. A lot of stuff on other models though. Can anyone lend a hand with a step by step on how to remove the radiator and condenser. Its hard to see whats all going on with the two basically sandwiched together now. I have the fans off and the two main coolant hoses off as well as all the r134 drained. Thanks for any help. Im a chevy guy so this seems a little strange to me. Not as straight forward of a repair as I thought.

Thread Starter
|
Junior Member
Joined: Aug 2018
Posts: 10
Likes: 0
It's a 2009. So do they HAVE to be dropped out together? To me it looks like they are connected but can't tell how to separate them completely. I also can't see how the two AC hoses are connected. Need to go get a mirror on a stick from harbor freight. Won't be able to work on it anymore until tomorrow. Parts won't be here till next week anyways.
Thread Starter
|
Junior Member
Joined: Aug 2018
Posts: 10
Likes: 0
So anytime you have to have the radiator replaced you have to recharge the AC system??

Super Moderator
Joined: Oct 2010
Posts: 5,517
Likes: 73
Correct.
You'll also need to remove the bumper cover to get to the AC connections to the condenser if I remember correctly. Remove the headlight to get a better view. I don't remember off hand.
You'll also need to remove the bumper cover to get to the AC connections to the condenser if I remember correctly. Remove the headlight to get a better view. I don't remember off hand.
Last edited by ES6T; Aug 2, 2018 at 04:25 PM.
Thread Starter
|
Junior Member
Joined: Aug 2018
Posts: 10
Likes: 0
Wow, that seems very...inefficient? (Drawing a blank on the right word here) The front bumper is already off for repairs from a previous deer hit, trying to kill two birds with one stone here. I'll pull the headlight as well. It looked tight to get in there, that's why I've been trying to get the radiator out first.
Thread Starter
|
Junior Member
Joined: Aug 2018
Posts: 10
Likes: 0
I guess around here you get raped if anything has to do with AC. Most shops won't even touch it. I can't imagine what this would cost taken to a shop. I'll take some pictures tomorrow to show everyone the damage. Nothing too bad but it needs a new lower support plus the two brackets on either side of the support. And obivously the radiator and condenser. Fans seemed to fare ok
Thread Starter
|
Junior Member
Joined: Aug 2018
Posts: 10
Likes: 0
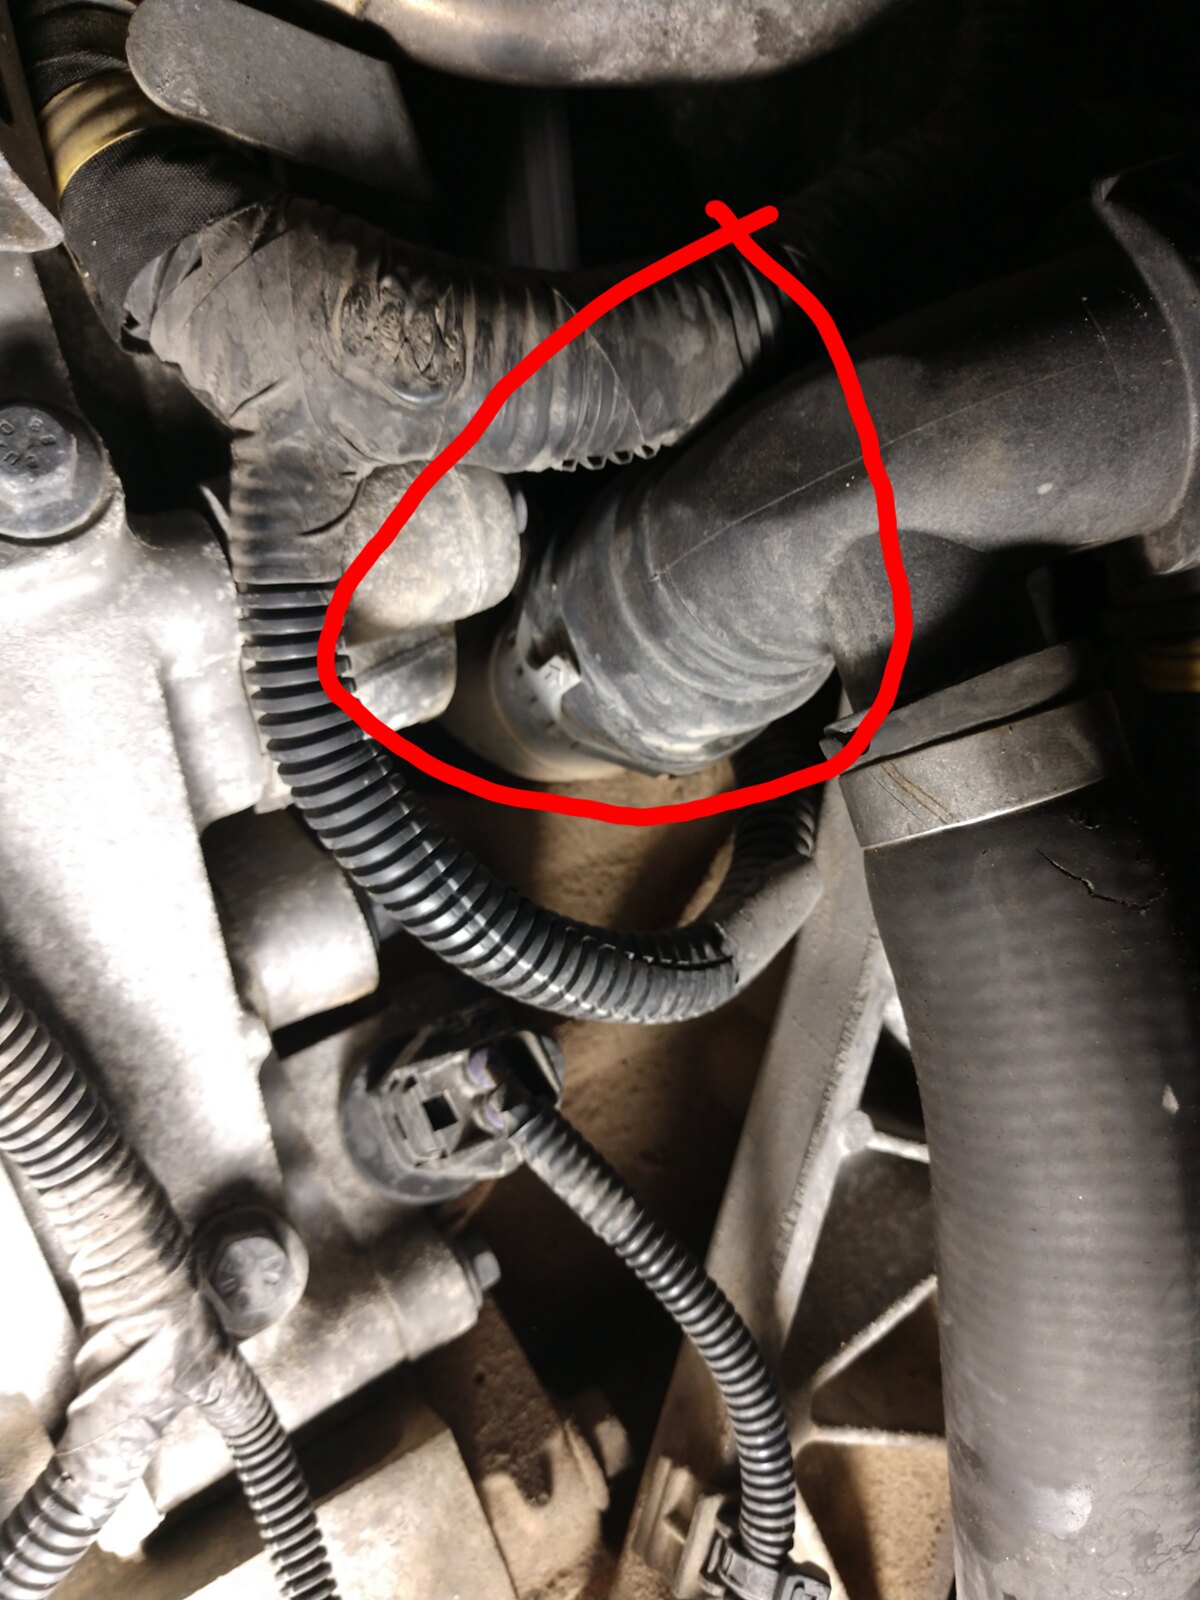
Anyone know how to remove this hose? Looks like a gray plastic clip of some sort. Would like to get it off before the new one.
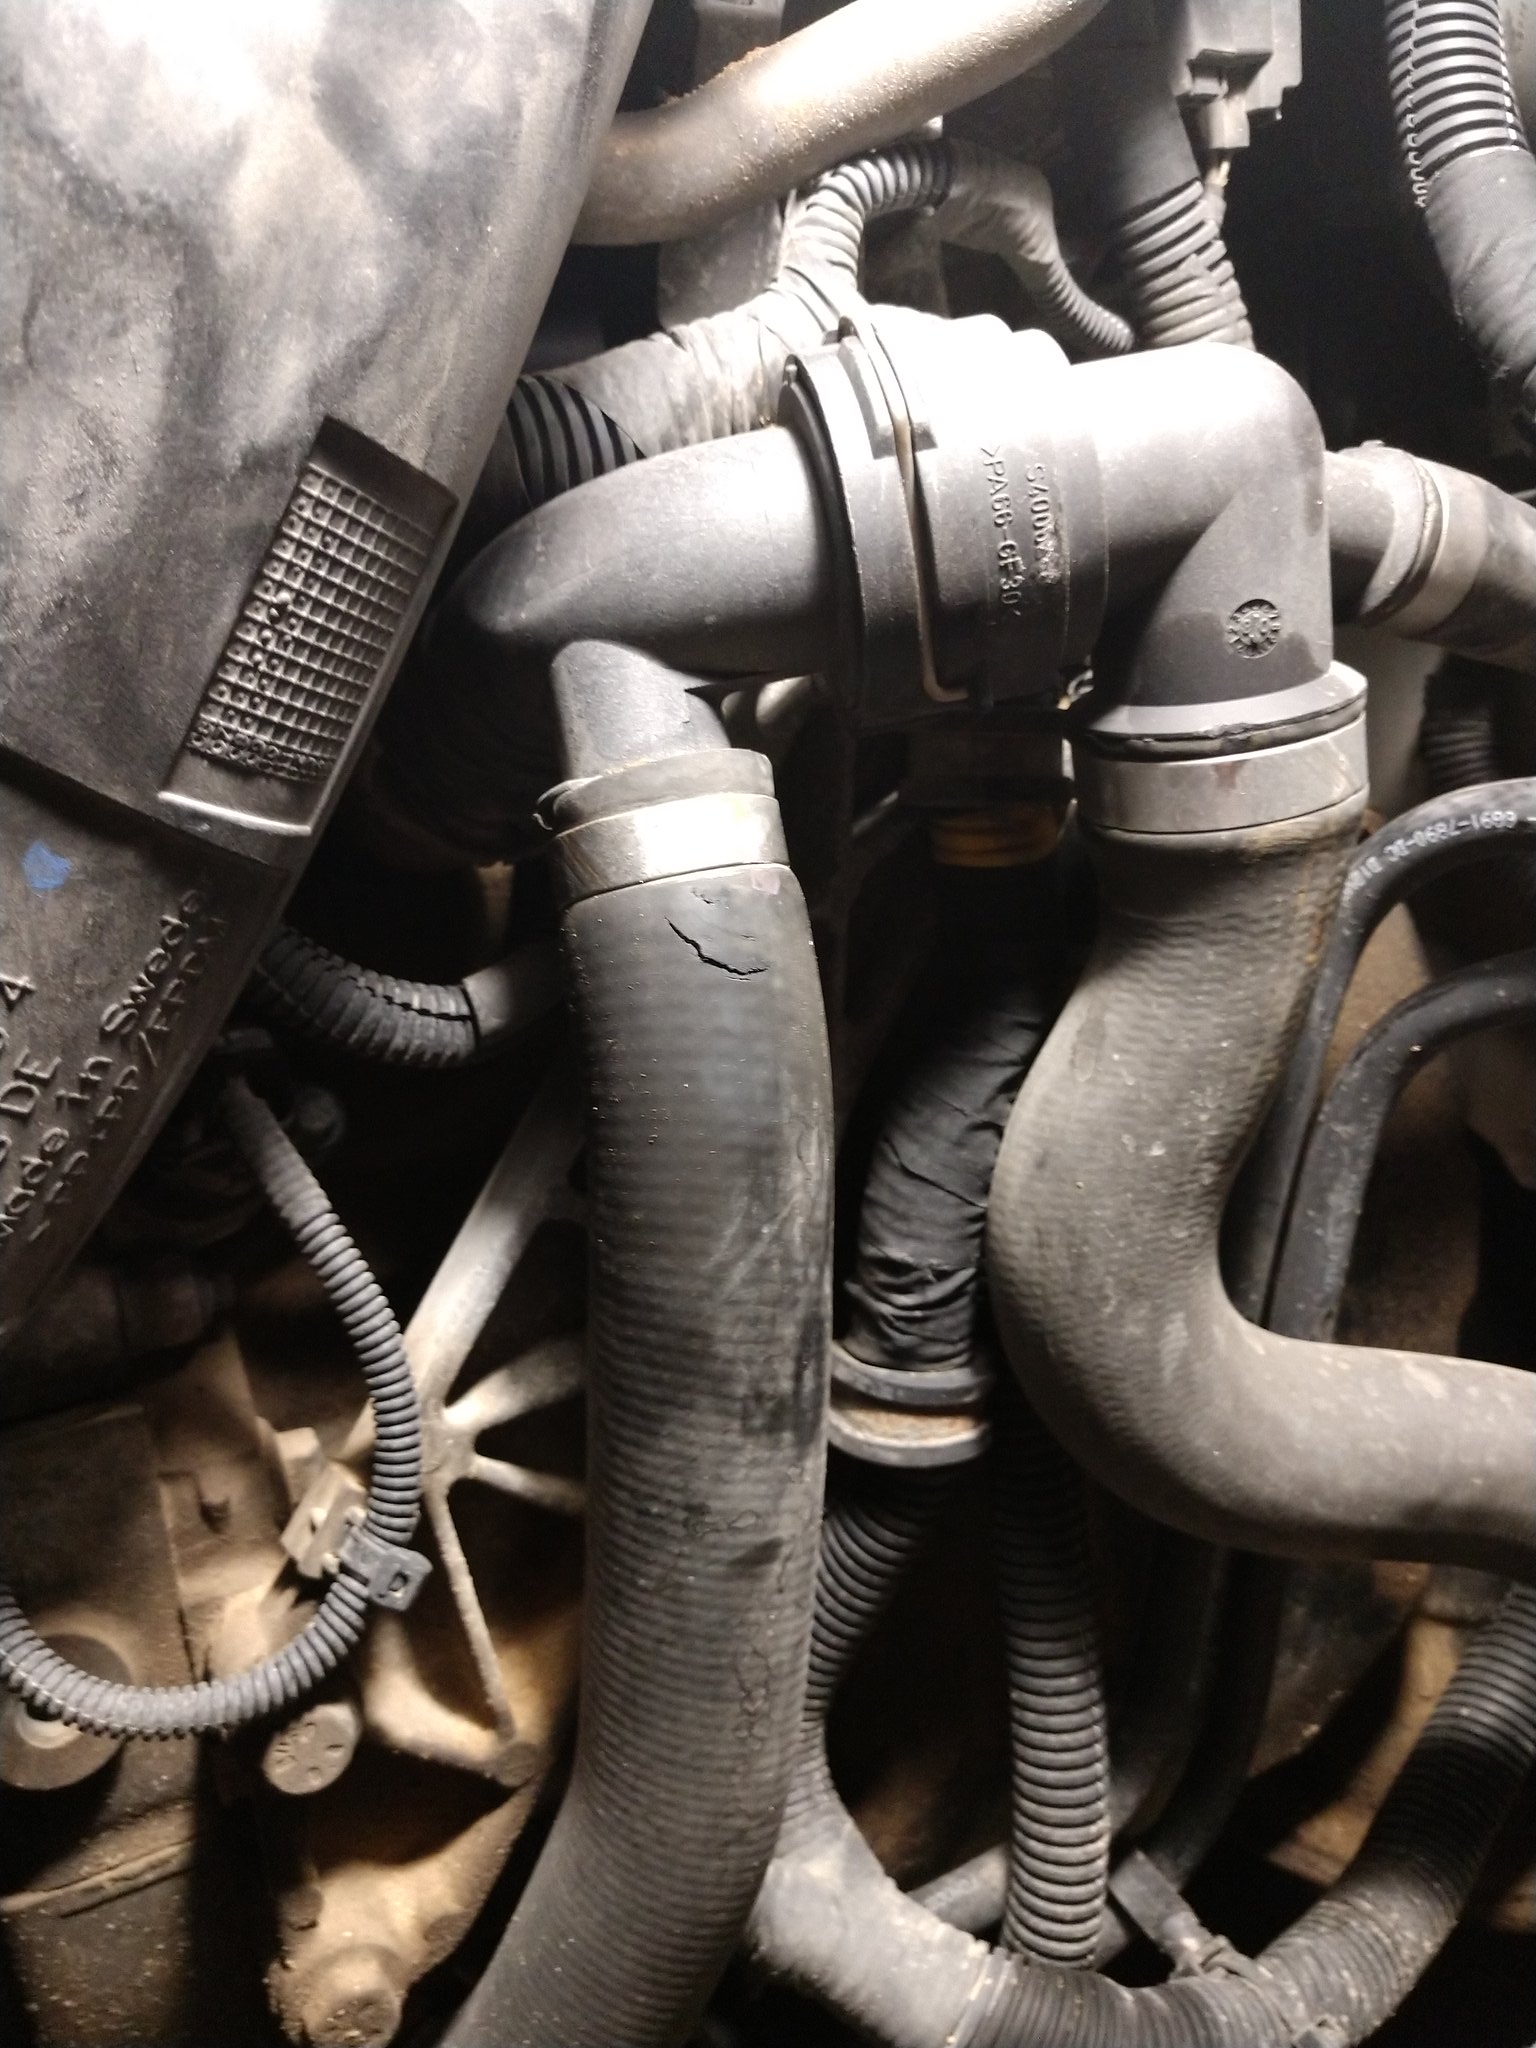
Heres an expanded view and shows the reason why it needs to be replaced. Wish I could just replace the single hose.
Heres an expanded view and shows the reason why it needs to be replaced. Wish I could just replace the single hose.
Thread Starter
|
Junior Member
Joined: Aug 2018
Posts: 10
Likes: 0
Does it matter which way you rotate it? Theres not a whole lot of room in there
Super Moderator
Joined: Oct 2010
Posts: 5,517
Likes: 73
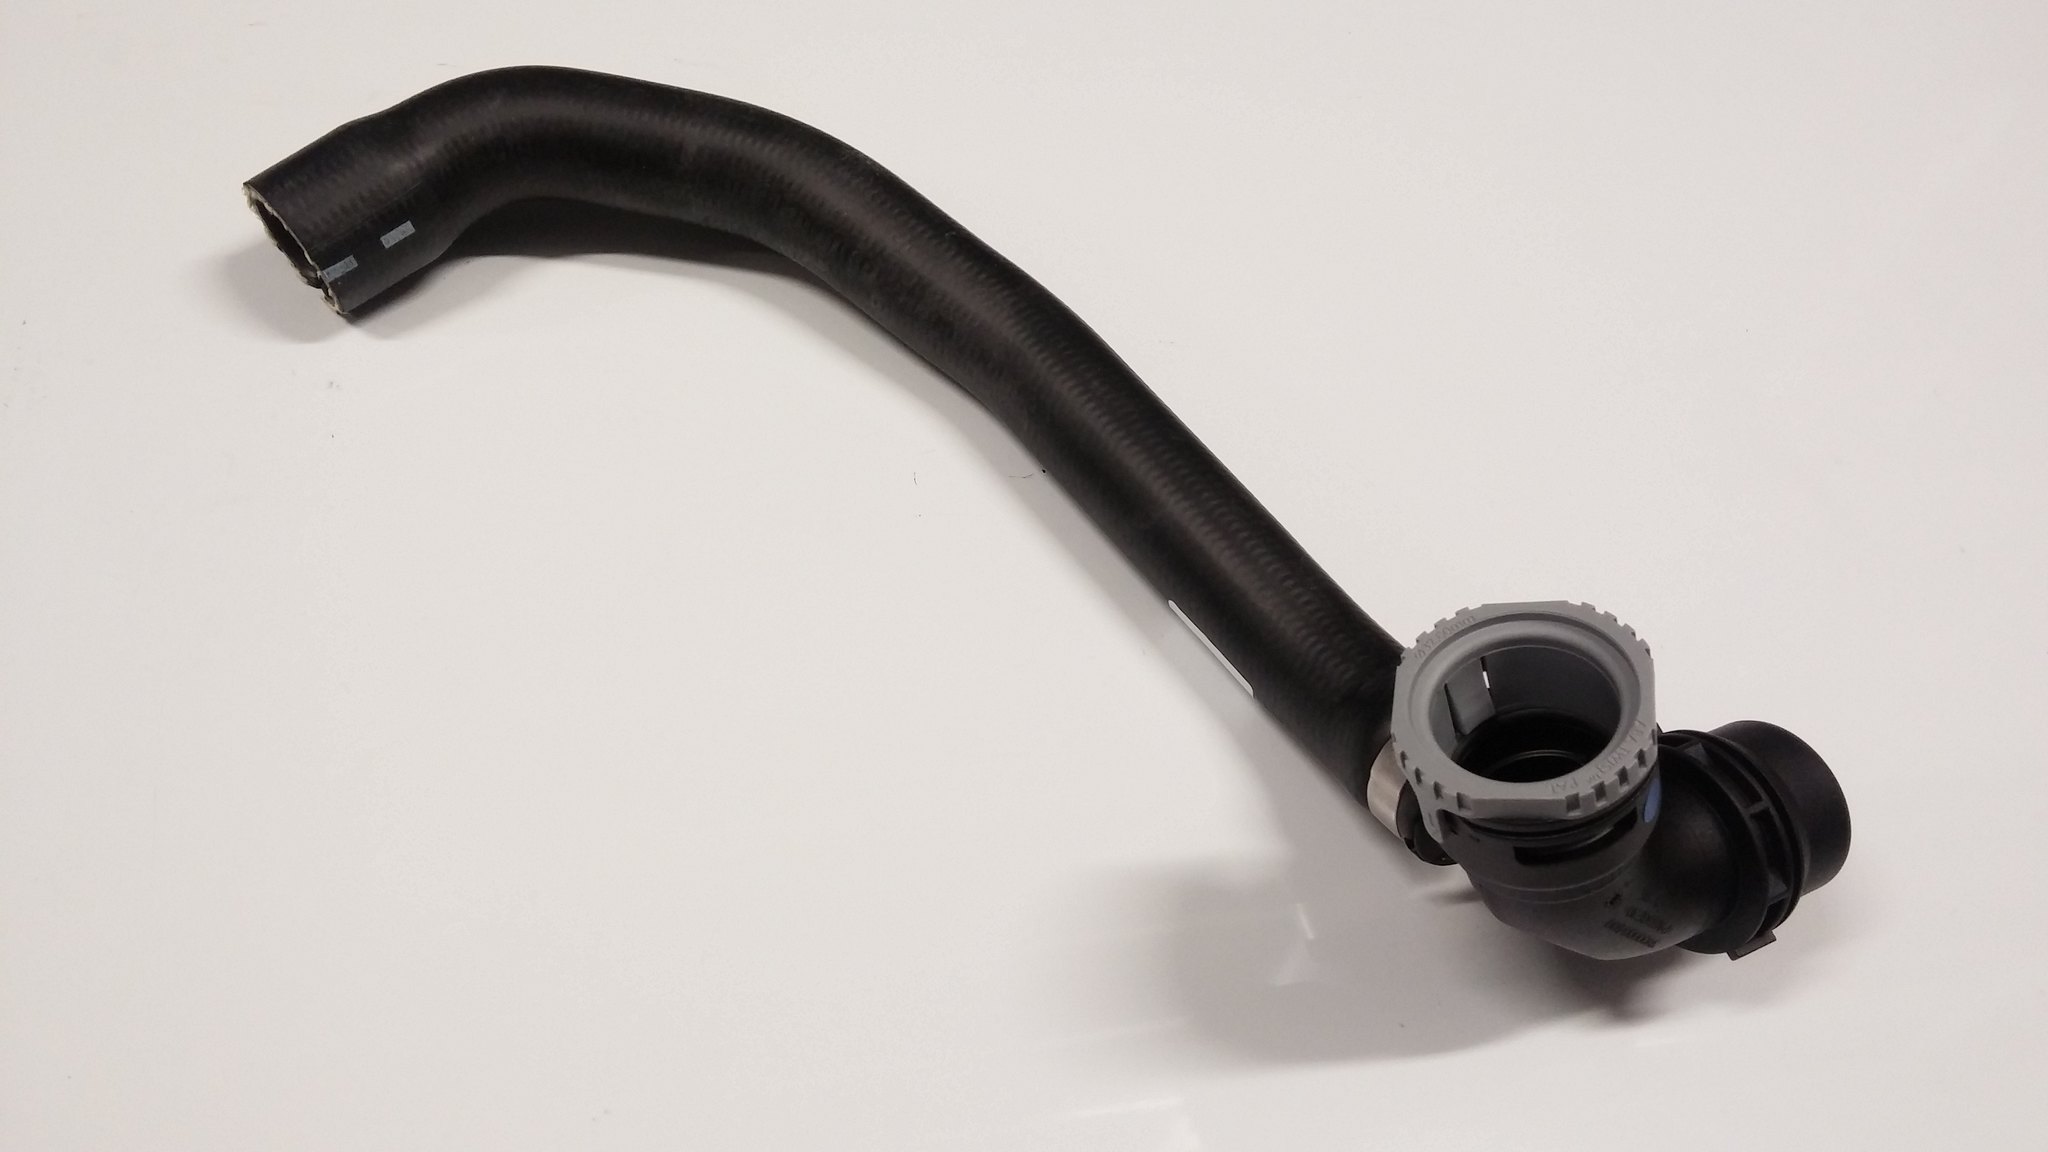
If you look from the top, you'll see a group of notches on the grey part (you can see them in the picture of the new part).
Push the hose onto the pipe a little if possible, then use a long screwdriver in one of those notches on an angle and hit it with a hammer to rotate.
Push the hose onto the pipe a little if possible, then use a long screwdriver in one of those notches on an angle and hit it with a hammer to rotate.
Thread Starter
|
Junior Member
Joined: Aug 2018
Posts: 10
Likes: 0
Got the new piece at the Volvo parts dealer in town, they had two in stock. I see what you're saying now. The tab that sticks out is easily accessible on the car now. I think I can get a screwdriver on the thick part of that to turn it.
Another question- what kind of coolant do these vehicles use? The little bit that came out was a teal color, not the bright green I'm used to. Parts guy said to use the Volvo specific coolant but he said he wasn't 100% sure
Another question- what kind of coolant do these vehicles use? The little bit that came out was a teal color, not the bright green I'm used to. Parts guy said to use the Volvo specific coolant but he said he wasn't 100% sure