


740/940 Heater Core Replacement (Pictures)


Thread Starter
|
Junior Member
Joined: Nov 2015
Posts: 7
Likes: 1
 740/940 Heater Core Replacement (Pictures)
Hey everybody! New to the forum. I replaced the heater core in my 91 740 turbo a few weeks ago, I guess you could say I'm a proper Volvo owner now lol . Here's some pictures that I took of the process.
Time to remove the core was 3.5 hours. Total time was probably around 12 hours over 3 days because I removed all of the carpets to pressure wash them.
Tools you will need:
7mm and 10mm 1/4 inch sockets
1/4 inch extensions
Universal joints
Socket wrench
10mm wrench
7mm ratcheting wrench (not necessary but very helpful)
Plastic pry bars (for interior pieces)
Philips and Torx drill bits.
Drill + small drill bit
Various screwdrivers
Sealant for heater core box
Hammer
Brass plumbing elbows
Flashlight
Small hands
Small phillips screw (For replacing the rivet)
4 cups of coffee
Cigarettes (optional)
First I bypassed the heater core with some brass plumbing pieces. (and disconnected the battery of course)

Then I took out the center console
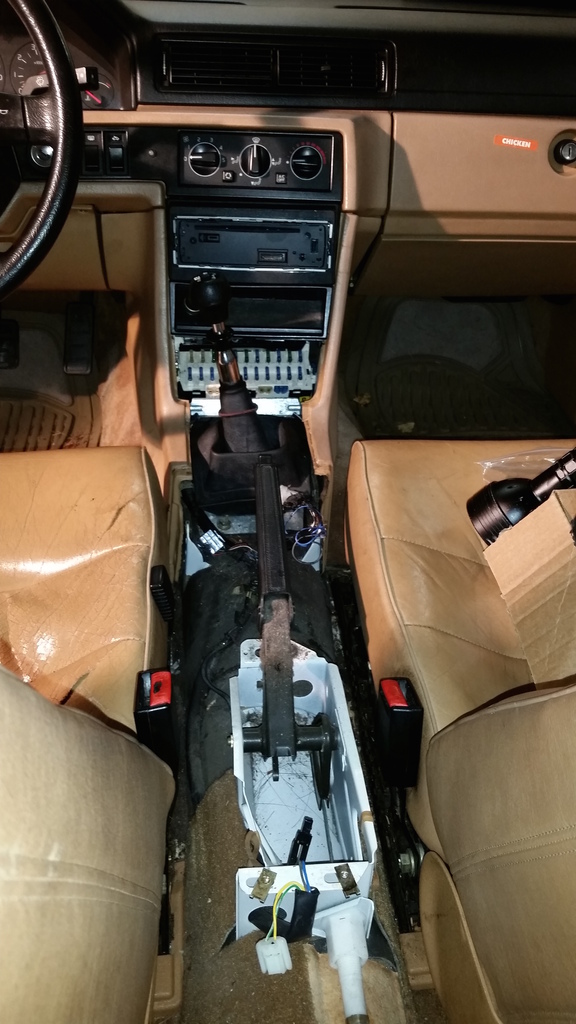
Then the glove box

Then the ash tray and center storage/cig lighter assembly

Stereo and its housing (phillips screw deep in there)

Now you can remove the center side panels and the kick panels

Unclip the relay tray and move it to the side
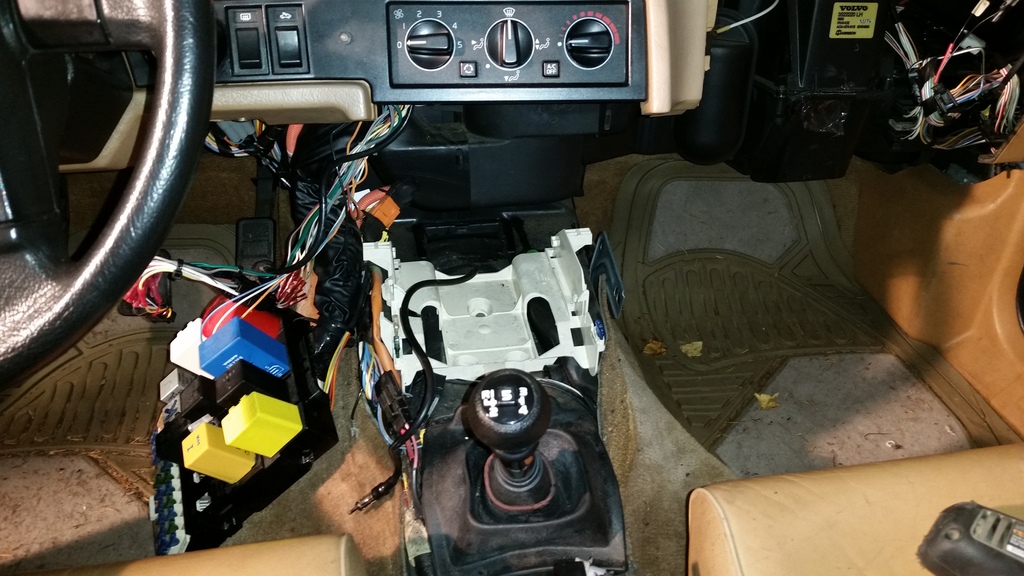
Remove the heater control panel, make note of wiring and vacuum lines

Here's where the fun starts. Start removing ducting. Its a fairly strong plastic and can handle twisting and pulling.
http://i292.photobucket.com/albums/m...styuejghh.jpeg
Rear floor vents removed

Drill out the rivet on the distribution box and remove. Remove rest of floor ducting

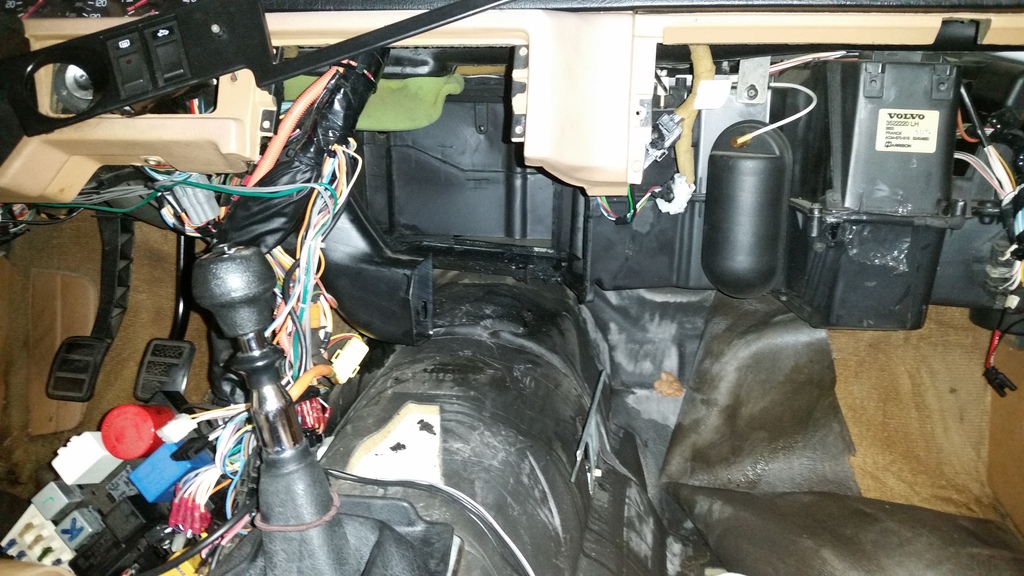
Here's the heater core box. There's about 11 7mm bolts around it

Box is removed. Getting those bolts out took me about an hour
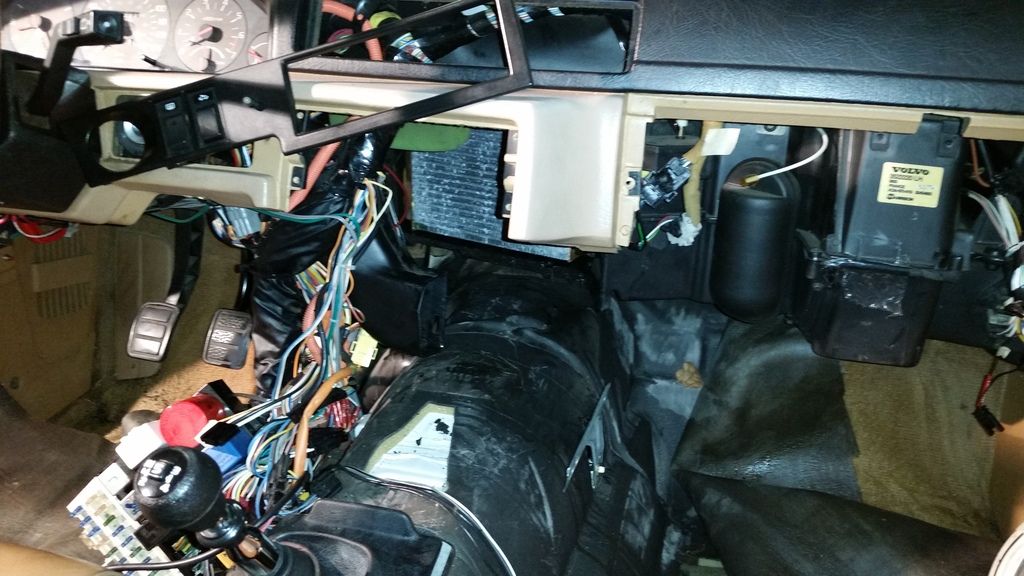
Closeup of heater core
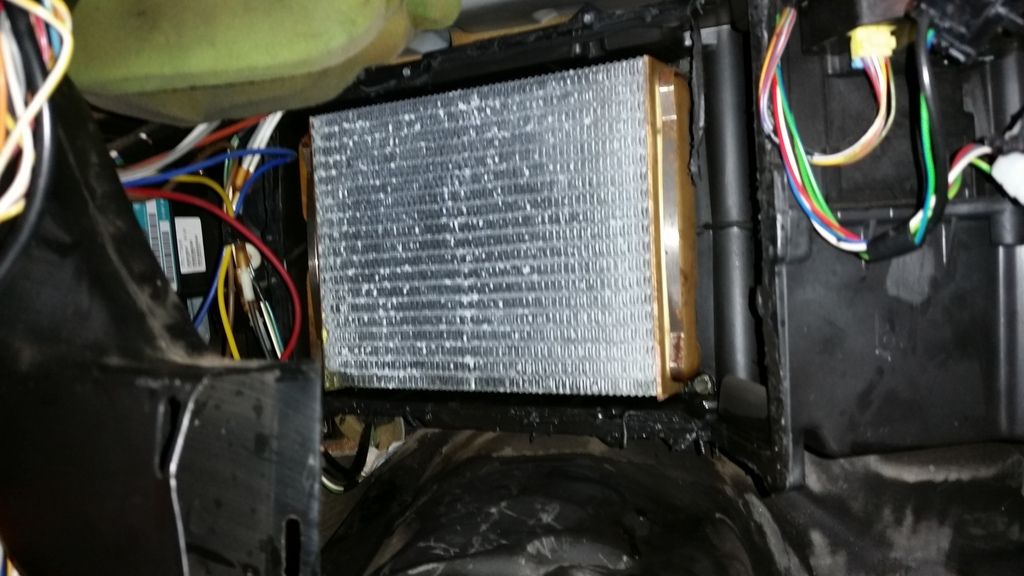
Core is out yay
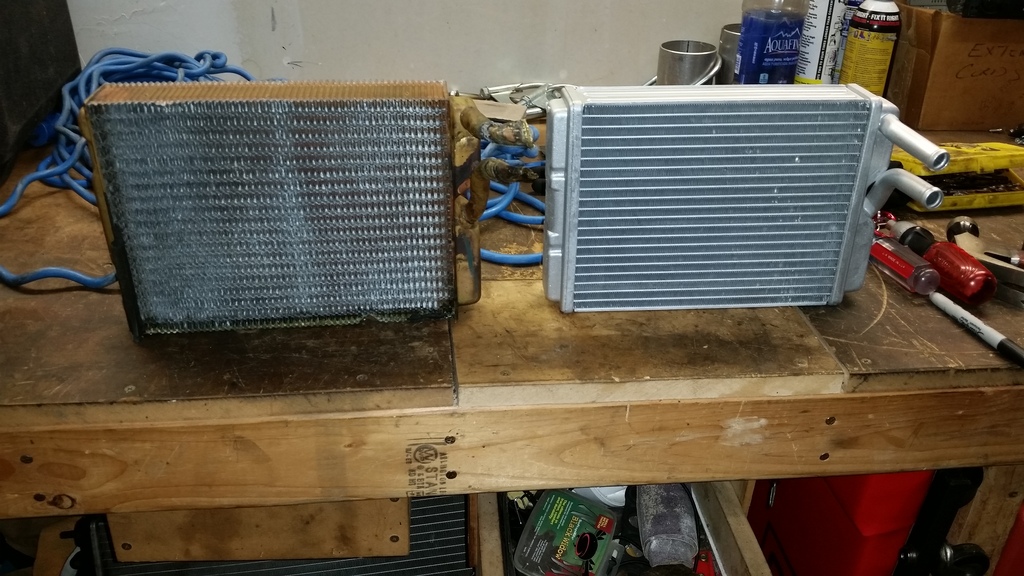
Old vs new. Idk why the company painted the new one silver. It's a Spectra brass/copper core ($70 on rock auto)
. Here's some pictures that I took of the process.Time to remove the core was 3.5 hours. Total time was probably around 12 hours over 3 days because I removed all of the carpets to pressure wash them.
Tools you will need:
7mm and 10mm 1/4 inch sockets
1/4 inch extensions
Universal joints
Socket wrench
10mm wrench
7mm ratcheting wrench (not necessary but very helpful)
Plastic pry bars (for interior pieces)
Philips and Torx drill bits.
Drill + small drill bit
Various screwdrivers
Sealant for heater core box
Hammer
Brass plumbing elbows
Flashlight
Small hands
Small phillips screw (For replacing the rivet)
4 cups of coffee
Cigarettes (optional)
First I bypassed the heater core with some brass plumbing pieces. (and disconnected the battery of course)
Then I took out the center console
Then the glove box
Then the ash tray and center storage/cig lighter assembly
Stereo and its housing (phillips screw deep in there)
Now you can remove the center side panels and the kick panels
Unclip the relay tray and move it to the side
Remove the heater control panel, make note of wiring and vacuum lines
Here's where the fun starts. Start removing ducting. Its a fairly strong plastic and can handle twisting and pulling.
http://i292.photobucket.com/albums/m...styuejghh.jpeg
Rear floor vents removed
Drill out the rivet on the distribution box and remove. Remove rest of floor ducting
Here's the heater core box. There's about 11 7mm bolts around it
Box is removed. Getting those bolts out took me about an hour
Closeup of heater core
Core is out yay
Old vs new. Idk why the company painted the new one silver. It's a Spectra brass/copper core ($70 on rock auto)
Thread Starter
|
Junior Member
Joined: Nov 2015
Posts: 7
Likes: 1
. The thing is I'm only 19, I can't afford a mechanic

Senior Member
Joined: Oct 2010
Posts: 4,540
Likes: 137
So, the finished project OK? Extra parts left over?
This is the ONLY way to learn: once you do a job you never forget it. I still remember my first big emergency I fixed myself, a broken drive shaft U joint on my '65 Galaxie at 3 am on the Oakland Freeway.
There is no substitution for laying hands on a mechanical job you need to do! Unfortunately these days fewer and fewer guys attempt these types of projects preferring instead to get hosed by some shop so they won't have to do the work and get their hands dirty; then they tell about it and pass themselves as "experts"!
This is the ONLY way to learn: once you do a job you never forget it. I still remember my first big emergency I fixed myself, a broken drive shaft U joint on my '65 Galaxie at 3 am on the Oakland Freeway.
There is no substitution for laying hands on a mechanical job you need to do! Unfortunately these days fewer and fewer guys attempt these types of projects preferring instead to get hosed by some shop so they won't have to do the work and get their hands dirty; then they tell about it and pass themselves as "experts"!

Member
Joined: Sep 2012
Posts: 37
Likes: 0
Nice pictorial! I don't recall mine having a rivet, but there was one screw holding the distribution box together, along the top, center, behind a foam strip, impossible to see, near impossible to access (7mm socket on extra-long extension)(I see you have that listed, also the "small hands" listed). It did not want to come apart until that one was removed.
The thing I worry about most from this process is subsequent squeaks and rattles. Seem to have avoided that, but am left with some persistent electrical problem that causes the instrument panel lamp rheostat to burn out within a short time. Probably connected something to the light harness that shouldn't have.
). It did not want to come apart until that one was removed. The thing I worry about most from this process is subsequent squeaks and rattles. Seem to have avoided that, but am left with some persistent electrical problem that causes the instrument panel lamp rheostat to burn out within a short time. Probably connected something to the light harness that shouldn't have.

Junior Member
Joined: Sep 2012
Posts: 12
Likes: 0
I did my 92 940 turbo a few years ago. I bought a Nissans replacement core, but the lines to the heater hoses ran out at an angle rather than at 90 degrees from the core, had to modify the dash holes to make it fit, pissed me off extra work because the supplier Nissans did not built it correctly to the spec of the Volvo number it was listed under, so avoid a Nissans replacement, unless they have fixed the problem!

Thread
Thread Starter
Forum
Replies
Last Post
ScandinavianSensation
Volvo 260, 760 & 960
3
Oct 14, 2023 03:56 AM
ycartf
Volvo 850
39
May 6, 2013 11:19 AM

