When you click on links to various merchants on this site and make a purchase, this can result in this site earning a commission. Affiliate programs and affiliations include, but are not limited to, the eBay Partner Network.
I have a 1993 Volvo 940, no turbo. I have searched around the forum and believe I have located my issue.
A/C compressor does not come on. I have tested the freon using the low pressure switch by trying to trip it with a paper clip. No luck. Fan behind the radiator does not come on except for intermitent cooling from the temp sensor on the engine.
I think it is the controller I have read about behind the panel in the dash, and it has been suggested to have it re soldered.
Can someone help with tips on removing the dash panel, etc??
Pop out trim piece around control, unscrew the four screws holding it, and unplug it from the back. Then open it up and look for the break in the solder.
Thanks Tech
I pulled it out last night...poured through it and could not find any wires loose, etc. Looks real clean. car has 71,xxx miles on it and all connections appear to be good. Obviously I have an electrical problem but may have assumed too much with my original post. Any ideas?
recap: compressor turns fine with mild resistance by hand. Cannot trip low pressure sensor on accumulator to kick compressor. Fan on rad. comes on from heat sensor not from a/c switch.
Maybe I did not tear it down far enough to see. A pic might help. Thanks!
OK here they are.
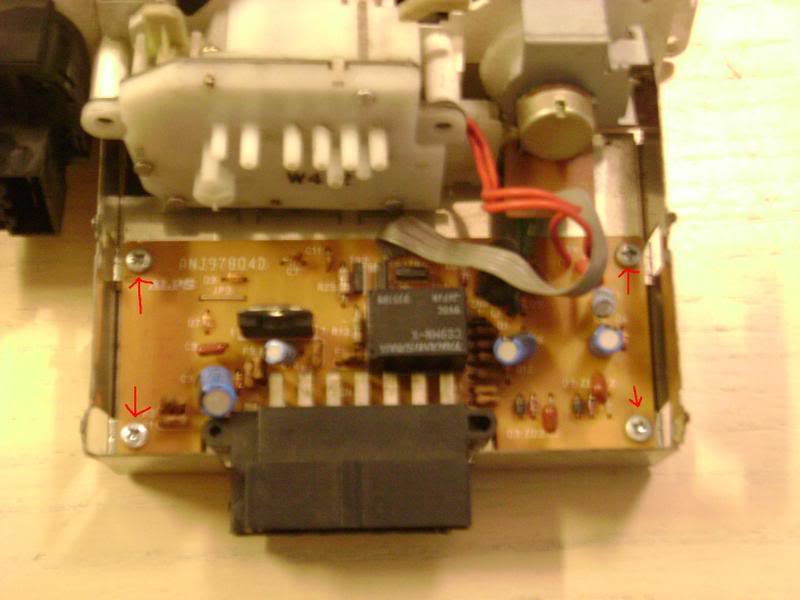
Once you have it out of the car and the black cover off you will see this. Remove the 4 screws the arrows point to.
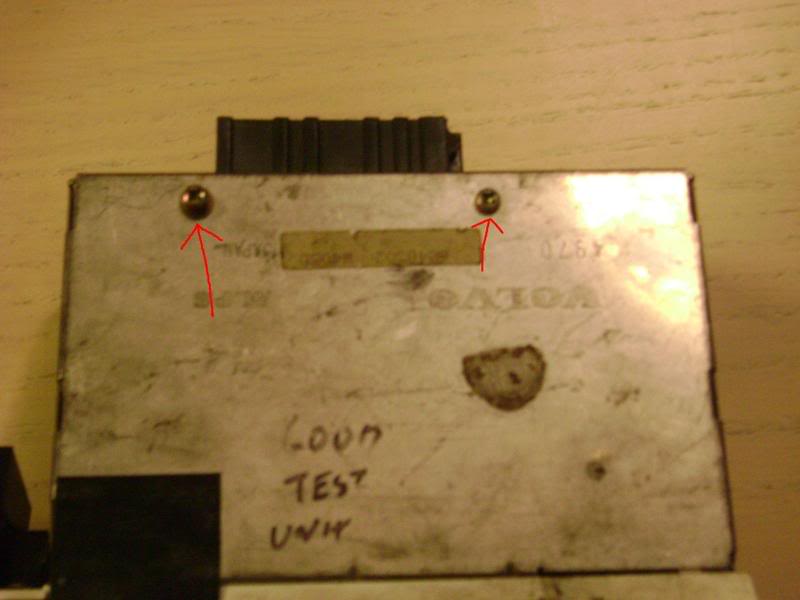
Then flip it over and remove the 2 screws (Red arrows)
The slide the circuit board out and flip over.
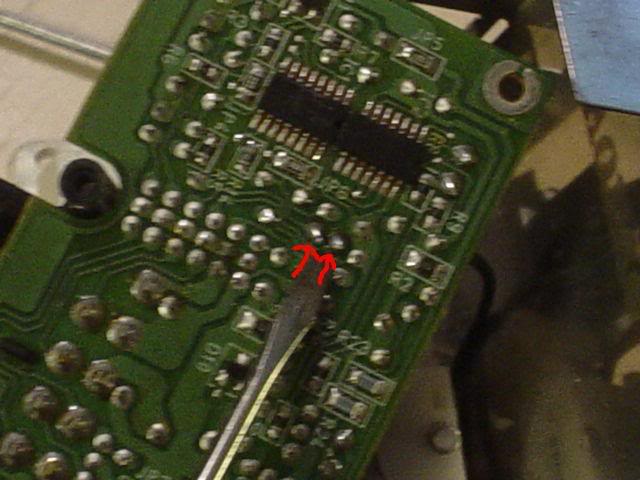
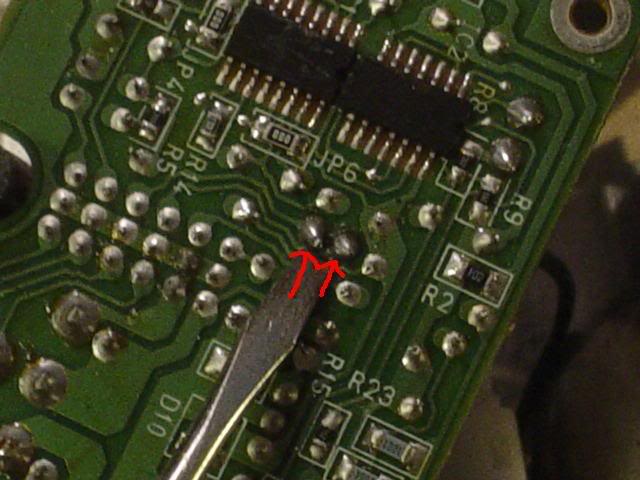
Then check the solder joints that I have the screwdriver by and the arrows.
(Sorry about the quality of the pics.Spend $300.00 for a new camera and pics suck. Use my camera that is 8 years old same brand as new one and quality is a ton better)
Those are the joints that normally go bad.
Thanks Tech
Your pictures were invaluable. After tearing it all down all of the solder is in tact. No signs at all of wear or burn.
Are there any inline fuses or anything I should check before I run to the shop with it?
Thanks
last question Tech, I promise
should I remove the old solder before putting the new on or do I just drip a small amount over the existing solder. Kinda looks like in the pic you provided I would just add some new over the old. I really appreciate your help!
actually, no. I pulled the A/C controller and broke it down exactly as shown in the pictures provided by Tech. I reheated the solder and applied a small amount more. Put it all back together and still no power to a/c compressor.
I am taking it to a mechanic now. I will be glad to let you know what I find out. I am puzzled and am out of ideas
Hey Lendsouth,
Did you ever diagnose this issue? I know it's been awhile...
The connections that crack and need to be resoldered are the ones going to the relay (the black rectangle on the other side of the circuit board). 90% of the time it's a bad connection, the other 10 it's a bad relay or bad electronics on the board.
I have the same AC issue as landsouth for my 92 Volvo GE non turbo. The AC turns on when engine is cool but when the engine became hot the compress stops working. I did some test below:
Freon pressure is correct
Connect 12V battery power to compressor, the clutch engaged (my compressor works)
The compressor clutch gap is 0.4mm
When I short circle the AC pressure switch on drier, the compressor did not engage ( I have to double check if I turned on AC before shorting the low pressure socket)
Clean the corrosion joints of the compressor wire inside the plastic capsule (it was filled with wax and green stuff)
I tried to remove AC control unit and re-solder all the solder points especially focus on "red arrows" and "rely" solder points but it is so hard to remove the vacuum tubes, Is there an easy way to remove them? The tube seems like welded to the plastic white tube !!! I don't want to break them (very stressful )
Please let me know an easy way to remove the tubes
I will share the result once solder points are fixed
It's been awhile since I had to pull the unit but I think they're all connected to one plug going into the AC controller. You'll unplug all of them at once instead of each one individually...
Finally I found AC root cause of my 92 Volvo 940. When I hit on top of the AC controller the compressor engaged and I have AC on. This leads to suspicious of solder cracks. I just re-flowed all solder cracks. Thanks for all the posts. Very helpful🥳 attached images of the cracks in red dot and the vacuum select dial- be ware the dial has many small components, they can jump when open the assembly. Luckily I found all components on the floor.
After solder re-flowed, the AC work great 😊 latest update. (Lessons learned do not open vacuum dial assembly. Only remove tubings in one piece unless vacuum pin hole inside the assembly is blocked)
It's been awhile since I had to pull the unit but I think they're all connected to one plug going into the AC controller. You'll unplug all of them at once instead of each one individually...
I removed the vacuum tube in one unit but I just realized I did it wrong by unscrew the vacuum dial assembling. Suddenly all the tiny parts jump all over the place. I managed to find them and put them together. Thnak you


 )
)