
Engine Disassembling


Thread Starter
|
Senior Member
Joined: Apr 2008
Posts: 3,948
Likes: 3
From: Milwaukee, WI
Couple questions I have while I'm working my way around my motor taking everything off.
How do I remove the two oil lines that are in the front of the motor? I see a torx bit that goes into this "thing" that sticks out of the block, do I just undo that?
Where should I start with the whole timing belt contraption? I'm going to be putting on a full timing belt/water pump kit so it all needs to come off. (I will obviously make sure the cams do not move and will lock em down some way)
I think that's about it for now, I'm just working on getting the engine mount side stuff off, but I found out you need a bigger torx then I thought I would need, I got a set that goes up to T25, and the ones on the motor have to be at least T30.
Oh, and to top it off, as I was pulling off the PCV hose that goes to the back of the motor, the crank position sensor plug got caught and crumbled to pieces. Go me. So if anyone is throwing out a crank sensor and doesn't need the plug, send me a pm.

Administrator
Joined: Sep 2004
Posts: 36,349
Likes: 46
From: Orlando, Florida
Leave the timing belt till the motor is out of the car.
For the oil cooler lines you can remove the cooler from the front of the motor or remove the lines from the cooler. Yes the t-30 if you are just removing the lines.
For the oil cooler lines you can remove the cooler from the front of the motor or remove the lines from the cooler. Yes the t-30 if you are just removing the lines.
Thread Starter
|
Senior Member
Joined: Apr 2008
Posts: 3,948
Likes: 3
From: Milwaukee, WI
Motors out of the car, I bought one, it's on a stand in my parking spot.  The front of the motor is completely naked already and I wanna get everything off of it because I'm going to thoroughly clean the exterior of it and then paint it before I start buying all the new parts for it.
The front of the motor is completely naked already and I wanna get everything off of it because I'm going to thoroughly clean the exterior of it and then paint it before I start buying all the new parts for it.


Thread Starter
|
Senior Member
Joined: Apr 2008
Posts: 3,948
Likes: 3
From: Milwaukee, WI
OMG, funny story about that. Last weekend when I got the motor on the stand, I was all done, cleaned up, and took my camera out to snap a couple pictures, and as I was pulling it out of my pocket I must of gotten a case of limphands because the camera like fell out of my hand and broked. It doesn't save to the external memory anymore, and I tired taking a couple pictures with it and they progressively got worse.

So, I'll snap a few pictures this coming weekend with the progress of it. I just took a couple pictures with my camera and they seemed alright.
Here's a teaser though...
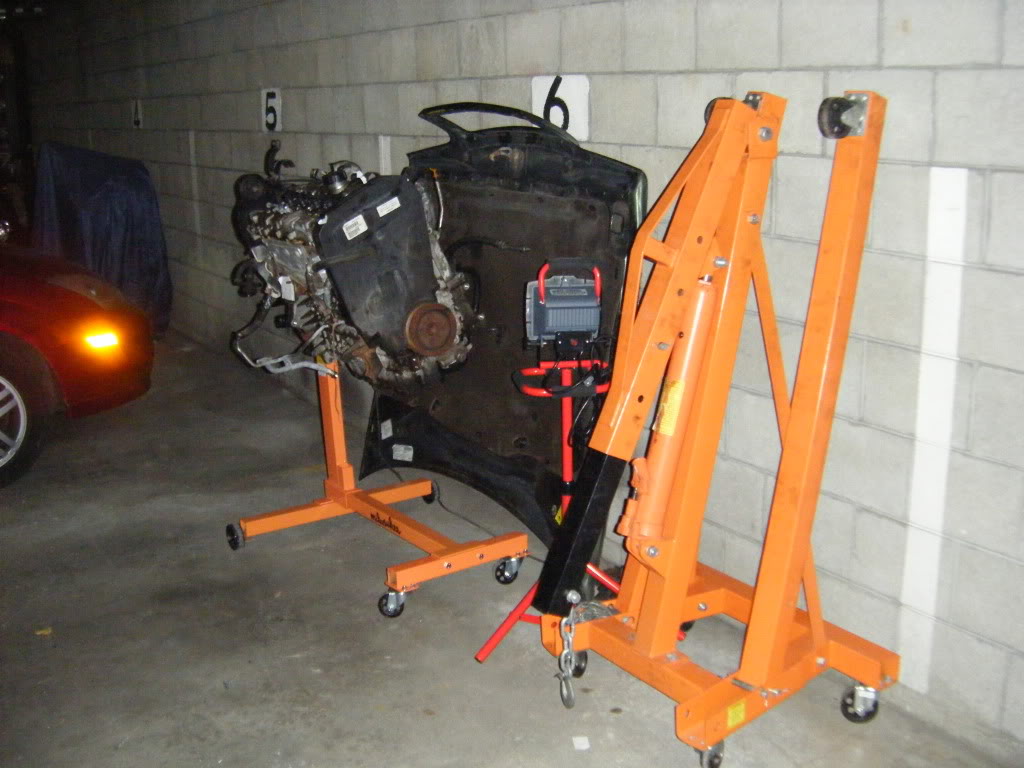
")
Thread Starter
|
Senior Member
Joined: Apr 2008
Posts: 3,948
Likes: 3
From: Milwaukee, WI

Haha. I want to be down there all the time working on it, but with work and homework the only times I get are usually one night on the weekends to spend on it. I guess it's all right though, I have all winter to work on it, so I need to space it out. Plus I got my other project being shipped out tomorrow.
Here's another teaser to keep you guys' minds from wandering....

Thread Starter
|
Senior Member
Joined: Apr 2008
Posts: 3,948
Likes: 3
From: Milwaukee, WI
Yeah, it's got a long ways to go though. I wish it was driving right now, which if I would actually get some ATF and add it to the oil it probably would be, but I'd like to get it into my parking garage and do some of the interior things. But I think I have enough on my plate for the time being. Now I can't wait for next weekend so I can get that hoist out of there, open it up some, and get the rest of the stuff off the motor.
Oh, and when I took off the intake manifold, it was nice and clean in there, no residue on the valves at all. Clean enough to eat off of.....so I did, I made pudding inside there and spooned it out.
Oh, and when I took off the intake manifold, it was nice and clean in there, no residue on the valves at all. Clean enough to eat off of.....so I did, I made pudding inside there and spooned it out.


Thread Starter
|
Senior Member
Joined: Apr 2008
Posts: 3,948
Likes: 3
From: Milwaukee, WI
30 pages is a milestone. You have those headlights done yet? I'll start a progress log tonight.
Thread Starter
|
Senior Member
Joined: Apr 2008
Posts: 3,948
Likes: 3
From: Milwaukee, WI
My progress log will be the best one evar! Haha, I have like seven different threads of stuff about this, but starting tonight...or tomorrow night.........or this weekend, it will be combined into one. And I'll take some good pictures this weekend. I plan on getting the rest of the stuff off of it after I make a trip to Harbor Freight and get a couple tools.
Speaking of Harbor Freight, have any of you guys heard of that place or been there???
It's like the best place ever, I want to go there and just turn my parking spot into a work shop, I'm not even exaggerating.
Speaking of Harbor Freight, have any of you guys heard of that place or been there???
It's like the best place ever, I want to go there and just turn my parking spot into a work shop, I'm not even exaggerating.

Senior Member
Joined: Aug 2009
Posts: 106
Likes: 2
From: Evansville, IN
I have many tools from Harbor Freight. Just remember that you get what you pay for! I'd be careful putting lots of torque on some of their sockets; specifically some of their cheap "complete" kits, I've had them split on me. I'll be getting an engine hoist and stand from there shortly, a friend and I are turning a 744 tic into a drag-strip car and need a stand to start rebuilding the spare motor we pulled from a junked 760 tic.