
Engine rebuild progress


Thread Starter
|
Senior Member
Joined: Jul 2009
Posts: 459
Likes: 0
From: Sebastian, FLA
Started my engine rebuild project this weekend. My back is in serious!!! pain . It's a good thing I love this car.

I really don't know what the big deal about removing the intake manifold is??? It was one of the easier things I had to do. yeah you have to use a wrench on two bolts other than that ratchet and socket..... PCV system replacement is a walk in the park. Just pull the intake mainfold!!!! yeah you have to replace a gasket.
Problem areas were.
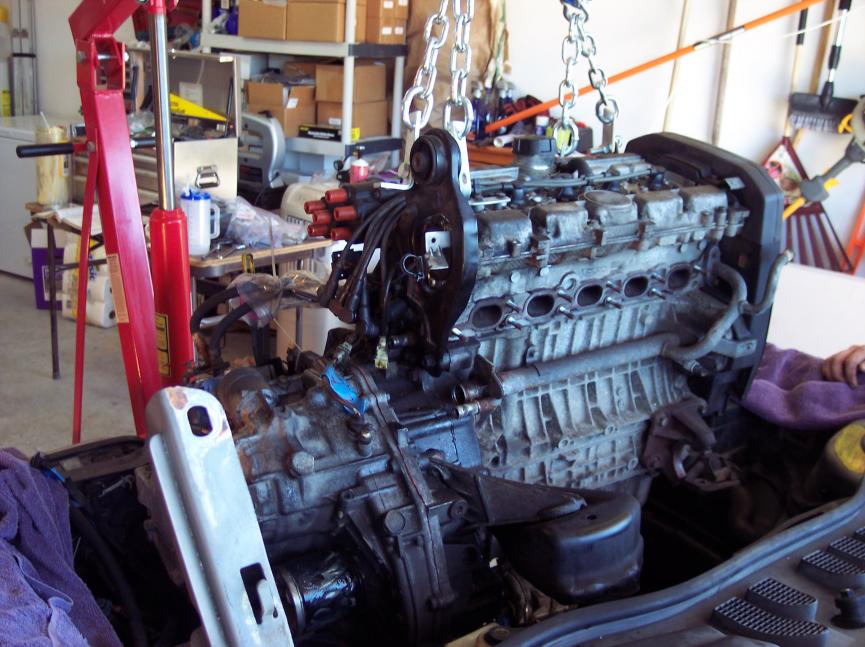
(1)Ball joint removal from the steering knuckle.... a major pain in the butt. right side was easier because it seems it was worked on or replaced(different bolt).By the way I made a "special Tool" out of the biggest chissel I could find At HD and using a cutoff disk, I cut the point off so it wouldn't bottom out on the ball joint stud but still allowed me to spread the knuckle enough to get the stud out. Cut off discs are one of man's great creation,, see item (7)
(2)Of course the exhaust manifold... but I expected this. I left it attached to the CAT and pushed it back while hoisting the engine so I didn't have to use a cutoff grinder to cut the bolts until the engine was removed.
(3)The harness. Man this is a big time consumer, especially behind the intake manifold. That's why I removed the intake.
(4)Head bolts.... oh yeah. they kicked me right in the back side. Big breaker bar, my legs pushing, my arms pulling and sweat running like a water fall. I only cracked them off to begin and worked my way through them a few times before spinning them out.

(5)Ceiling in the garage was too low. This engine has long legs.
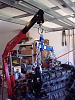
So, What to do? Get my girlfriend's teenage daughter (drives the 98 V70) to pull the hoist forward( haven't looked at the radiator since but had a nice piece of MDF in to protect it) as her boyfriend and I push the car into the garage while my girlfriend ( drives the 01 V70) steers and contols the brakes.
(6) FCP doesn't work on the weekend. I want to order parts but there are no 10% discounts on volvoforums.com on the weekends so I have to wait. I've already spent a ton of money so you'd think they'd give me my own discount coupon. Only in jest..they have been great.
(7) The thermostat housing bolts WOULD Not come out. I had to remove the housing to get that other casting elbowy thing off the head before I shipped it. Torque heads . PB Blasted, heated and then .... remembered one of my best friends....cutoff grinder. covered the head with nice thick poly (don't want any of that crap in my head, I already have enough crap in my head, not the engine's) and zipped the tops of those torque head "MF" bolts right off .
Questions????? sooo far!!
(1)Why do I have to make all of those special tools (haynes) to re-assemble the head. It seems easy enough to place the cams in the lower head, positioned very close to TDC, put the cover on top(after applying the sealant and oil to the cam bearings and lifter wells) and use the upper cover bolts to slowly push the cams into their bearings. Then rotate the cams, a few degrees, to perfect TDC. As long as the crank is TDC then I don't think I should have a problem pushing the valves into a piston. Does this seem really stupid??
I had to put the head back together to ship to Clearwater and this process seemed easy enough. Of course there were no pistons below.
(2)the torque converter came off with what I thought was a flywheel. Where's the beef?? sheet metal with a ring gear. yeah.. I was very carefull. The oil looked not really good so I drained it. I'm pretty sure I Should refill before re installing??
Okay, the wine is starting make my back feel a bit better and now it's time for the hot tub.

Comments and advice please.
. It's a good thing I love this car. 
I really don't know what the big deal about removing the intake manifold is???
It was one of the easier things I had to do. yeah you have to use a wrench on two bolts other than that ratchet and socket..... PCV system replacement is a walk in the park. Just pull the intake mainfold!!!! yeah you have to replace a gasket.Problem areas were.
(1)Ball joint removal from the steering knuckle.... a major pain in the butt. right side was easier because it seems it was worked on or replaced(different bolt).By the way I made a "special Tool" out of the biggest chissel I could find At HD and using a cutoff disk, I cut the point off so it wouldn't bottom out on the ball joint stud but still allowed me to spread the knuckle enough to get the stud out. Cut off discs are one of man's great creation,, see item (7)
(2)Of course the exhaust manifold... but I expected this. I left it attached to the CAT and pushed it back while hoisting the engine so I didn't have to use a cutoff grinder to cut the bolts until the engine was removed.
(3)The harness. Man this is a big time consumer, especially behind the intake manifold. That's why I removed the intake.
(4)Head bolts.... oh yeah. they kicked me right in the back side. Big breaker bar, my legs pushing, my arms pulling and sweat running like a water fall. I only cracked them off to begin and worked my way through them a few times before spinning them out.
(5)Ceiling in the garage was too low. This engine has long legs.

So, What to do?
Get my girlfriend's teenage daughter (drives the 98 V70) to pull the hoist forward( haven't looked at the radiator since but had a nice piece of MDF in to protect it) as her boyfriend and I push the car into the garage while my girlfriend ( drives the 01 V70) steers and contols the brakes.(6) FCP doesn't work on the weekend
. I want to order parts but there are no 10% discounts on volvoforums.com on the weekends so I have to wait. I've already spent a ton of money so you'd think they'd give me my own discount coupon. Only in jest..they have been great.(7) The thermostat housing bolts WOULD Not come out
. I had to remove the housing to get that other casting elbowy thing off the head before I shipped it. Torque heads . PB Blasted, heated and then .... remembered one of my best friends....cutoff grinder. covered the head with nice thick poly (don't want any of that crap in my head, I already have enough crap in my head, not the engine's) and zipped the tops of those torque head "MF" bolts right off . Questions????? sooo far!!
(1)Why do I have to make all of those special tools (haynes) to re-assemble the head. It seems easy enough to place the cams in the lower head, positioned very close to TDC, put the cover on top(after applying the sealant and oil to the cam bearings and lifter wells) and use the upper cover bolts to slowly push the cams into their bearings. Then rotate the cams, a few degrees, to perfect TDC. As long as the crank is TDC then I don't think I should have a problem pushing the valves into a piston. Does this seem really stupid??
I had to put the head back together to ship to Clearwater and this process seemed easy enough. Of course there were no pistons below.
(2)the torque converter came off with what I thought was a flywheel. Where's the beef?? sheet metal with a ring gear. yeah.. I was very carefull. The oil looked not really good so I drained it. I'm pretty sure I Should refill before re installing??
Okay, the wine is starting make my back feel a bit better and now it's time for the hot tub.
Comments and advice please.

Senior Member
Joined: Apr 2008
Posts: 3,948
Likes: 3
From: Milwaukee, WI
Daaammnnn, Looks awesome, super clean motor too btw. It doesn't sound like it's that bad to pull the motor out, seeing these pics make me that more excited to do mine. AAHHHH, haha. On another note, I got pretty much all of the accessories off of my motor, time to start cleaning, I'll post pics in my project thread.
Looks good, keep the pics coming, you know that's everyone's favorite part. I remembered my dad would always get mad because we would be in the middle of something and I would stop to get my camera to take a picture. Lawlz.
Looks good, keep the pics coming, you know that's everyone's favorite part. I remembered my dad would always get mad because we would be in the middle of something and I would stop to get my camera to take a picture. Lawlz.
Thread Starter
|
Senior Member
Joined: Jul 2009
Posts: 459
Likes: 0
From: Sebastian, FLA
Yeah pictures are great. I should be taking more of them.
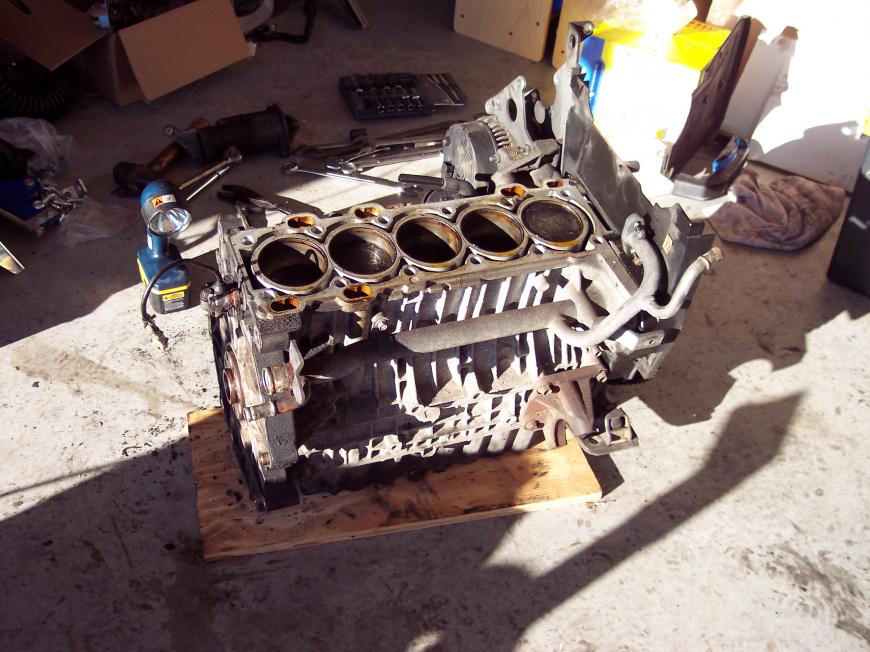
We'll see how clean when I measure the bore and crank.
Drove the 01 V70 to work today. Oh... I should have upgraded, but I'm getting a totally refreshed engine, right???
The parts list is growing...new lower control arms..the rubber is old and I pinched the ball joint seal removing one side, new axles..they don't last forever, new exhaust manifold.
thinking about adding a new alternator, they don't last forever and it doesn't seem real easy to remove when it's in the car.

Senior Member
Joined: Apr 2008
Posts: 3,948
Likes: 3
From: Milwaukee, WI
Haha. Do it!
But realistically, a used R manifold is about 250+shipping. So if you have the funds, they are a great mod, although, I don't know how noticeable it would be with all stock motor.
But realistically, a used R manifold is about 250+shipping. So if you have the funds, they are a great mod, although, I don't know how noticeable it would be with all stock motor.
Thread Starter
|
Senior Member
Joined: Jul 2009
Posts: 459
Likes: 0
From: Sebastian, FLA
Sorry, I should have said header it's an NA. I already know what you'll say next... ah it's not even worth rebuilding it, junk it.
I think after this project I'll try to pick up an 850 R high milage project car to rebuild so I can see what all the excitement is about. I just won't be able to keep it long for fear of too many tickets.
I think after this project I'll try to pick up an 850 R high milage project car to rebuild so I can see what all the excitement is about. I just won't be able to keep it long for fear of too many tickets.
Senior Member
Joined: Apr 2008
Posts: 3,948
Likes: 3
From: Milwaukee, WI
Nah, personally if I had an NA and the engine needed rebuilding I would just get a turbo, but I think what you're doing is awesome. I wish I could rebuild my motor to the extent that you are. Some day though. It's not that I don't like NA's, its more so when someone has an NA and they're desperately asking what they can do to gain more performance out of it, when that's the case, then the obvious answer is to ditch the na.
Anways, any new progress?
Anways, any new progress?
Thread Starter
|
Senior Member
Joined: Jul 2009
Posts: 459
Likes: 0
From: Sebastian, FLA
Nothing until Saturday. working 9hrs, commuting 2.5hrs(this is when you really get to appreciate a Volvo) a day doesn't leave too much spare time. I did pick up my new(rebuilt) axles and muffler to night. Wish I could have bought from FCP but core shipping adds some cost and inconvenience.
I'll post this weekend, more pics, bore measurements...please, please be within tolerance.. crank. Any special requests??? Ask before Saturday.
I'll post this weekend, more pics, bore measurements...please, please be within tolerance.. crank. Any special requests??? Ask before Saturday.
Thread Starter
|
Senior Member
Joined: Jul 2009
Posts: 459
Likes: 0
From: Sebastian, FLA
Okay...the joke is on me.
This is not an easy motor to rebuild and I've only taken it apart. Tonight I had to remove the crank pulley (just realized while typing that I didn't make reference marks on the crank and pulley, serious panic!! and then remembered the volvo timing mark that I verified just after taking the head off that it was at TDC), the oil pan, the pistons, the intermediate section so I could order the correct main bearings.
This was a mystery to someone who hasn't done it because haynes tells you all about what you need to do but nothing about where to look for the letter codes for the main bearing shell sizes. Yeah they say it's on the crank and the block but where on the crank and the block. The crank is dark with old burnt oil and the block is stained with 13 years worth of stuff.
I Reeeeally don't know how some part suppliers can sell a main bearing set with out having this info and there are so many combinations that it seems to me impossible to supply them as set. It's a good thing I have FCP on my side. Mike ...if you're listening I need them soooon, I'll call first thing tomorrow.
I have pics that I'll post this weekend. If your thinking about making this your first engine rebuild...I only have this advice.. DON'T!!!!. Start with a small "all iron" diesel, like yanmar, kabota, mitsubishi.
Thread Starter
|
Senior Member
Joined: Jul 2009
Posts: 459
Likes: 0
From: Sebastian, FLA
Okay it was the end of a long day. I'm getting over it and it's not so bad.
After having a look (only a look) at the main bearings I don't think I needed to take it down this far, they look very clean.
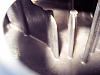
There is however a noticeable, visual (I can't find my feeler gauges, they're here somewhere) difference in the ring end gap. I'll post a photo of them.
The most frustrating part of this project is finding the parts I want to buy. Mostly rings, and main bearings. Many places carry rod bearings only but I can't imagine tearing the engine out and down to do rod bearings without doing rings. And well I'm of the school of thought that if you're going this far you might as well check the mains too. Just a not to some of the suppliers out there.
After having a look (only a look) at the main bearings I don't think I needed to take it down this far, they look very clean.
There is however a noticeable, visual (I can't find my feeler gauges, they're here somewhere) difference in the ring end gap. I'll post a photo of them.
The most frustrating part of this project is finding the parts I want to buy. Mostly rings, and main bearings. Many places carry rod bearings only but I can't imagine tearing the engine out and down to do rod bearings without doing rings. And well I'm of the school of thought that if you're going this far you might as well check the mains too. Just a not to some of the suppliers out there.
Thread Starter
|
Senior Member
Joined: Jul 2009
Posts: 459
Likes: 0
From: Sebastian, FLA
If I could have anything I wanted for this project it would be a parts washer, Big time.
This is where the main bearing codes are (transmission end), lower left(stamped into the block) are the uppers, stamped into the crank are the lowers. I ordered 3 sets of main bearings.
1 ...FCP I got (5) red thrust bearings.. duh,
2.. Engine parts in atlanta. (where I bought my rings that by the way look perfect). After market, but was told by a few that the volvo grading was just way to make us come back to them for parts.. I guess plastigage will be the judge(I'm not looking forward to doing all of the bolts on the IM section just as a test)
3. Volvo.. the price was surprisingly good but they only sell in set of uppers and lowers of the same color.

Above photo is the oil return port of the PCV system. It was totally plugged.. in the block.

A nasty dirty piston..necessity is the mother of inovation.

Back woods mechanics solution to a parts washer. Don't laugh.. it worked. But do not go crazy on the heat.
Clean oil pan. I really thought about buying an new one.
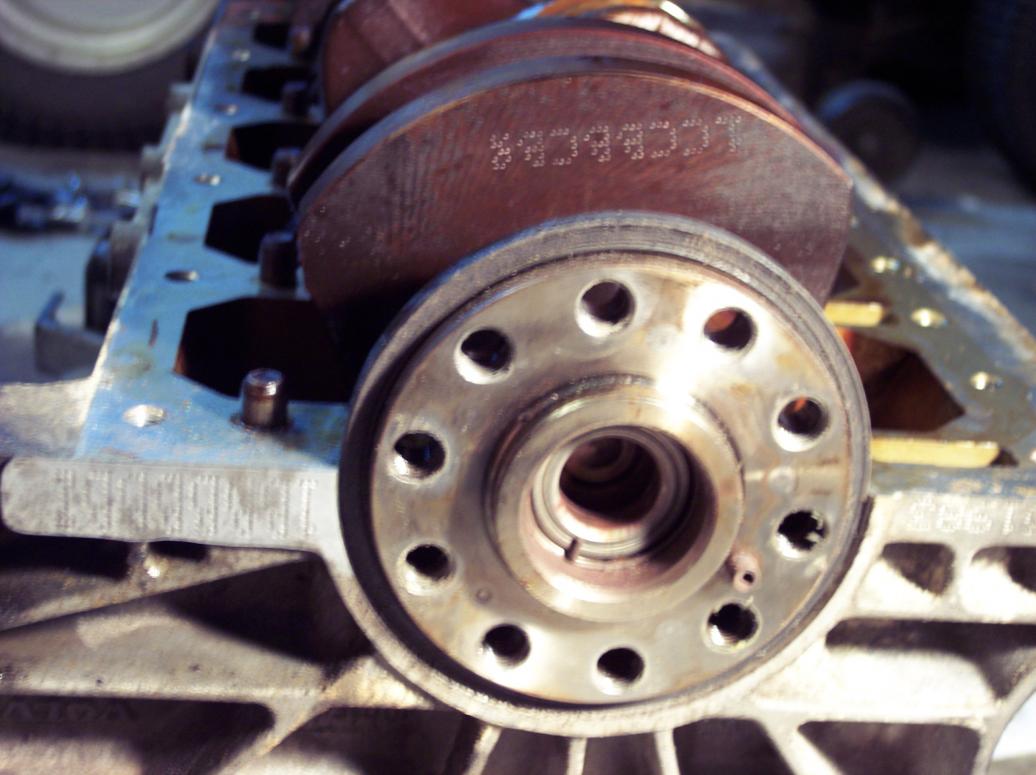
This is where the main bearing codes are (transmission end), lower left(stamped into the block) are the uppers, stamped into the crank are the lowers. I ordered 3 sets of main bearings.
1 ...FCP I got (5) red thrust bearings.. duh,
2.. Engine parts in atlanta. (where I bought my rings that by the way look perfect). After market, but was told by a few that the volvo grading was just way to make us come back to them for parts.. I guess plastigage will be the judge(I'm not looking forward to doing all of the bolts on the IM section just as a test)
3. Volvo.. the price was surprisingly good but they only sell in set of uppers and lowers of the same color.
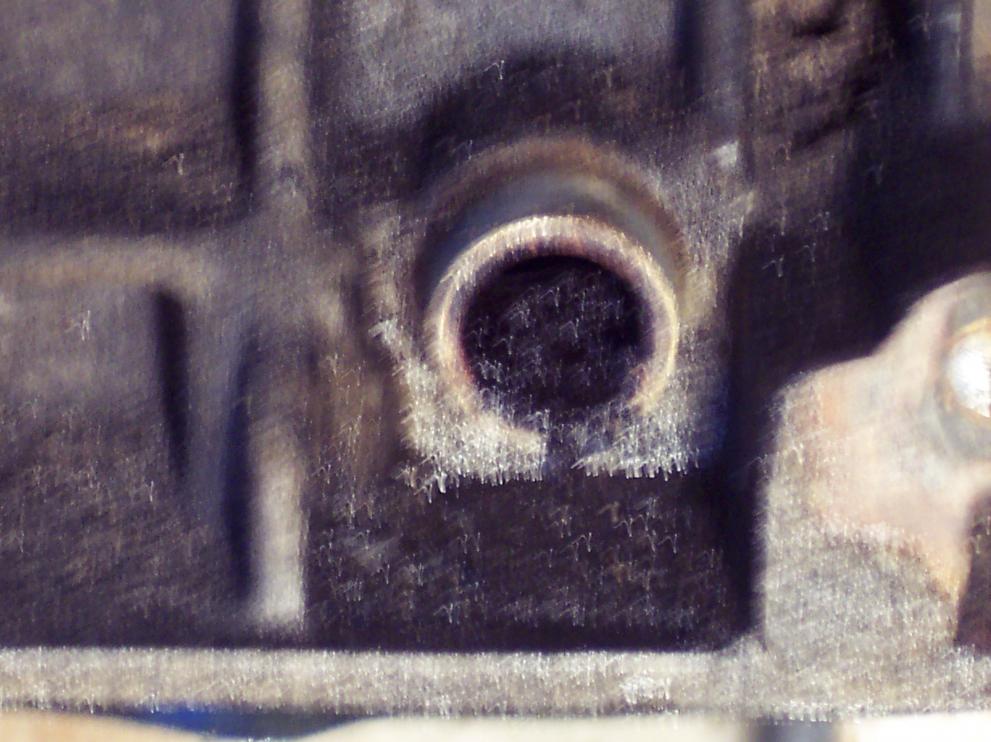
Above photo is the oil return port of the PCV system. It was totally plugged.. in the block.
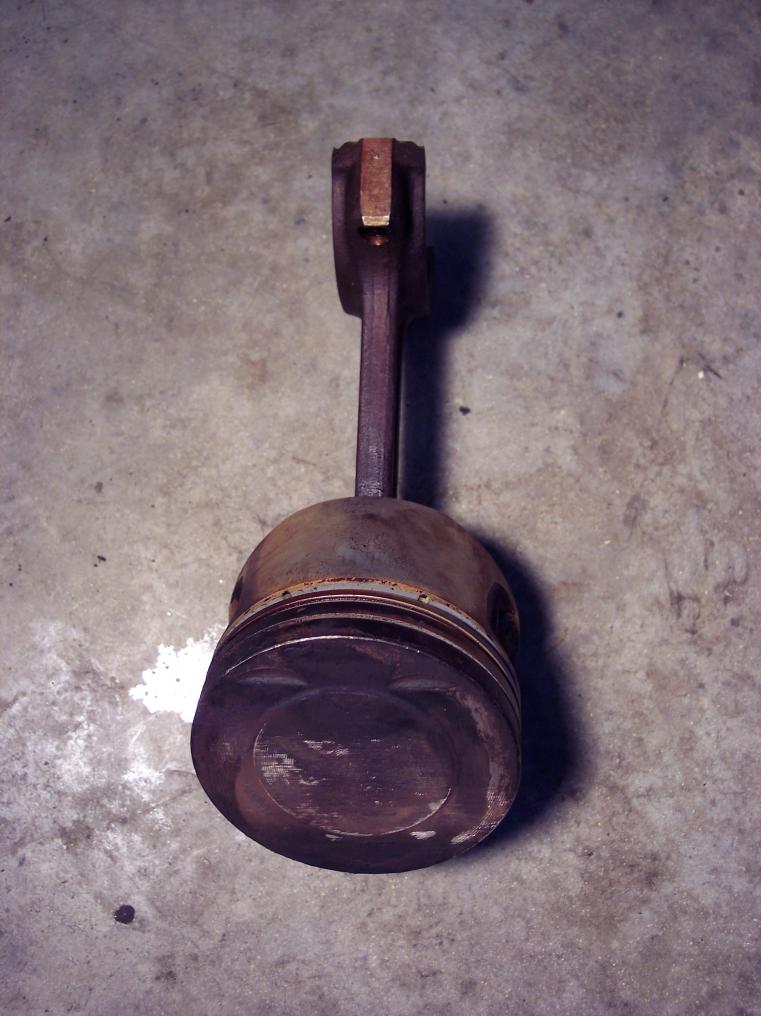
A nasty dirty piston..necessity is the mother of inovation.

Back woods mechanics solution to a parts washer. Don't laugh.. it worked. But do not go crazy on the heat.

Clean oil pan. I really thought about buying an new one.
Thread Starter
|
Senior Member
Joined: Jul 2009
Posts: 459
Likes: 0
From: Sebastian, FLA
Go for it Gilbert. We should all be working for preservation of the species.
You know.. When they're all done ..they will be gone. Screw this... "through them in the trash when the timing belt breaks", Buy a used "junkyard model" because it's cheaper. What about saving something we are all empassioned by?? When the only thing left are 300K engines WHO's going to buy??
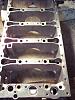
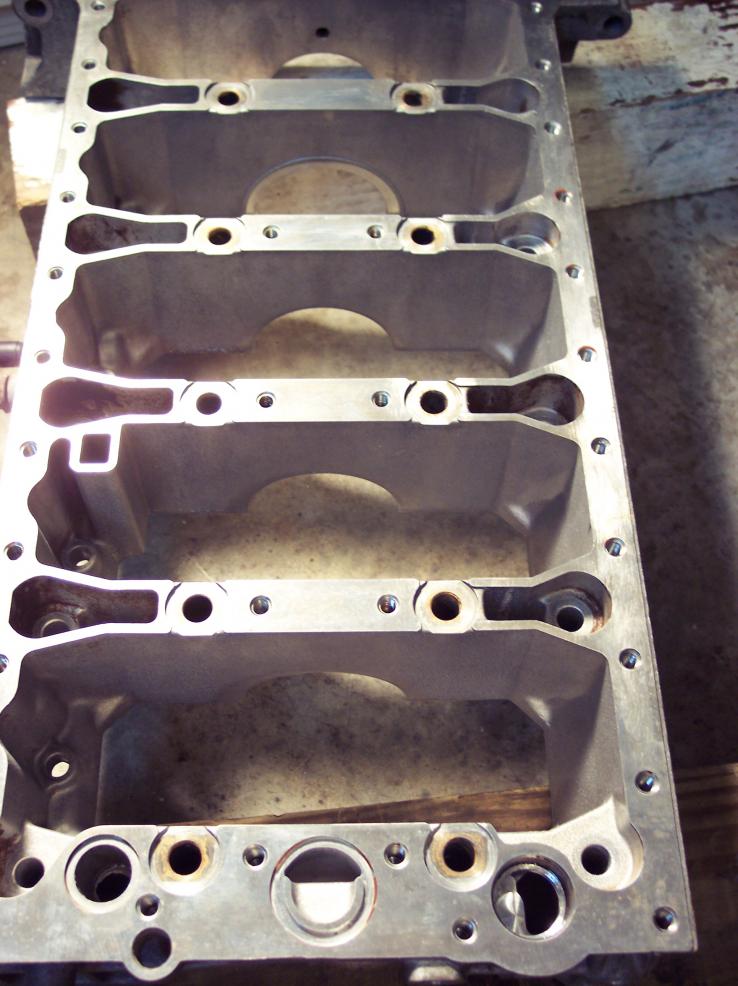
I hate it but I love it. The interface sufaces require real effort when you're rebuilding. Cleaning!! cleaning!! cleaning!!. The cast iron main bearing re-inforcements call right out with their oxidation (... okay ...rust, it shows up an hour after washing. cleaning, cleaning everything... You better be willing to clean, clean and clean, otherwise do not even start!!!!!!. I've cleaned for two solid days and I still feel like I have two more days of cleaning to go. The cylinders were honed yesterday and where cleaned once but they need to be cleaned with hot, soapy, water and a scrub brush more than a few more times. Cleaning, Cleaning, Cleaning ........... You Must be a clean freak!!!! The oil pan really really sucks, th IM section really sucks but It has to be clean. Almost spotless.
PLEASE... DO NOT expect pics of a freshly painted and shiny engine exterior because to me it's the insides that count. It will never be a show car but I'm hoping it will continue to be a Volvo. Besides Aluminum Oxide is the "BEST" protection for aluminum.

You know.. When they're all done ..they will be gone. Screw this... "through them in the trash when the timing belt breaks", Buy a used "junkyard model" because it's cheaper. What about saving something we are all empassioned by?? When the only thing left are 300K engines WHO's going to buy??
I hate it but I love it. The interface sufaces require real effort when you're rebuilding. Cleaning!! cleaning!! cleaning!!. The cast iron main bearing re-inforcements call right out with their oxidation (... okay ...rust, it shows up an hour after washing. cleaning, cleaning everything... You better be willing to clean, clean and clean, otherwise do not even start!!!!!!. I've cleaned for two solid days and I still feel like I have two more days of cleaning to go. The cylinders were honed yesterday and where cleaned once but they need to be cleaned with hot, soapy, water and a scrub brush more than a few more times. Cleaning, Cleaning, Cleaning ........... You Must be a clean freak!!!! The oil pan really really sucks, th IM section really sucks but It has to be clean. Almost spotless.
PLEASE... DO NOT expect pics of a freshly painted and shiny engine exterior because to me it's the insides that count. It will never be a show car but I'm hoping it will continue to be a Volvo. Besides Aluminum Oxide is the "BEST" protection for aluminum.

Senior Member
Joined: Aug 2007
Posts: 684
Likes: 2
From: Columbus, OH
Agreed... I HATE that machine shops paint Aluminum heads that fakey looking silver color... it traps in heat and looks stupid, as well as hiding any defects.
First engine I ever rebuilt was a 2.8L V-6 out of a Pontiac 6000, back in High School. Haven't done a full tear- down of a Volvo engine yet, but maybe some day. The real- world customer, who looks at their car as an appliance, often isn't willing to spend several thousand dollars to get their car back on the road... that is why people buy junkyard engines. But if I have a car that I love, and plan to hold on to for a while... yes, of course I'd do a rebuild.
First engine I ever rebuilt was a 2.8L V-6 out of a Pontiac 6000, back in High School. Haven't done a full tear- down of a Volvo engine yet, but maybe some day. The real- world customer, who looks at their car as an appliance, often isn't willing to spend several thousand dollars to get their car back on the road... that is why people buy junkyard engines. But if I have a car that I love, and plan to hold on to for a while... yes, of course I'd do a rebuild.
Senior Member
Joined: Apr 2008
Posts: 3,948
Likes: 3
From: Milwaukee, WI
I would love to, but I just can't fully justify pulling apart a motor with only 100k miles on it. Maybe further down the road I will pick up another motor with more miles and rebuild that one, when I'm done with my undergrad or something.
Senior Member
Joined: Apr 2008
Posts: 3,948
Likes: 3
From: Milwaukee, WI
And I agree, I almost feel good about myself knowing that I'm keeping this wagon running, instead of letting it go to the junkyard.