
MCC removal


Thread Starter
|
Senior Member
Joined: May 2009
Posts: 787
Likes: 0
From: wisconsin
it has been asked that some instruction be given to help with the removal of an mcc seeing as its not exactly the easyest thing to do.
begining steps:
1) remove radio - push in the two upright rectangular peices on the lower right and left of the radio, pull radio out and unplug. make sure you have the radio code before hand
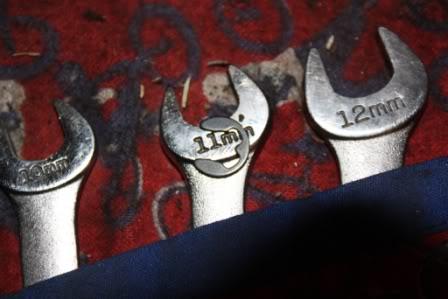
2) remove all three ***** on mcc - to help with removal a pliers of channel lock may help, dont crack the **** though.
3) remove the two screws holding the face plate on - there are two screws behind the driver and passenger heat control *****
4) remove the face plate - i usualy use a flat tip screw driver and give it a little pry here, and a little jimmy there untill it comes out
5) remove the four screws holding the mcc unit in place - these screws are located at the four corrners of the white unit
***beer break***
this is the part that it starts to get a little tricky. what needs to happen in the cables need to be moved from the mcc. this is easyer said then done, but hopfully my steps will help.
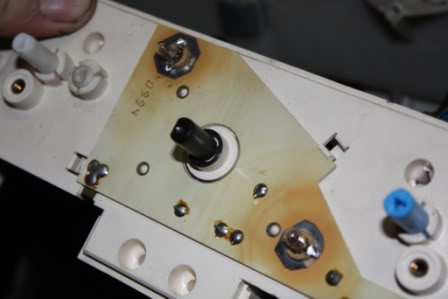
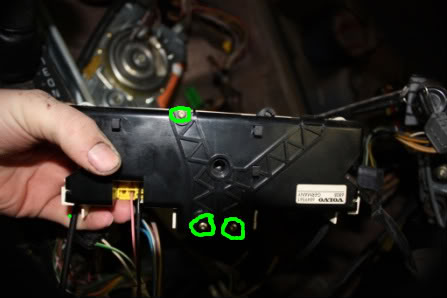
1)using a t10 torx remove the three screews holding the black cover onto the mcc. keep track of these screws, you may need them for spares
IMG_8766-1.jpg?t=1255458983
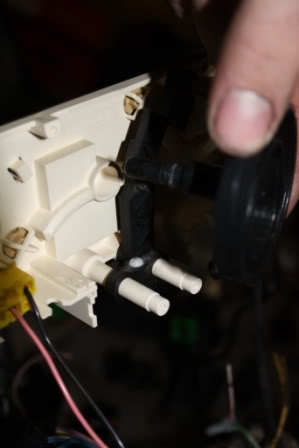
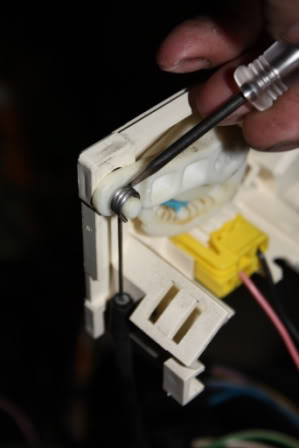
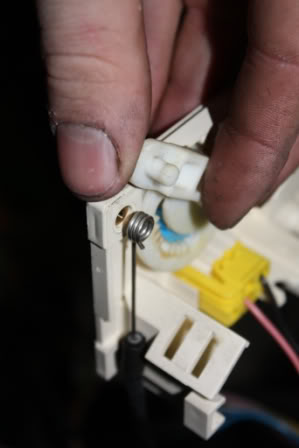
2)remove the retaining C clip from the front of the mcc (air flow ****)
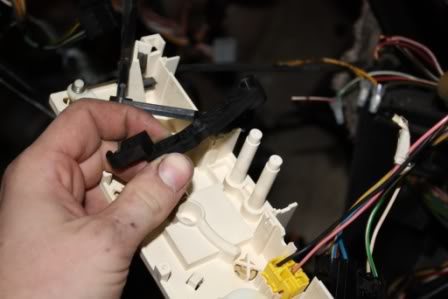
3)start to remove the control arms that are connected to the cables (walk through the pictures below)
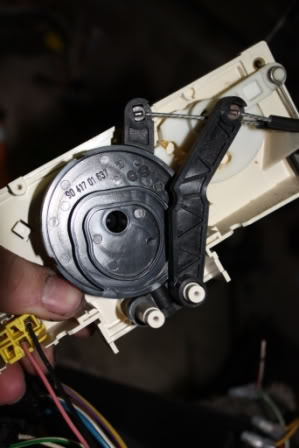

pull out center round cam ****
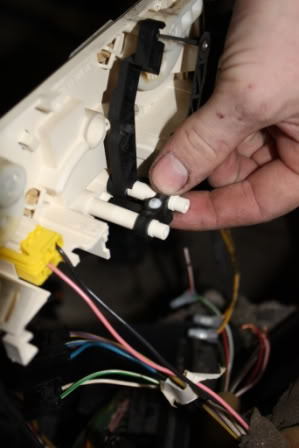
remove clicker ball
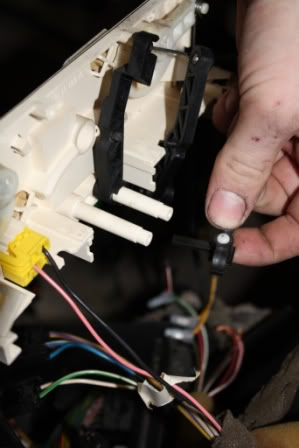
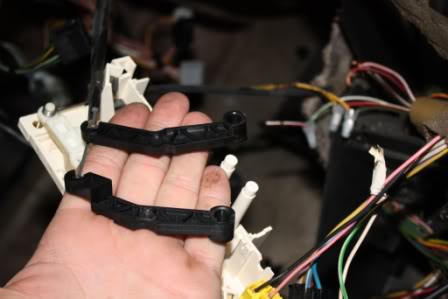
remove last black arm
***BEER BREAK!!!***
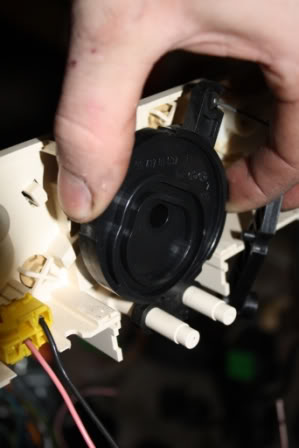
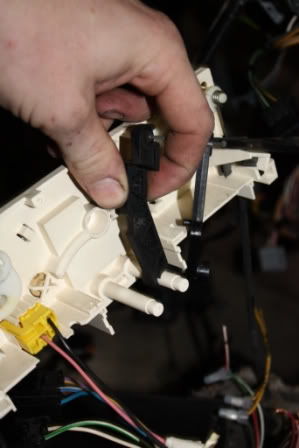
these are the clips that hold the cables onto the mcc. best thing i can say is try using a needle nose pliers or maybe a flat tip to realease them out of the mcc (or if you dont care just crack the mcc)
there are three on the driver side, and one on the passenger side
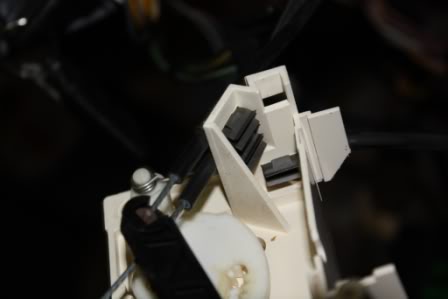
the two remaining cables are on the far driver side. and the far passenger side.
removal is quick and easy, both remove the same way, they are almost identical)
with that all done, assuming you have already removed the cable clips that are holding the cabels to the the mcc white plastic, you should be able to turn and twist out the mcc unit.
hope that helps, let me know if you need a larger picture, or more instructions.
begining steps:
1) remove radio - push in the two upright rectangular peices on the lower right and left of the radio, pull radio out and unplug. make sure you have the radio code before hand
2) remove all three ***** on mcc - to help with removal a pliers of channel lock may help, dont crack the **** though.
3) remove the two screws holding the face plate on - there are two screws behind the driver and passenger heat control *****
4) remove the face plate - i usualy use a flat tip screw driver and give it a little pry here, and a little jimmy there untill it comes out
5) remove the four screws holding the mcc unit in place - these screws are located at the four corrners of the white unit
***beer break***
this is the part that it starts to get a little tricky. what needs to happen in the cables need to be moved from the mcc. this is easyer said then done, but hopfully my steps will help.
1)using a t10 torx remove the three screews holding the black cover onto the mcc. keep track of these screws, you may need them for spares
IMG_8766-1.jpg?t=1255458983
2)remove the retaining C clip from the front of the mcc (air flow ****)
3)start to remove the control arms that are connected to the cables (walk through the pictures below)
pull out center round cam ****
remove clicker ball
remove last black arm
***BEER BREAK!!!***
these are the clips that hold the cables onto the mcc. best thing i can say is try using a needle nose pliers or maybe a flat tip to realease them out of the mcc (or if you dont care just crack the mcc)
there are three on the driver side, and one on the passenger side
the two remaining cables are on the far driver side. and the far passenger side.
removal is quick and easy, both remove the same way, they are almost identical)
with that all done, assuming you have already removed the cable clips that are holding the cabels to the the mcc white plastic, you should be able to turn and twist out the mcc unit.
hope that helps, let me know if you need a larger picture, or more instructions.


Administrator
Joined: Mar 2009
Posts: 15,736
Likes: 36
From: Albuquerque, NM
Ok, it appears that I have a ECC unit. So, I checked Matthew's site and found some instructions. However, I simply pulled the ***** off then jerked it out of the dash with 2 sets of pliers.
http://www.matthewsvolvosite.com/for...hp?f=1&t=19025
http://www.matthewsvolvosite.com/for...hp?f=1&t=19025
Administrator
Joined: Mar 2009
Posts: 15,736
Likes: 36
From: Albuquerque, NM
Unfortionately my wagon has an after market stereo in it and I have no idea how to get it out so the pliers was the simpliest thing I could think of.

Thread
Thread Starter
Forum
Replies
Last Post

