
Score!!


Thread Starter
|
Super Moderator
Joined: May 2009
Posts: 2,702
Likes: 1
From: Rocklin, Ca
Adding this to my thread...
Creating a Custom Pillar Pod
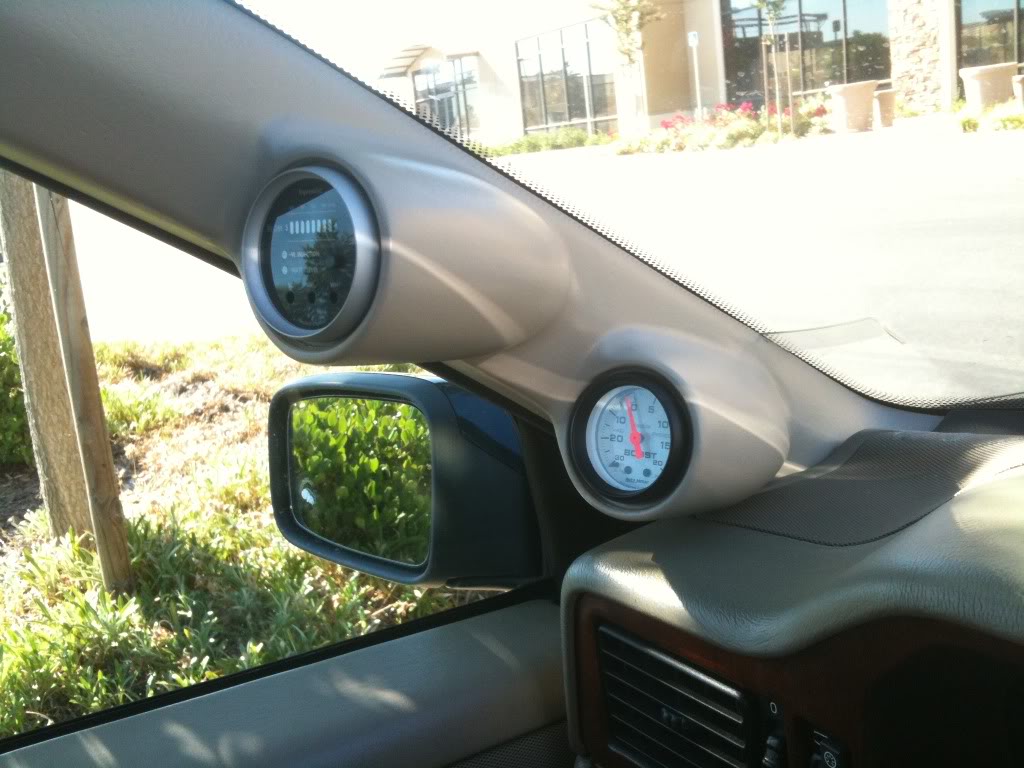
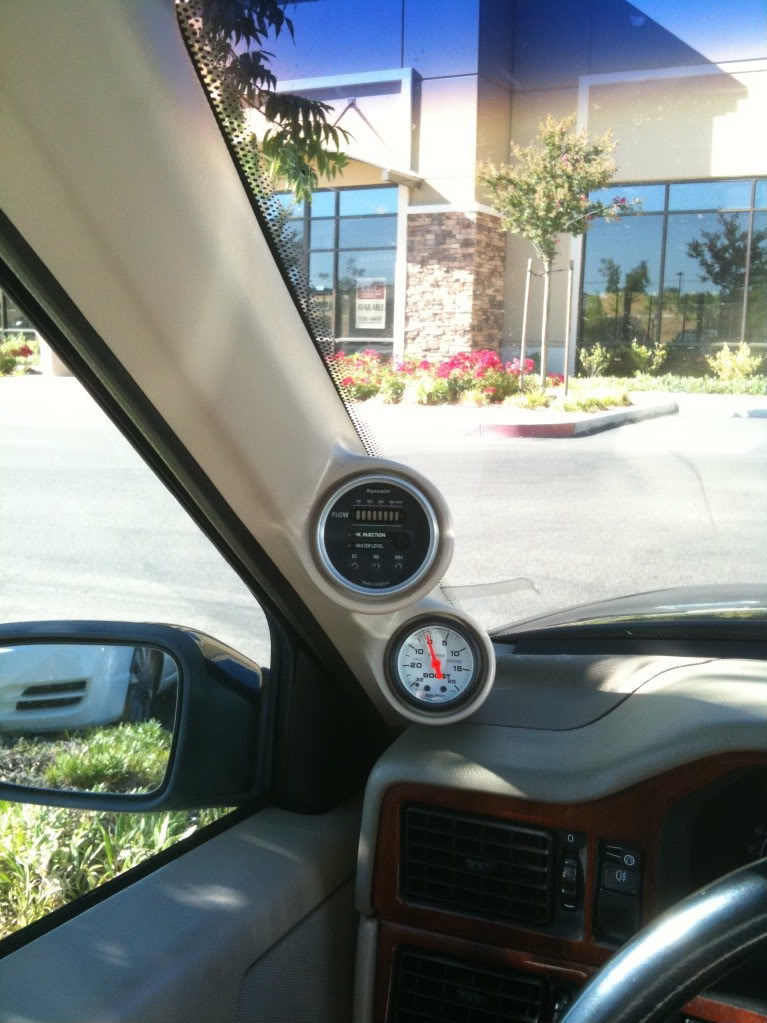
I have been hit up many times by forum users wondering how I created the boost gauge pod on my pillar. I have had to turn down several requests to make them for others. Recently there was a need to create another pod so I took this opportunity to document the process for those who want to do it.
I will list the items I used, your welcome to alter the list any way you want.
Materials:
Tomtom GPS window mount
Resin and Hardener
Bondo
Sand paper
T-shirt or grill cloth
Color matched paint
Primer (don’t use Krylon)
Misc part found around the home
Time
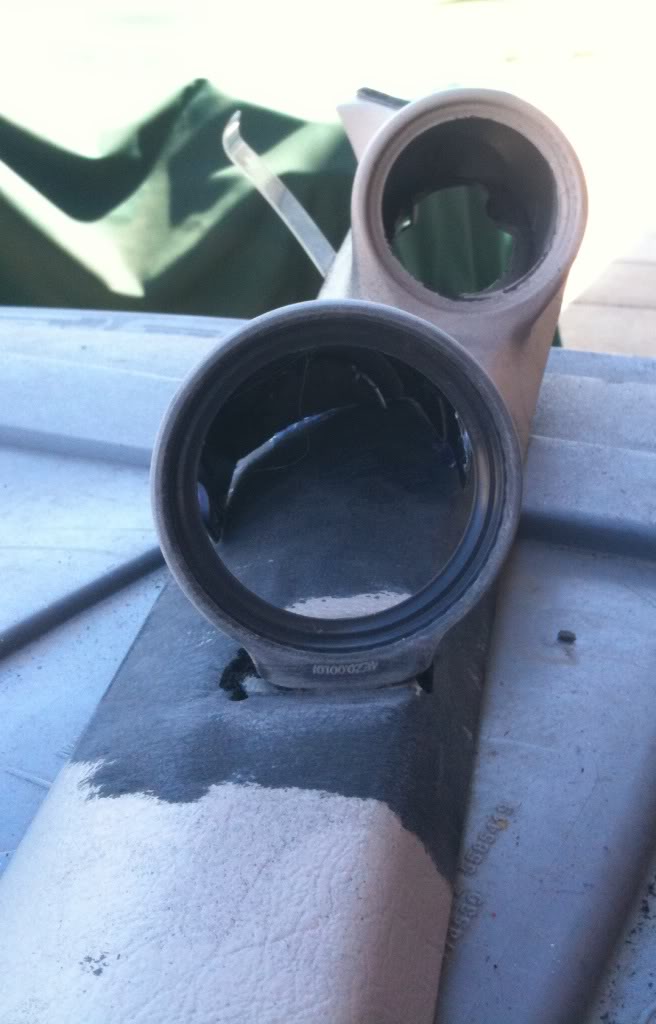
Here is a before picture:
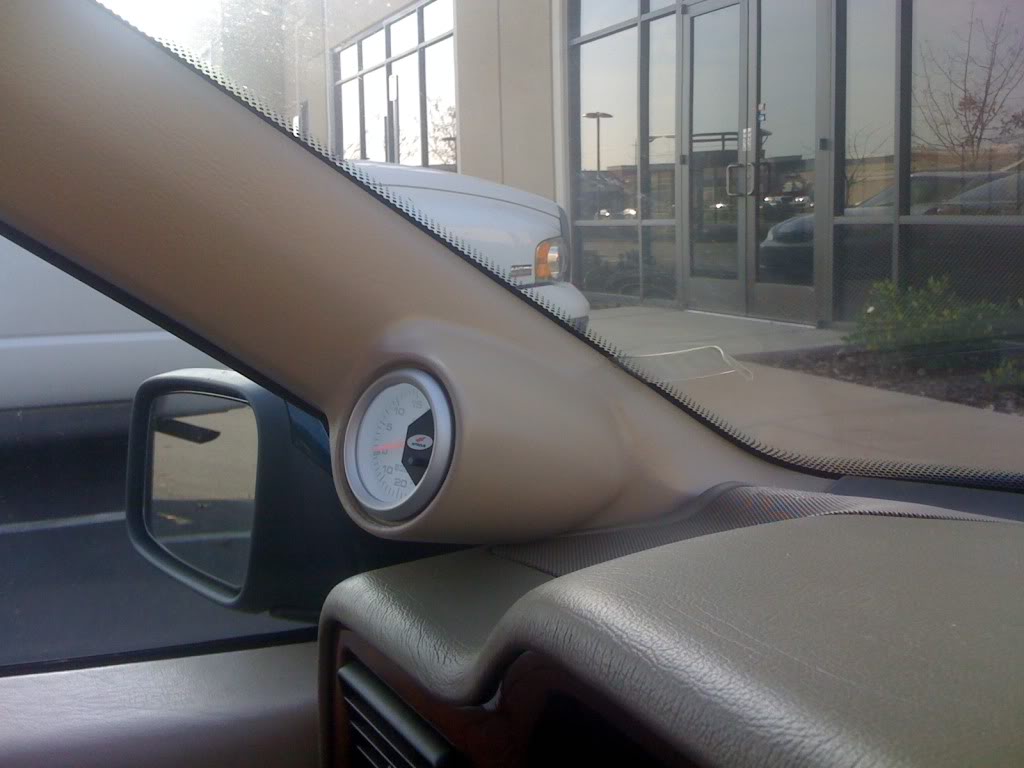
To start, I used a TomTom window mount because it’s a good size for the gauge and round. Plus it actually can mount to the pillar.
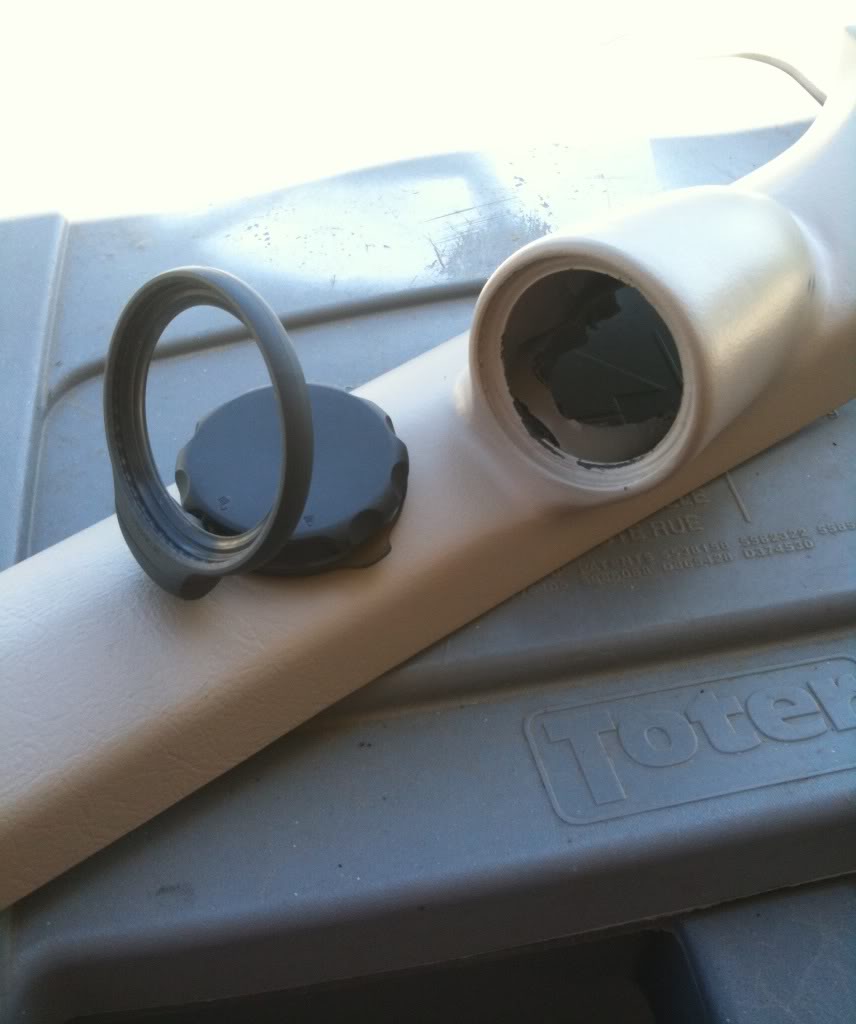
Next take the ring off the mount

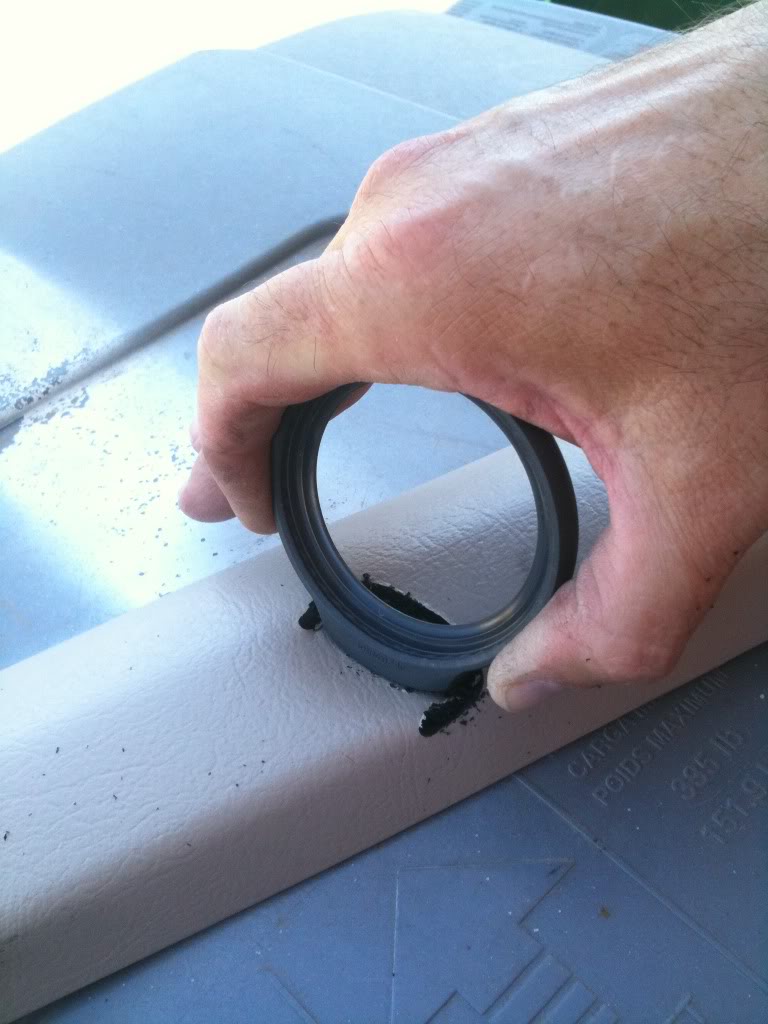
The ring is then mounted with its own screws to the pillar. Notice in the picture I ground around the mount point so I could move the plastic to get the ring in just the right place. I used a heat gun to do this
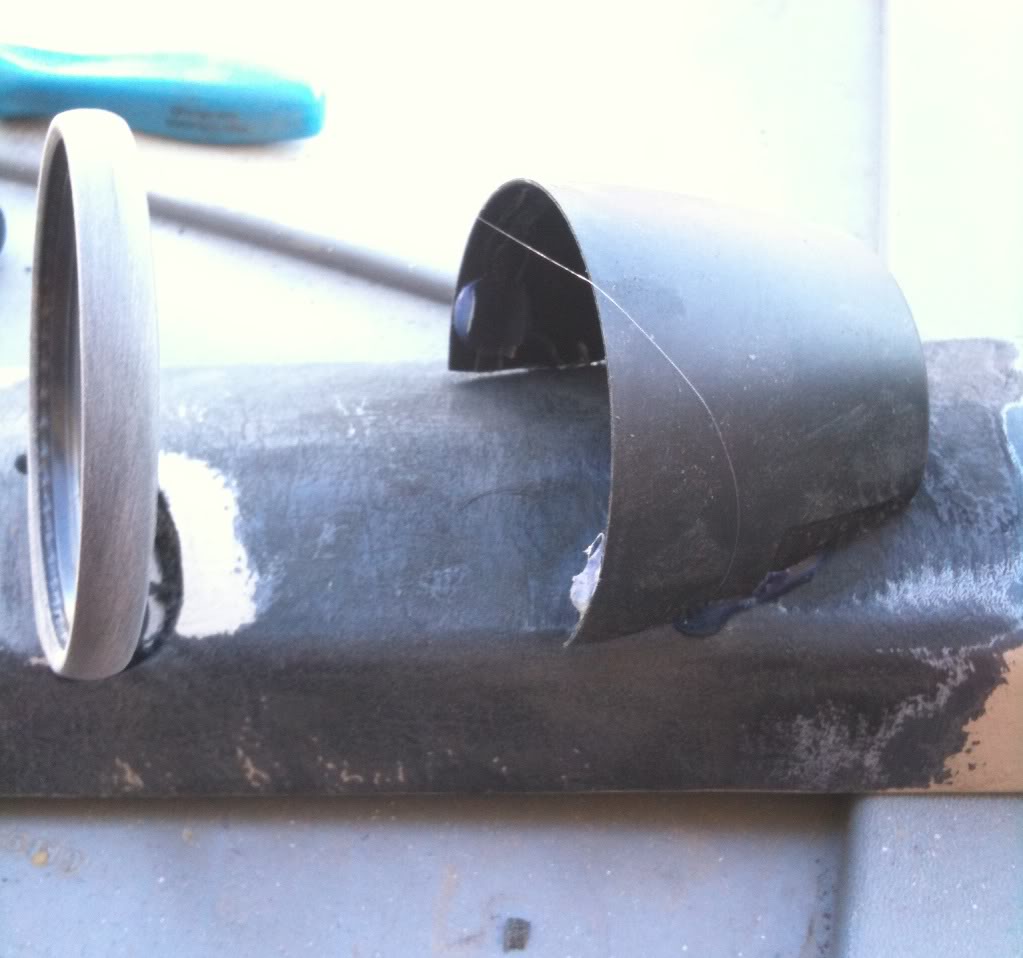
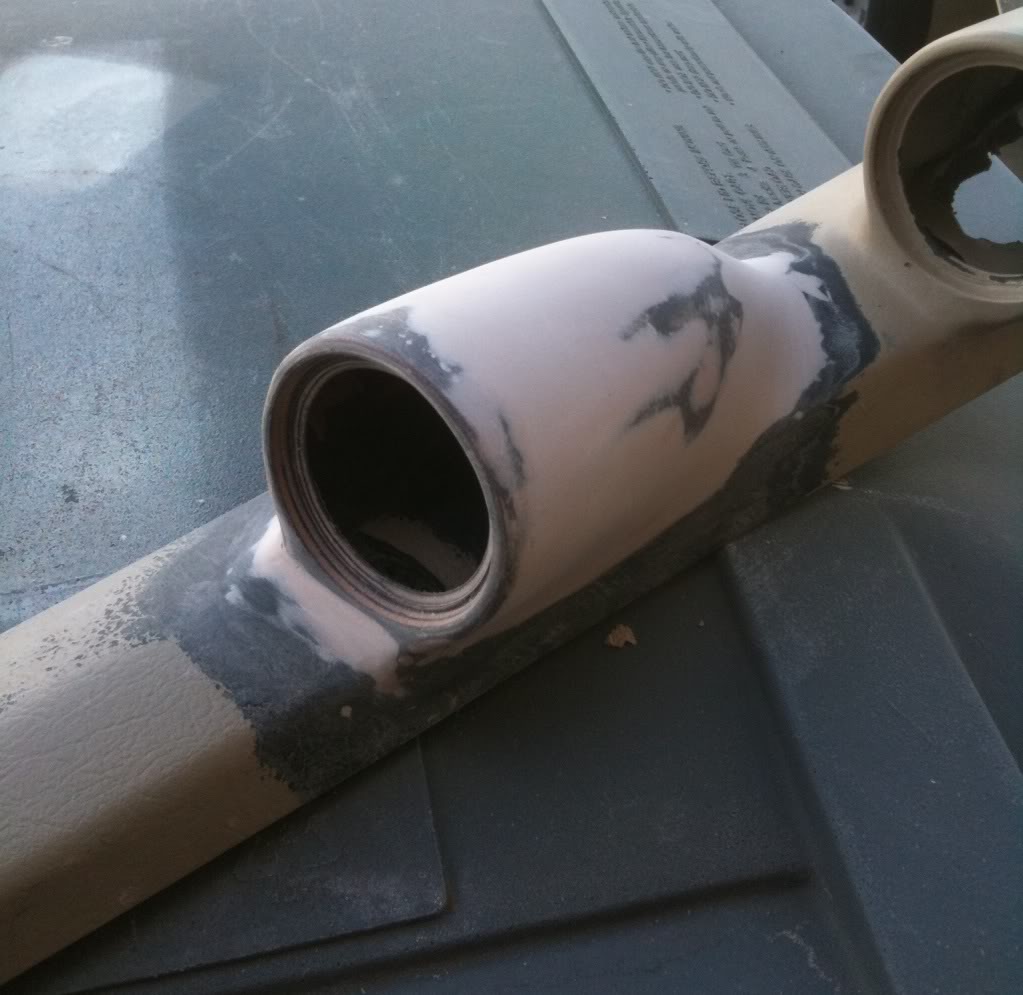
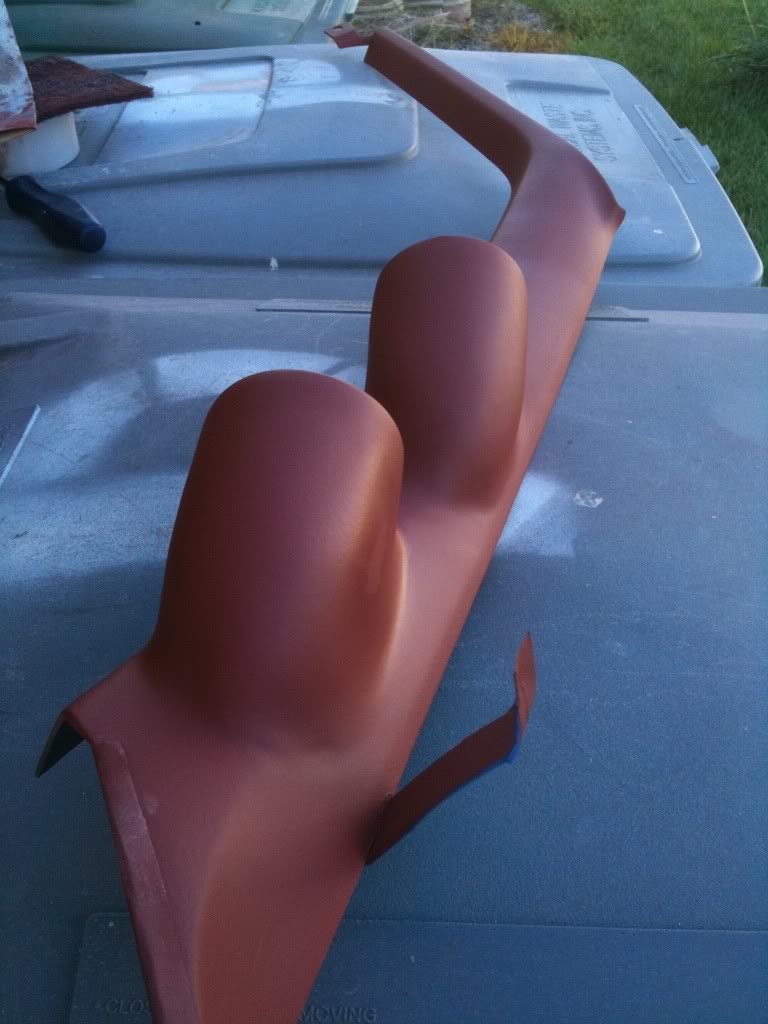
Then I ground away the paint and roughed up the surface for the resin to stick. But, continuing with the shape, I used a Krylon paint cap that is tapered and cut the bottom of it off so it sat on the pillar. This will be the final shape of the pod. Its held on with hot glue.
Next, stretch grill cloth or a cotton t shirt over the ring and cap until you get your shape. I used a zip tie and some wire to hold it in place.
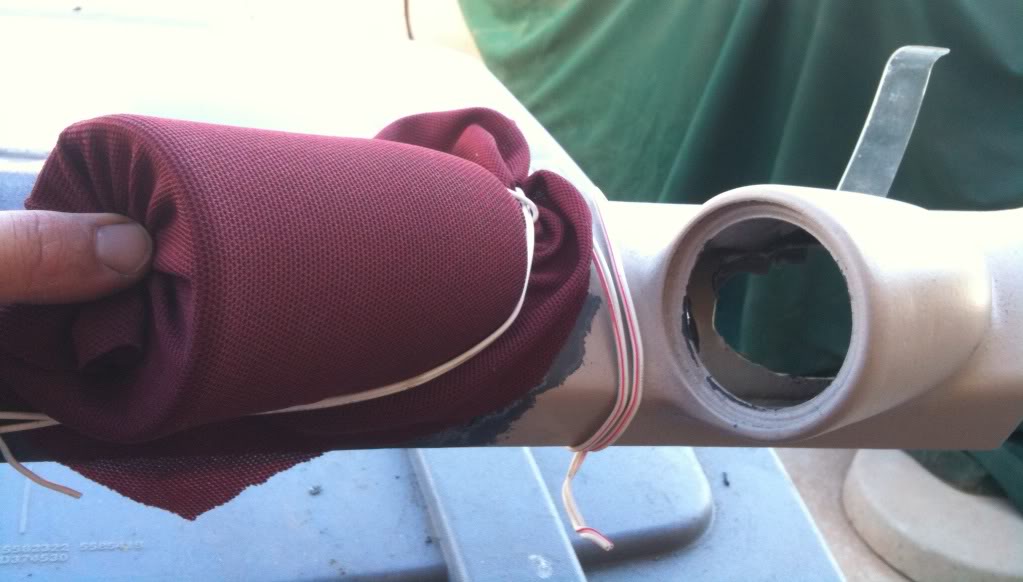
Then apply a coat of resin

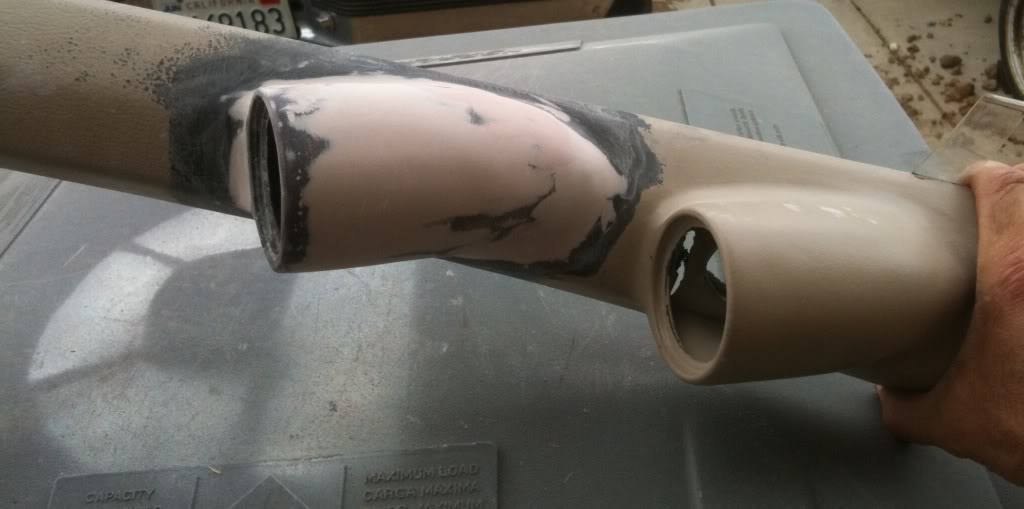
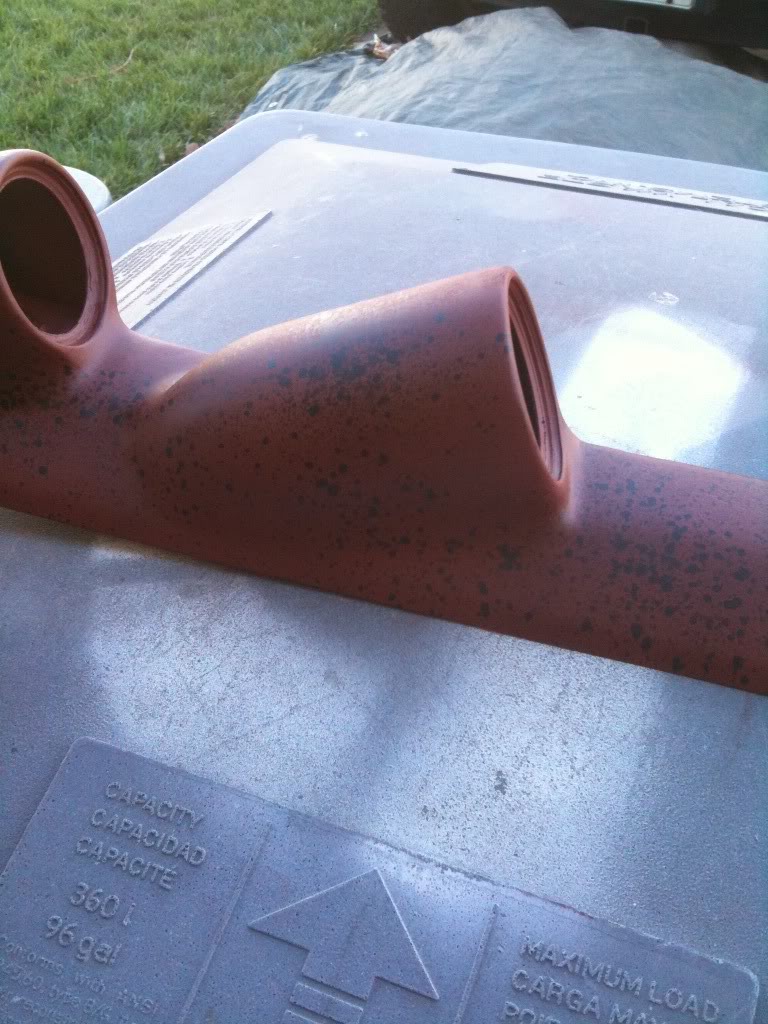
In my case I had some fiberglass matt and was able to continue on at this point applying another coat of fiberglass for strength. You can again use another coat of grill cloth for this. . The next picture is after it has dried and a rough sanding
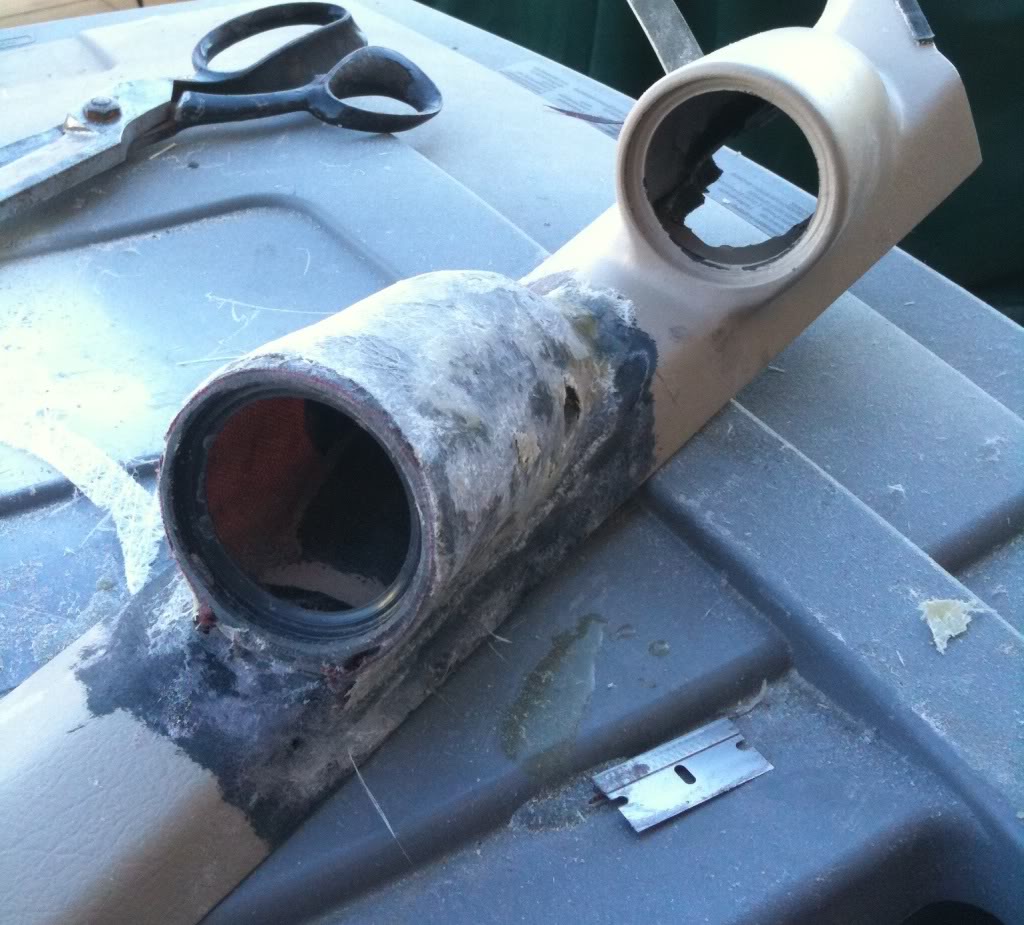
After the sanding, begin to add bondo to smooth out the surface and work your final shape.
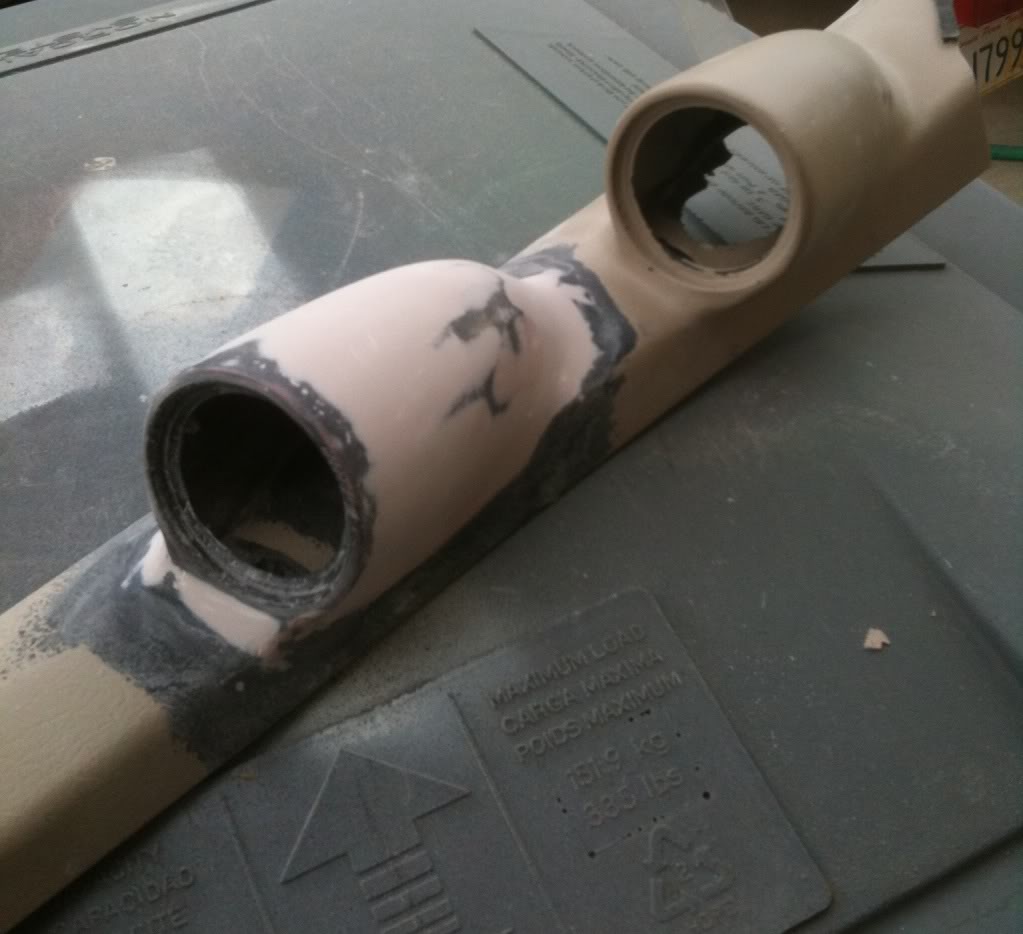
Now add primer to get all those imperfections out.
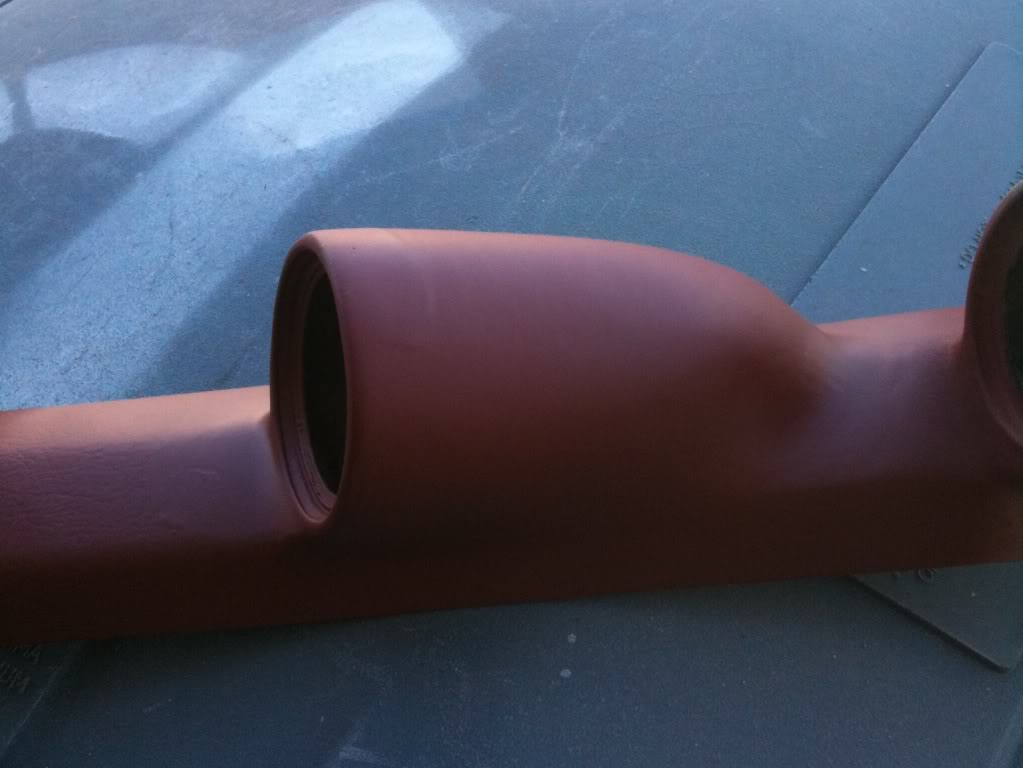
More sanding
After sanding the entire pillar it was ready for priming
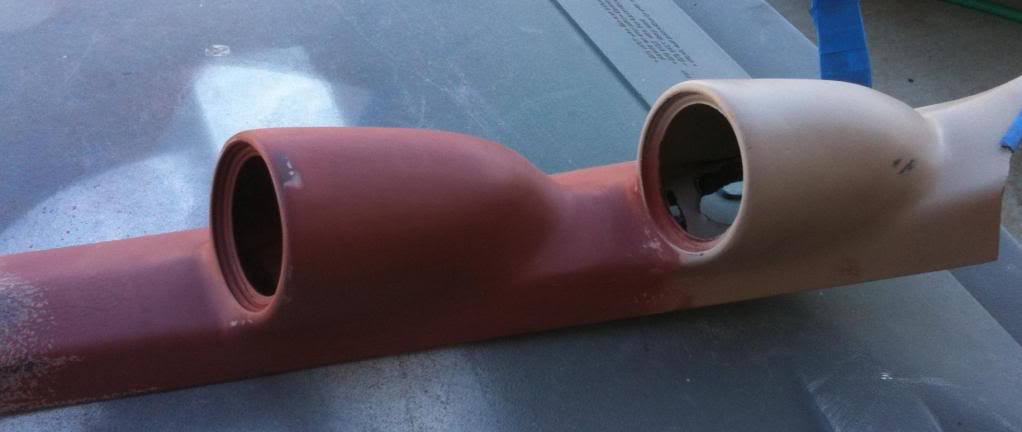
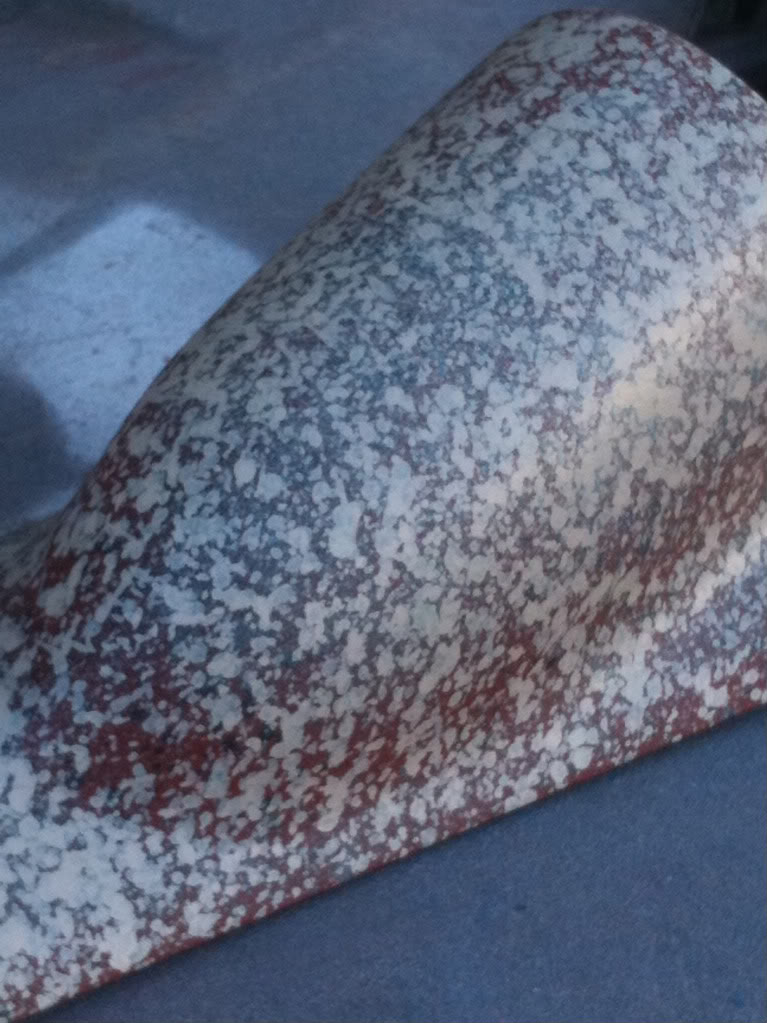
Here comes a very delicate time consuming process. Getting the texture back on the pod. Doing this takes some tricky feathering of the paint can. You want to paint your pod with the spray can spitting. You barely hold it down so it spits out paint in blobs not a mist. Here are a couple pictures of the process. Do this over and over and over and over to get your texture. Let it dry between spittings.
When your done, let it dry then paint your final color, install and enjoy….
If you have any questions feel free to ask.
Boxpin (John)
Creating a Custom Pillar Pod
I have been hit up many times by forum users wondering how I created the boost gauge pod on my pillar. I have had to turn down several requests to make them for others. Recently there was a need to create another pod so I took this opportunity to document the process for those who want to do it.
I will list the items I used, your welcome to alter the list any way you want.
Materials:
Tomtom GPS window mount
Resin and Hardener
Bondo
Sand paper
T-shirt or grill cloth
Color matched paint
Primer (don’t use Krylon)
Misc part found around the home
Time
Here is a before picture:
To start, I used a TomTom window mount because it’s a good size for the gauge and round. Plus it actually can mount to the pillar.
Next take the ring off the mount
The ring is then mounted with its own screws to the pillar. Notice in the picture I ground around the mount point so I could move the plastic to get the ring in just the right place. I used a heat gun to do this
Then I ground away the paint and roughed up the surface for the resin to stick. But, continuing with the shape, I used a Krylon paint cap that is tapered and cut the bottom of it off so it sat on the pillar. This will be the final shape of the pod. Its held on with hot glue.
Next, stretch grill cloth or a cotton t shirt over the ring and cap until you get your shape. I used a zip tie and some wire to hold it in place.
Then apply a coat of resin
In my case I had some fiberglass matt and was able to continue on at this point applying another coat of fiberglass for strength. You can again use another coat of grill cloth for this. . The next picture is after it has dried and a rough sanding
After the sanding, begin to add bondo to smooth out the surface and work your final shape.
Now add primer to get all those imperfections out.
More sanding
After sanding the entire pillar it was ready for priming
Here comes a very delicate time consuming process. Getting the texture back on the pod. Doing this takes some tricky feathering of the paint can. You want to paint your pod with the spray can spitting. You barely hold it down so it spits out paint in blobs not a mist. Here are a couple pictures of the process. Do this over and over and over and over to get your texture. Let it dry between spittings.
When your done, let it dry then paint your final color, install and enjoy….
If you have any questions feel free to ask.
Boxpin (John)


Senior Member
Joined: Nov 2009
Posts: 216
Likes: 0
From: SE Conn
Very nice,
Quick question though about the "RIP kit"
didn't Volvo recall the stock rip set up on the early turbo 850's? do you have any trouble with increased oil consumption or anything that others may claim to be a problem running it?
Quick question though about the "RIP kit"
didn't Volvo recall the stock rip set up on the early turbo 850's? do you have any trouble with increased oil consumption or anything that others may claim to be a problem running it?
Thread Starter
|
Super Moderator
Joined: May 2009
Posts: 2,702
Likes: 1
From: Rocklin, Ca
I dont know the reason for the recall but yes you are right, they used to have the routing this way. Some cars that missed the recall are still like this but are very rare.
I can only speculate why the recall happened. Here is my best guess.
The PCV system injects small amounts of oil into the intake system. That oil makes its way through the entire path into the engine. Its pretty free flowing until it gets to the intercooler. When it hits the intercooler it has to pass through small channels and will tend to collect. I would think with time it would cause a blockage. So Volvo recalls the setup and changes the path way so the air from the Turbo enters the intercooler from the bottom to allow that oil to drip off the channels into the bottom of the intercooler. If you look at the bottom of your intercooler there is a small pin hole about 3/4 to the passenger side, this lets oil escape. Thats my two cents on the subject.
Aside from that, with a RIP kit you take 14" of air travel out of the system and provide larger diameter lines for flow. Plus, it looks cool.
Senior Member
Joined: Nov 2009
Posts: 216
Likes: 0
From: SE Conn
Thanks for taking the time to respond, and not just freak out and say i'm off topic =)
I just wonder what the effects are of running the RIP. I can only assume that it spolls faster with out the extra 14" or so of pipe, and that it gets a little cooler... plus. Im sure if any of us take our charge pipes off we will see some small amount oil getting past the IC w/ or w/o the little drain hole...
but like you said. we are just speculating that this was the reason. Plus didnt the newer turbos go back to the up and over style routing???
(im trying to convice my self not to drop the cash on the RIP Kit, but i'm losing so far)
Senior Member
Joined: Nov 2009
Posts: 216
Likes: 0
From: SE Conn
Now i really hope i get a house with a garage... that way the car never sees the snow =)
Thread Starter
|
Super Moderator
Joined: May 2009
Posts: 2,702
Likes: 1
From: Rocklin, Ca
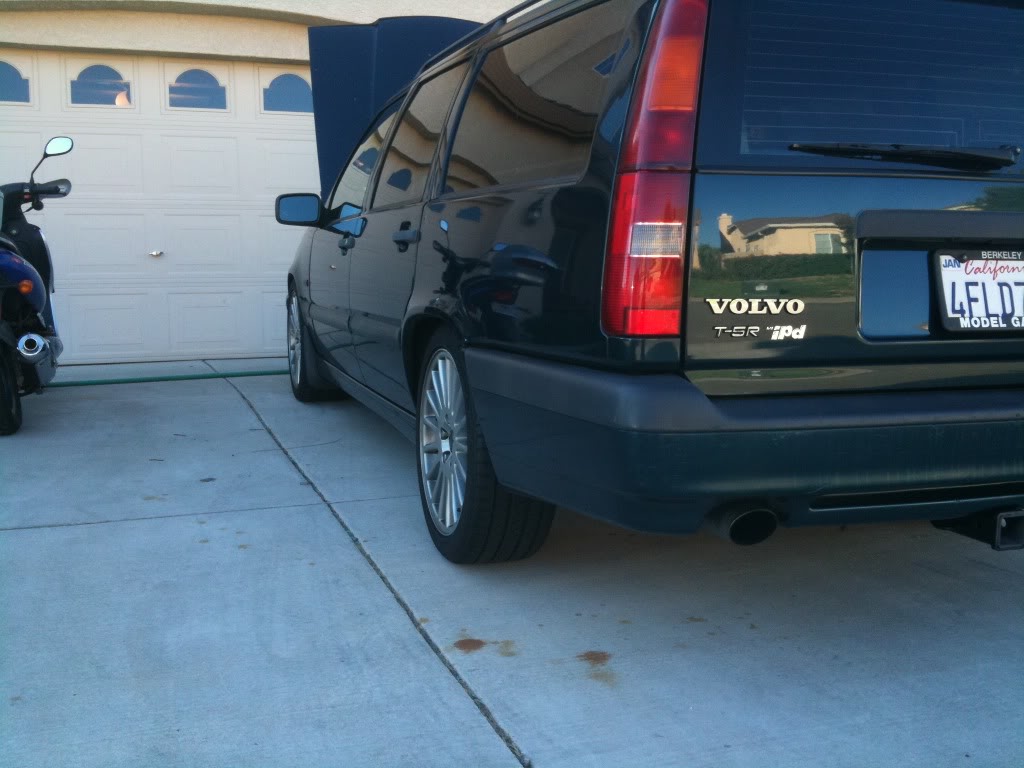
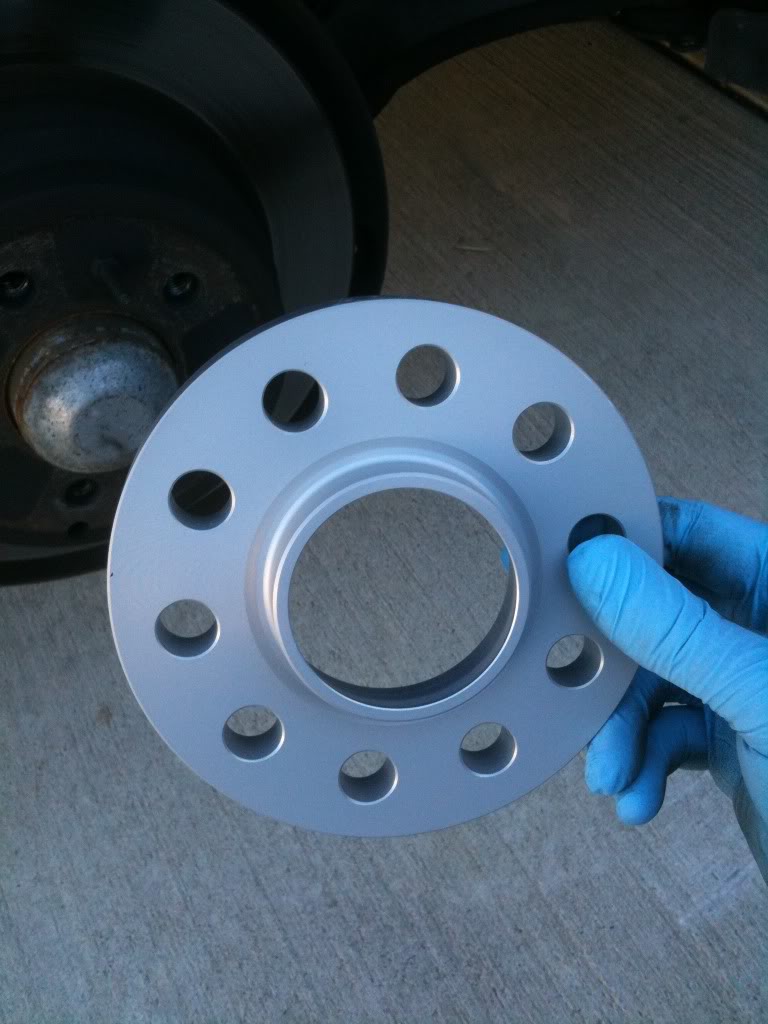
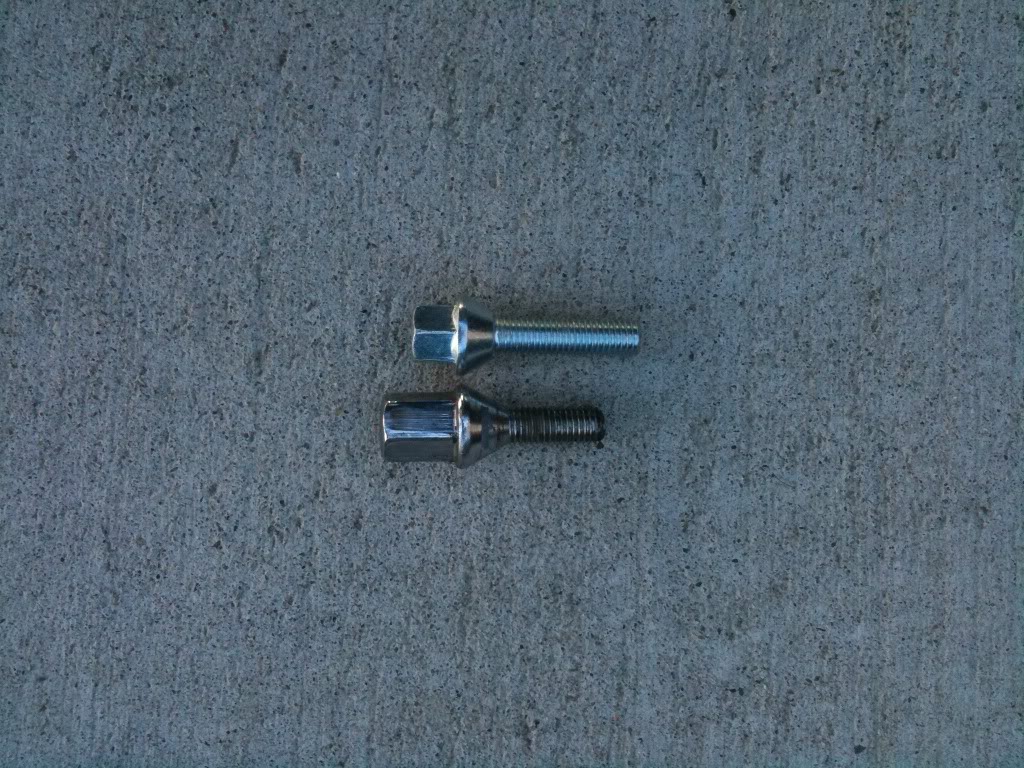
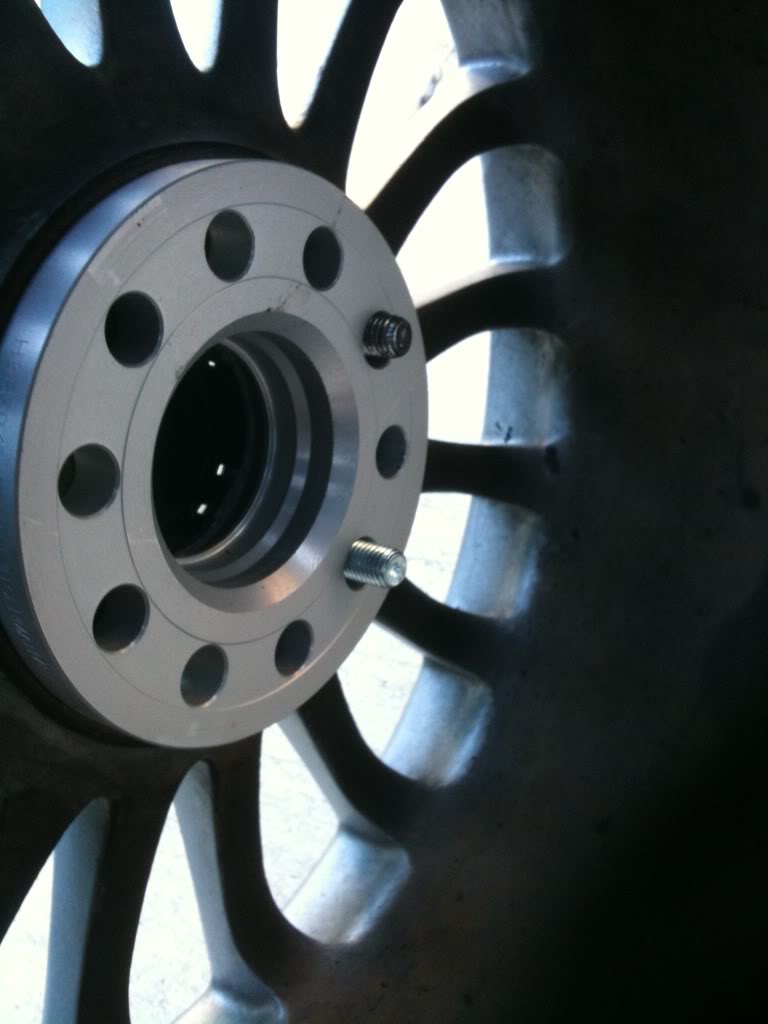
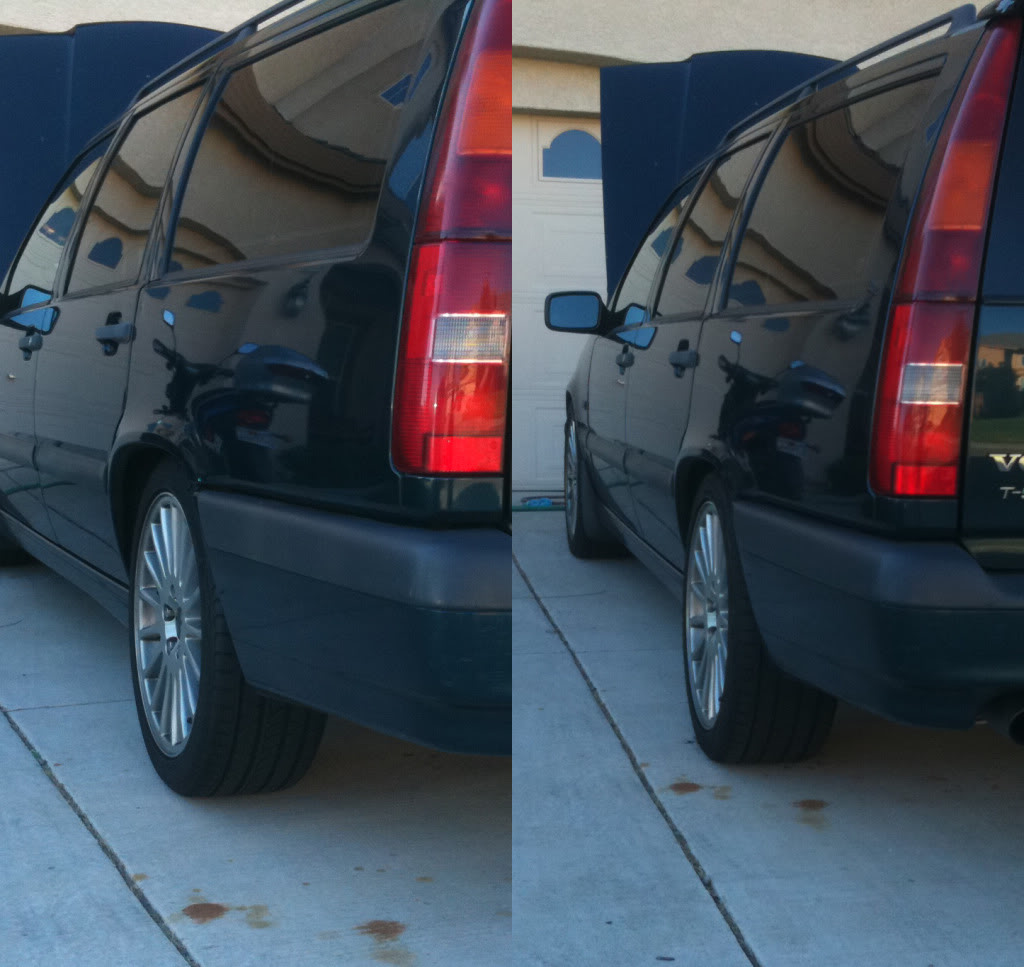
While trying to decide what spacers to get for the rear I found it very difficult to get a good picture of what it would look like before and after. I purchased 15mm H&Rs from IPD and thought I would post some pictures to help those deciding on this step.
Before Pictures:

The spacers:

Lug comparison:
Fitting the spacers (removing rust and dirt buildup):


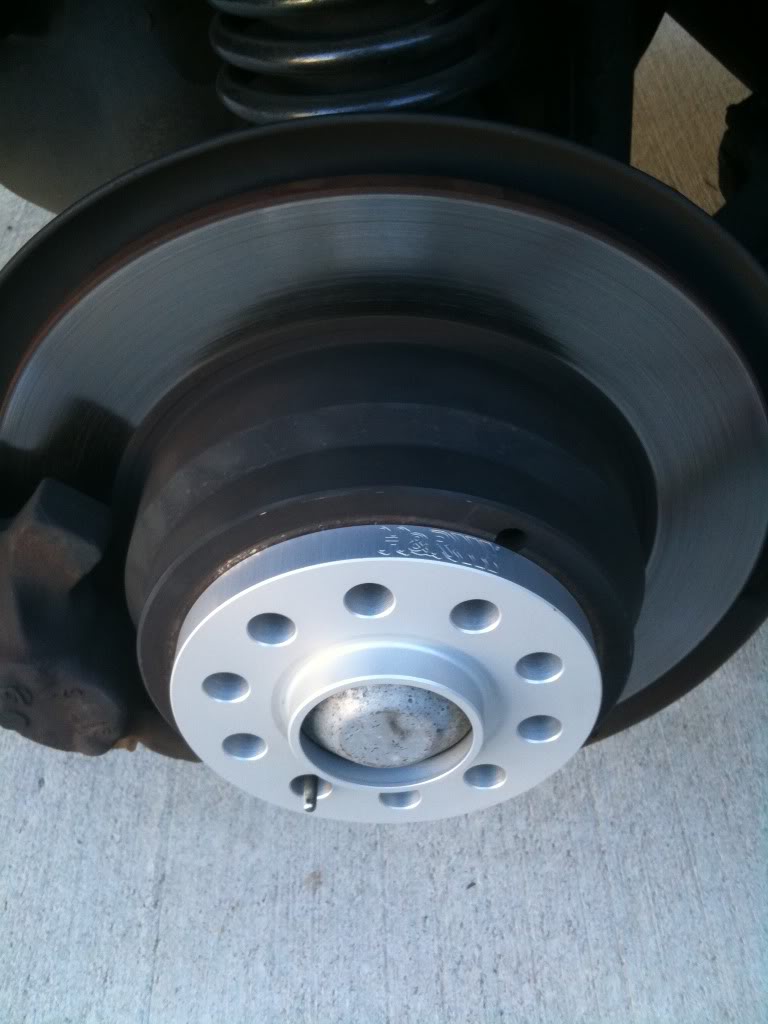
Finished:
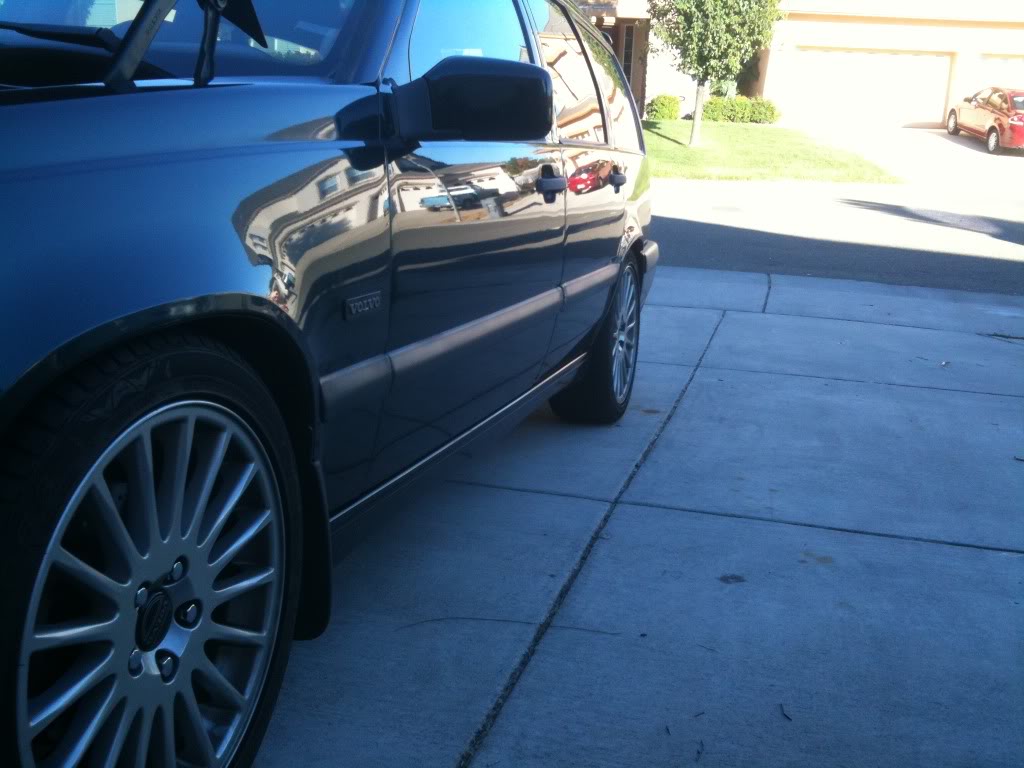
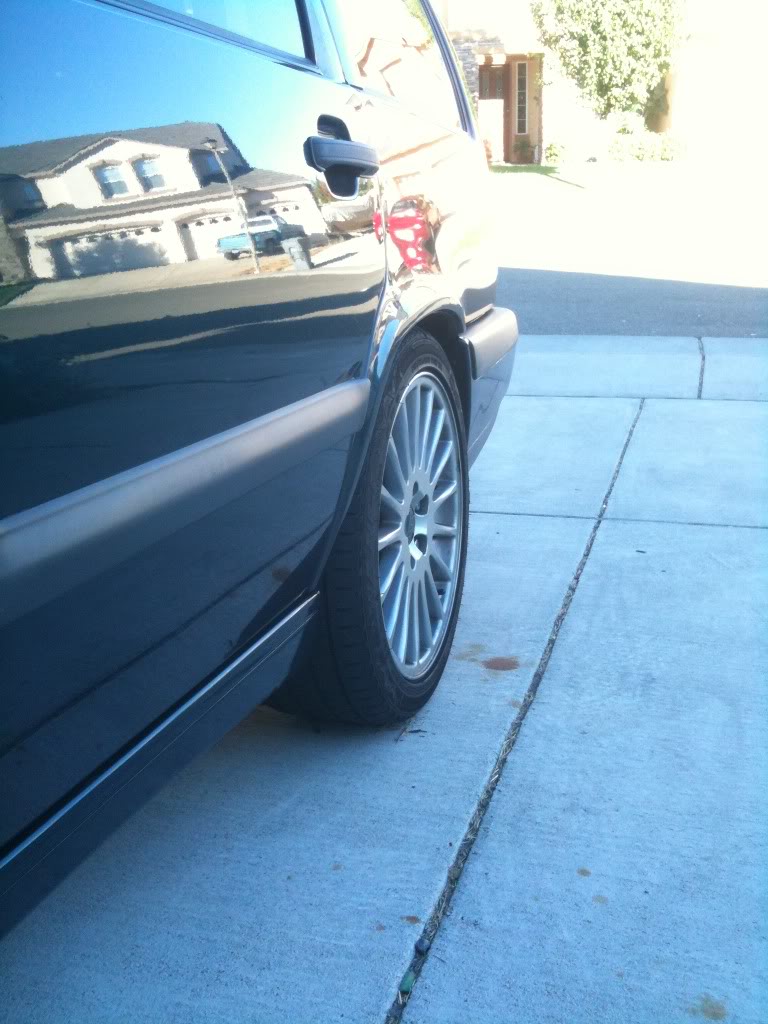

Before and After:
Before Pictures:
The spacers:
Lug comparison:
Fitting the spacers (removing rust and dirt buildup):
Finished:
Before and After:
Last edited by boxpin; Sep 17, 2010 at 08:56 AM.