SC 901 lens cleaning guide (with pics) to cure cd loading error
#1
Having just purchased my 2005 C70 I was very impressed by the Dolby Pro Logic surround sound hifi using the radio but I found a problem with the 3 cd changer.
The 3 disc cartridge would load into the deck and then lots of whirls and clicks would follow but the disc would not load. The loading tray would then eject to change the disc before sliding back in. More clicks and whirls and the cycle would repeat with the tray sliding in and out but no cd’s would actually load.
The display would register a change of cd number but the track numbers would stay at “00” till the disc was rejected. To stop this continues cycle the eject button would need to be pressed and the cartridge was ejected. I tried a number of different cd’s both old and new but always with the same result.
I remembered that I had once purchased (at great cost) a early CDRW disc drive for the PC and that had started playing up and rejecting the discs for no apparent reason. The solution that I found was to clean the laser lens with some rubbing alchol. Of course that was fairly easy with a single PC drive but I figured it should be able to be done with the 901 head unit as long as I could find access to the lens.
Now this process is a lot easier if you are able to remove the radio from the car and sit indoors with it on the kitchen table. However by unplugging the radio you activate the anti theft setting and you will need the “radio code” to re activate it once you reconnect in the car.
Unfortunately my car did not come with the code (something I need to sort) so I need to try to clean the lens with the radio still connected to the cars 12 volt supply. This makes things a bit more tricky but still “do able”.
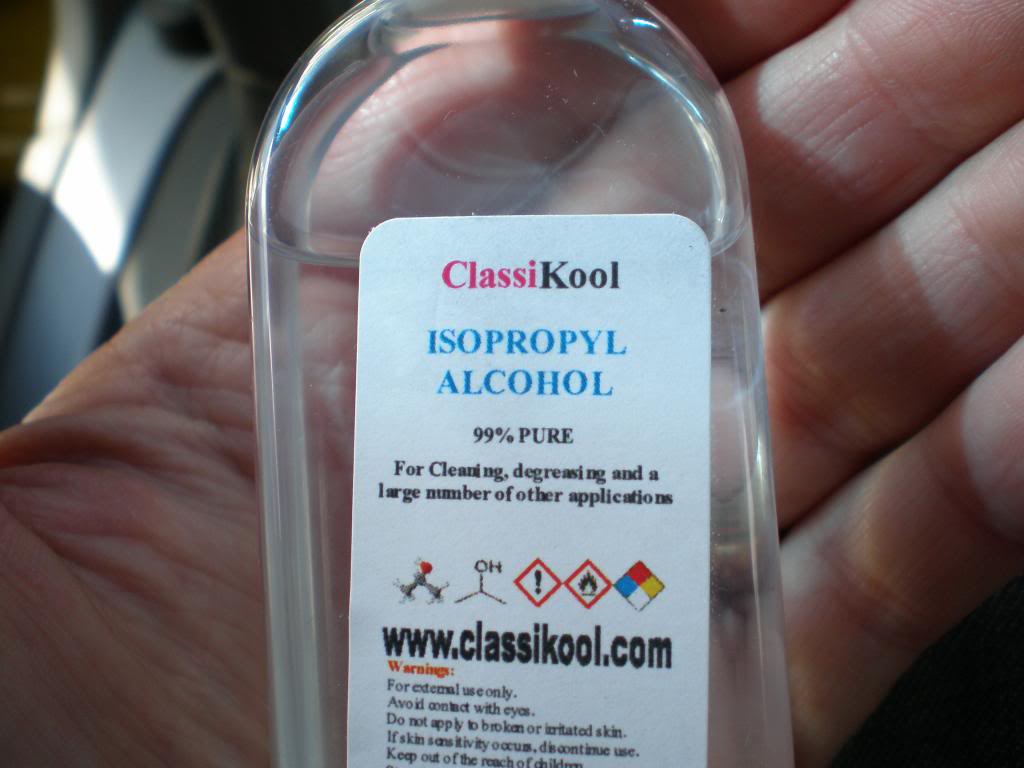
First thing you need to do is purchase a small bottle of ISOPROPYL ALCOHOL. I found plenty of sellers on EBay / Amazon and a small bottle will set you back around £2-3 here in the UK. You may also find that a small bottle will be provided in a cd cleaning kit that you can pick up at budget shops like Poundworld etc. Isopropyl is the best liquid to use as its normally 99% alcohol pure and evaporates quickly without leaving streaks etc.
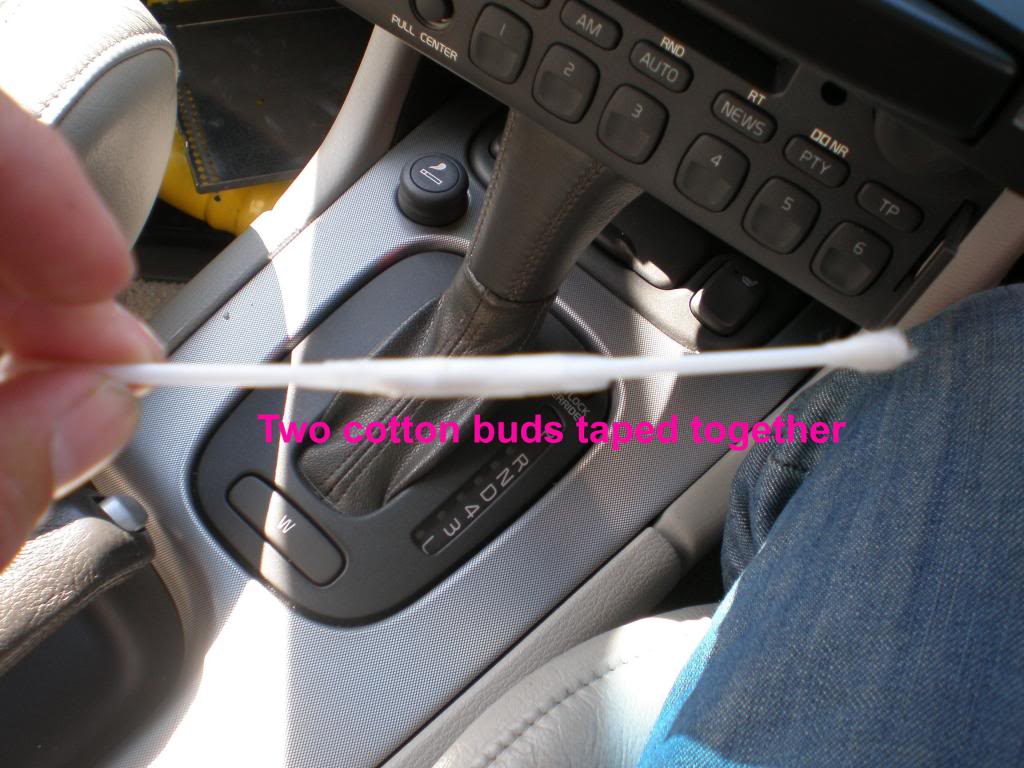
You will also need some basic tools such as a micro Phillips screwdriver as you will need to remove 2 small screws from the radio case lid. Also obtain 2 cotton buds and tape them together to make one long one.
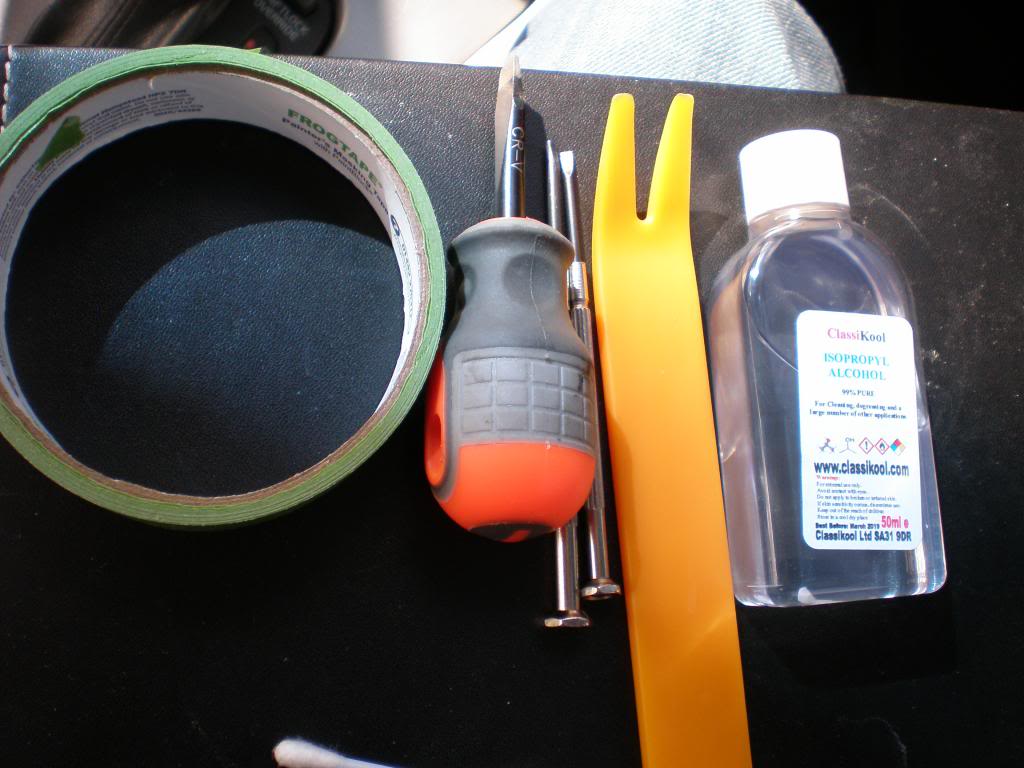
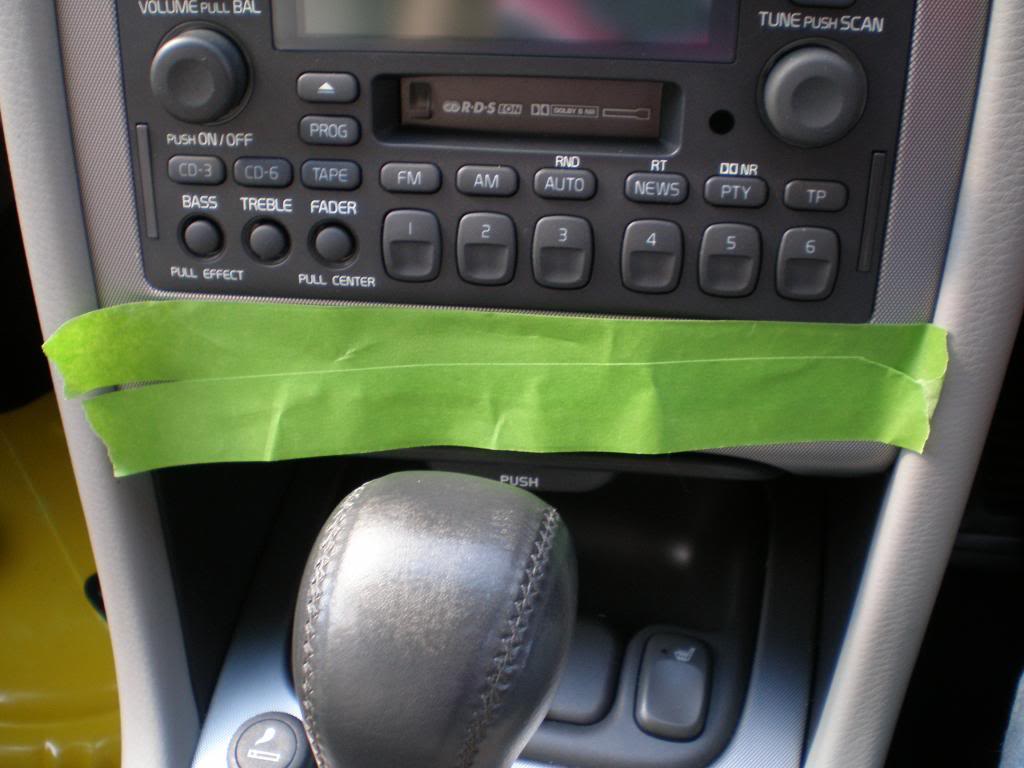
I would recommend you place some tape around the radio trim to protect it from scratching.
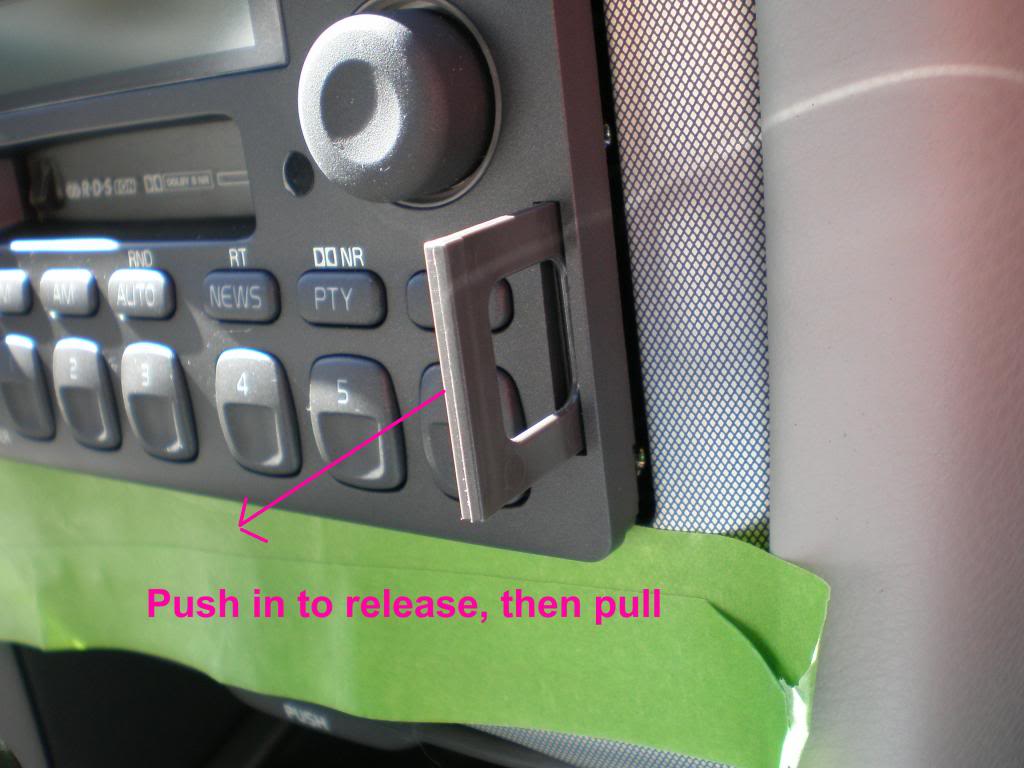
The radio unit is actually worryingly easy to remove. All you have to do is slightly depress the small handles till they spring out. Then you pull them outwards till they click and the radio is now unlocked.
Carefully slide the radio forward to allow access to the rear connections and screws.
You need to remove the 2 small screws in the top corners of the back panel. Working with the radio still connected I did find this a little tricky as they are quite tight and difficult to undo with small screwdrivers. It may help to get someone to hold the radio (balanced on the gear selector) and for you to apply extra leverage with a pair of long nose pliers on the shaft of the micro screwdriver. I was working alone so I managed to remove them with a small ratchet set and Phillips bit.
Once the screws are out the top plate is held firmly closed by 3 pressed clips in the side of the casing. There are 2 on the left side and one on the right. The front of the plate is hinged under the front plastic facia of the control panel so you need to lift the rear first.
Using a small flat blade micro screwdriver I was able to prise the top plate up enough to slide in a larger flat screwdriver between the case and lid and kind of twist to pop the case open. Once you have eased up the back simple lift up and un hook the front tabs.
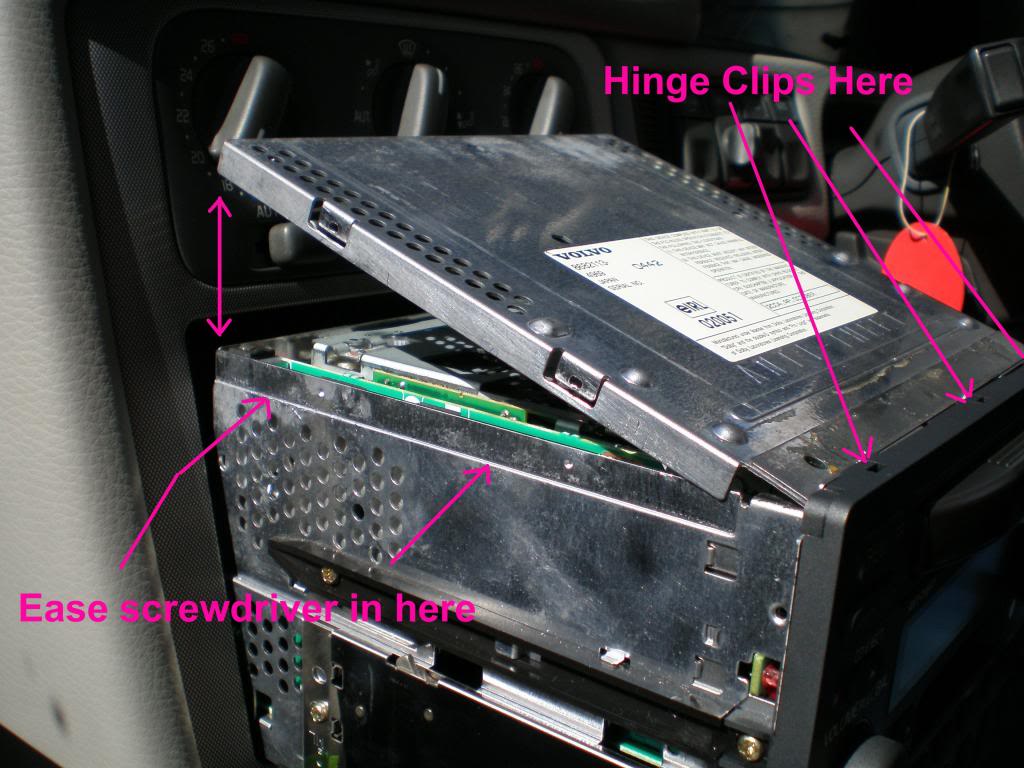
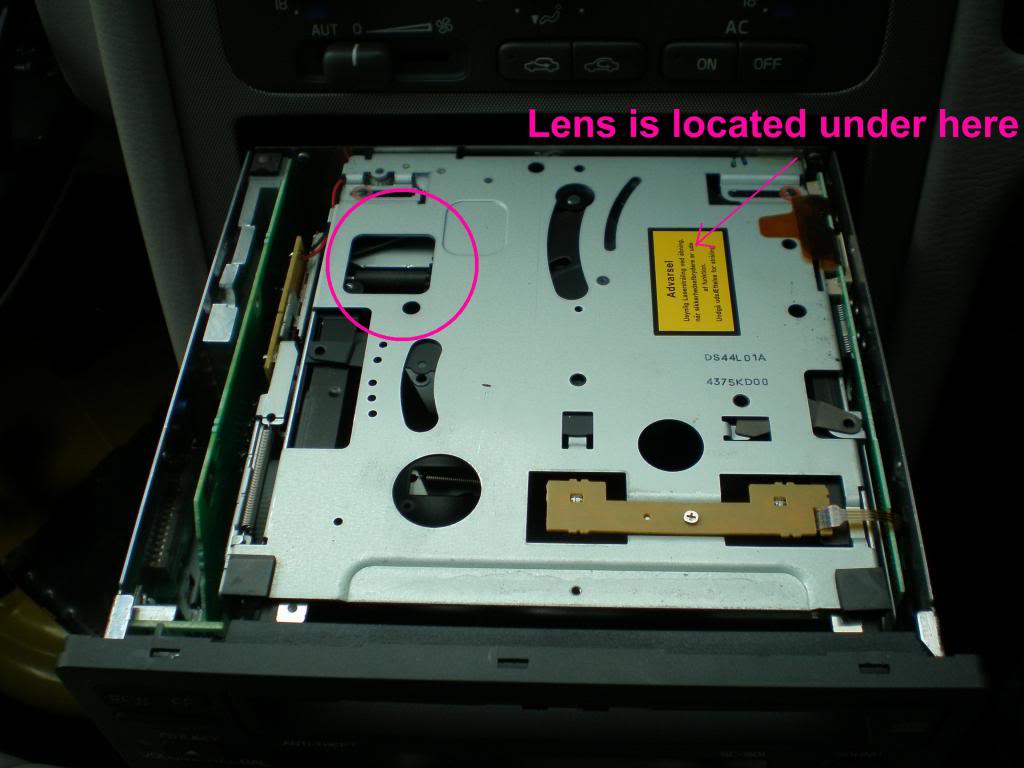
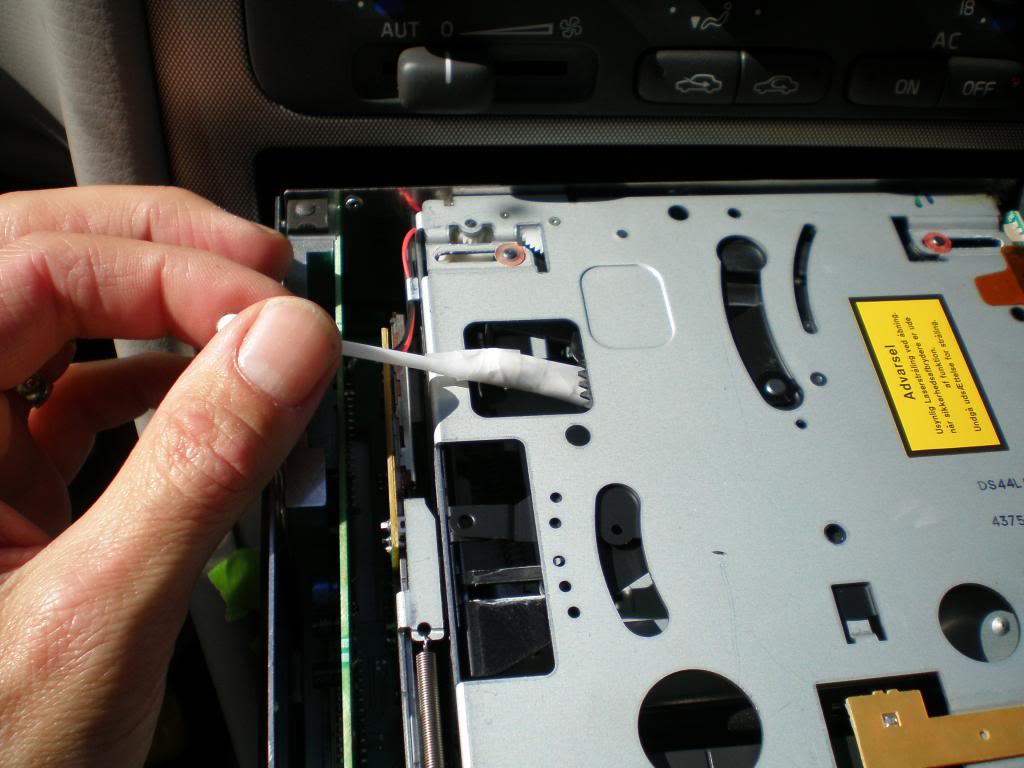
Now we have the top cover off we still cannot see very much but the laser lens is located almost directly under the yellow sticker. To the left is the small square opening where we will gain access to clean the lens.
If you HAVE the radio code then insert a empty cartridge and allow the unit to start its loading process. What you need to do is remove the power plug whilst the loading tray is fully extended. You can now remove the other wire connections and take the radio indoors.
If you are working with the radio still attached in the car we need to trick the radio into thinking a cd has become jammed so that it goes into sleep/ stand by mode. The way that I found to do this was to push a empty cd cassette into the radio and allow the unit to go through its loading procedure. When the tray ejected out I firmly grasped it preventing the tray from returning into the radio. You now play a short tug of war game with the machine and after around 4 attempts the radio decides there is something wrong and the motor switches off, you have won !
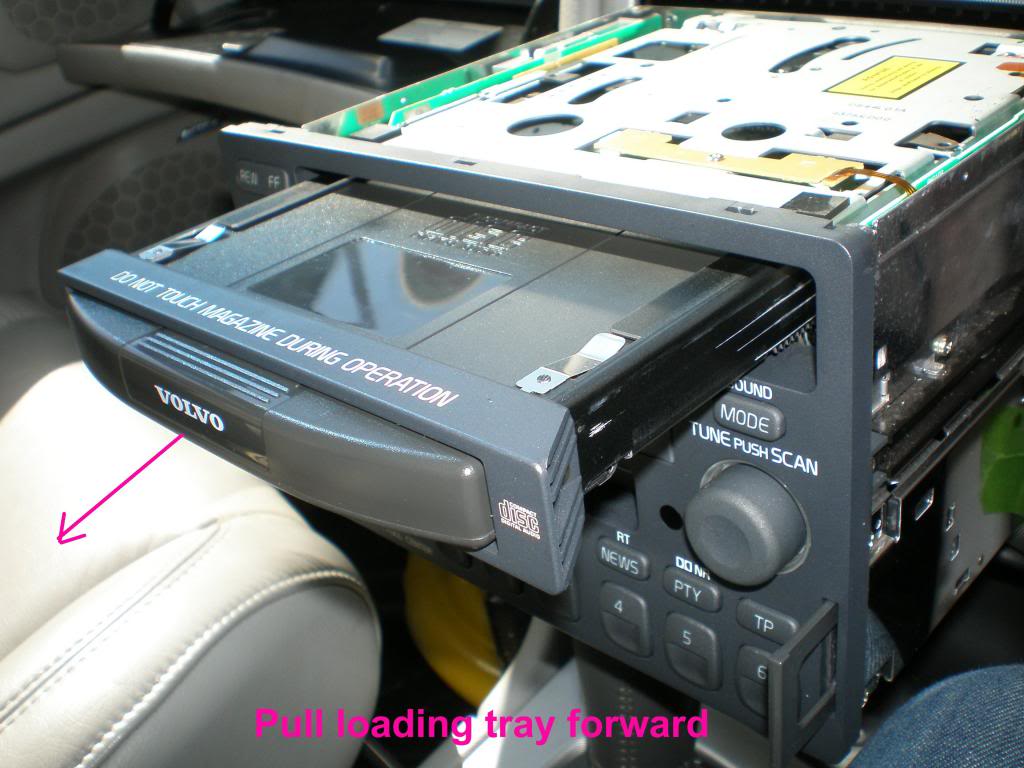
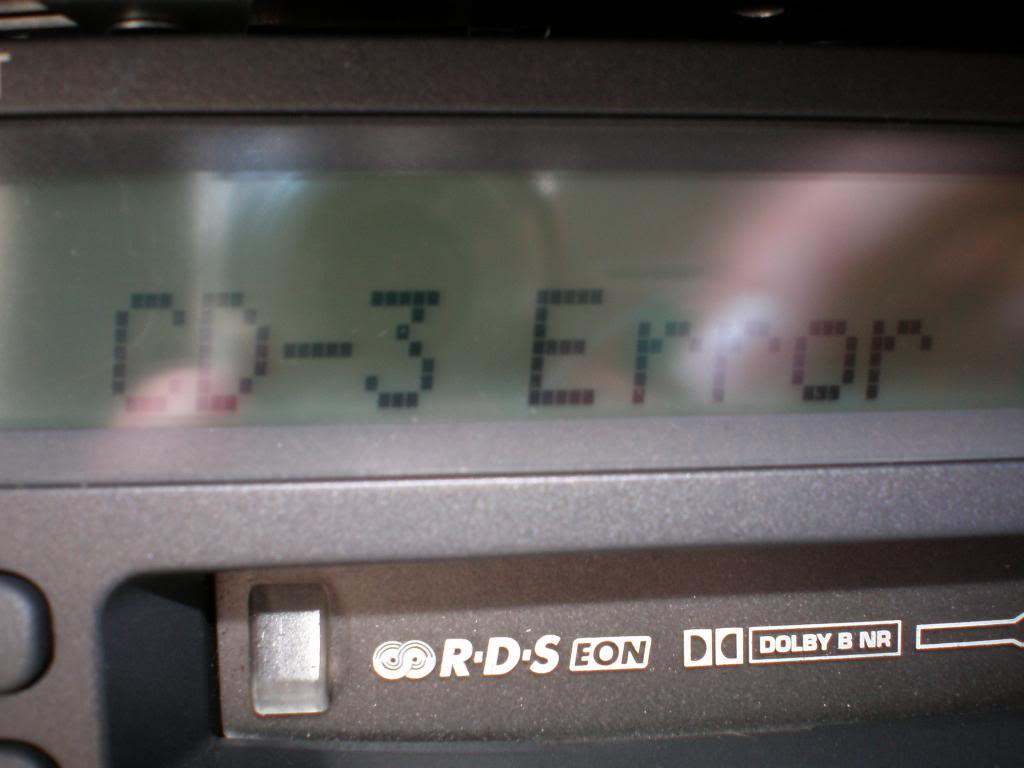
With the motor disengaged you can now carefully pull the tray fully forward. The radio will display a CD ERROR message. Push the **** to turn off the radio.
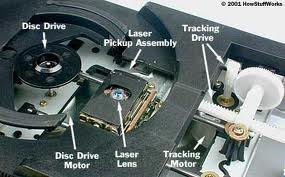
Next have a look inside the radio to locate the laser lens. I was unable to get a clear picture inside the radio but the picture below gives you an idea of a typical layout. The lens itself is just to the right of the black centre drive spindle and is a clear round disc about 4mm across.
Once you have found it take your extended cotton bud and dip one end into the alcohol solution. Then you carefully feed the long bud through the square aperture and on to the lens. I found that the lens had a concave surface so I simply placed the bulb of the bud in that and rolled it back and forth between my fingers a few times. You do not need any pressure and the lens is mounted on a spring anyway.
Carefully withdraw the cotton bud and that’s it your done. Any excess alchol will evaporated very quickly leaving a clean grease free surface on the lens.
If you have been lucky enough to have completed this outside the car you simply need to reconnect the wires leaving the power lead till last. Once connected and switched on the loading tray should return into the unit. If you get an ERROR message then turn off the radio and carefully push the tray back into the unit.
Replace the top cover by first sliding the hinge clips into their slots on the front panel before snapping the lid shut. Don’t forget the 2 small screws. I left mine a little looser in case I have to repeat this in the future.
Carefully slide the radio back into the dash watching that you do not scuff the surround trim panel. The radio will click into place. Finally push in the small square handles.
The moment of truth.
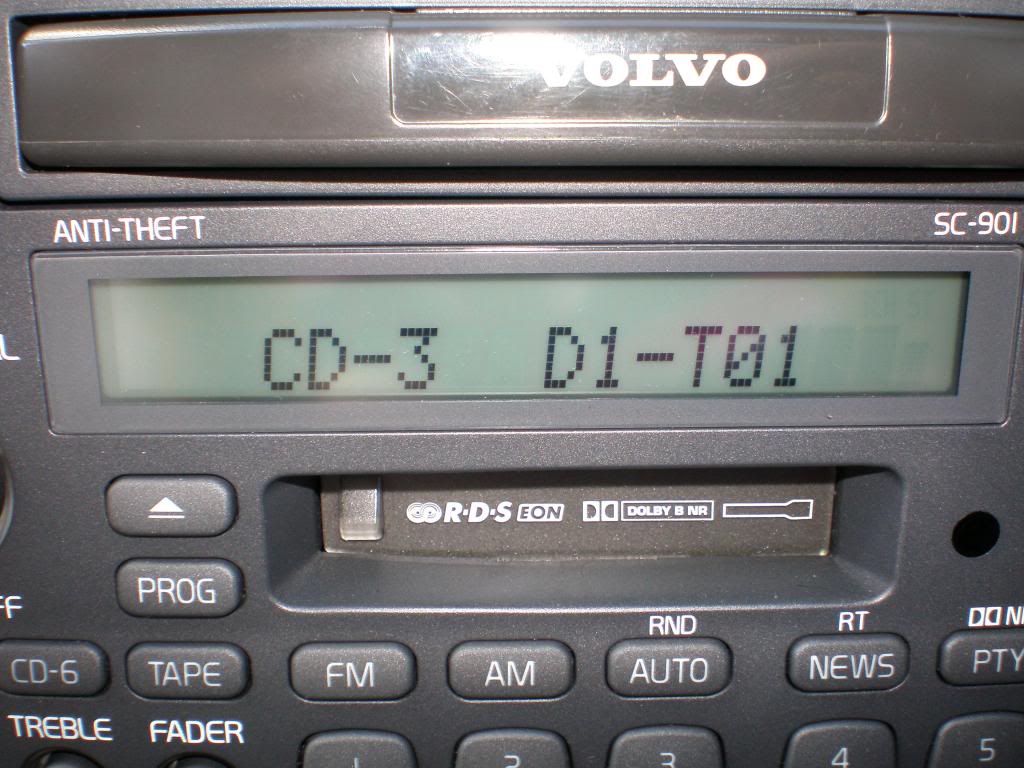
Turn on the radio and press the CD eject button to clear the ERROR message. Load a CD into the cassette and push home. Hopefully what will now happen is a series of clicks and whirls followed by the track number being displayed. The CD should now be fully functional once again.
I hope this works for you.
Kruss
The 3 disc cartridge would load into the deck and then lots of whirls and clicks would follow but the disc would not load. The loading tray would then eject to change the disc before sliding back in. More clicks and whirls and the cycle would repeat with the tray sliding in and out but no cd’s would actually load.
The display would register a change of cd number but the track numbers would stay at “00” till the disc was rejected. To stop this continues cycle the eject button would need to be pressed and the cartridge was ejected. I tried a number of different cd’s both old and new but always with the same result.
I remembered that I had once purchased (at great cost) a early CDRW disc drive for the PC and that had started playing up and rejecting the discs for no apparent reason. The solution that I found was to clean the laser lens with some rubbing alchol. Of course that was fairly easy with a single PC drive but I figured it should be able to be done with the 901 head unit as long as I could find access to the lens.
Now this process is a lot easier if you are able to remove the radio from the car and sit indoors with it on the kitchen table. However by unplugging the radio you activate the anti theft setting and you will need the “radio code” to re activate it once you reconnect in the car.
Unfortunately my car did not come with the code (something I need to sort) so I need to try to clean the lens with the radio still connected to the cars 12 volt supply. This makes things a bit more tricky but still “do able”.
First thing you need to do is purchase a small bottle of ISOPROPYL ALCOHOL. I found plenty of sellers on EBay / Amazon and a small bottle will set you back around £2-3 here in the UK. You may also find that a small bottle will be provided in a cd cleaning kit that you can pick up at budget shops like Poundworld etc. Isopropyl is the best liquid to use as its normally 99% alcohol pure and evaporates quickly without leaving streaks etc.
You will also need some basic tools such as a micro Phillips screwdriver as you will need to remove 2 small screws from the radio case lid. Also obtain 2 cotton buds and tape them together to make one long one.

I would recommend you place some tape around the radio trim to protect it from scratching.

The radio unit is actually worryingly easy to remove. All you have to do is slightly depress the small handles till they spring out. Then you pull them outwards till they click and the radio is now unlocked.

Carefully slide the radio forward to allow access to the rear connections and screws.
You need to remove the 2 small screws in the top corners of the back panel. Working with the radio still connected I did find this a little tricky as they are quite tight and difficult to undo with small screwdrivers. It may help to get someone to hold the radio (balanced on the gear selector) and for you to apply extra leverage with a pair of long nose pliers on the shaft of the micro screwdriver. I was working alone so I managed to remove them with a small ratchet set and Phillips bit.
Once the screws are out the top plate is held firmly closed by 3 pressed clips in the side of the casing. There are 2 on the left side and one on the right. The front of the plate is hinged under the front plastic facia of the control panel so you need to lift the rear first.
Using a small flat blade micro screwdriver I was able to prise the top plate up enough to slide in a larger flat screwdriver between the case and lid and kind of twist to pop the case open. Once you have eased up the back simple lift up and un hook the front tabs.

Now we have the top cover off we still cannot see very much but the laser lens is located almost directly under the yellow sticker. To the left is the small square opening where we will gain access to clean the lens.

If you HAVE the radio code then insert a empty cartridge and allow the unit to start its loading process. What you need to do is remove the power plug whilst the loading tray is fully extended. You can now remove the other wire connections and take the radio indoors.
If you are working with the radio still attached in the car we need to trick the radio into thinking a cd has become jammed so that it goes into sleep/ stand by mode. The way that I found to do this was to push a empty cd cassette into the radio and allow the unit to go through its loading procedure. When the tray ejected out I firmly grasped it preventing the tray from returning into the radio. You now play a short tug of war game with the machine and after around 4 attempts the radio decides there is something wrong and the motor switches off, you have won !

With the motor disengaged you can now carefully pull the tray fully forward. The radio will display a CD ERROR message. Push the **** to turn off the radio.

Next have a look inside the radio to locate the laser lens. I was unable to get a clear picture inside the radio but the picture below gives you an idea of a typical layout. The lens itself is just to the right of the black centre drive spindle and is a clear round disc about 4mm across.

Once you have found it take your extended cotton bud and dip one end into the alcohol solution. Then you carefully feed the long bud through the square aperture and on to the lens. I found that the lens had a concave surface so I simply placed the bulb of the bud in that and rolled it back and forth between my fingers a few times. You do not need any pressure and the lens is mounted on a spring anyway.


Carefully withdraw the cotton bud and that’s it your done. Any excess alchol will evaporated very quickly leaving a clean grease free surface on the lens.
If you have been lucky enough to have completed this outside the car you simply need to reconnect the wires leaving the power lead till last. Once connected and switched on the loading tray should return into the unit. If you get an ERROR message then turn off the radio and carefully push the tray back into the unit.
Replace the top cover by first sliding the hinge clips into their slots on the front panel before snapping the lid shut. Don’t forget the 2 small screws. I left mine a little looser in case I have to repeat this in the future.
Carefully slide the radio back into the dash watching that you do not scuff the surround trim panel. The radio will click into place. Finally push in the small square handles.
The moment of truth.
Turn on the radio and press the CD eject button to clear the ERROR message. Load a CD into the cassette and push home. Hopefully what will now happen is a series of clicks and whirls followed by the track number being displayed. The CD should now be fully functional once again.

I hope this works for you.
Kruss
The following users liked this post:
28CarsLater (07-15-2022)
#2
Thank you for your information and pictures.
My SC-901's CD-player stopped working, all it did was cycling through all three discs as if there was no information on any of them. The disc did not spinn either, and the lens had now stopped moving radially reading the disc. I opened my unit and followed the above instructions on how to clean the lens. This did not help my non-functioning Cd-player but I now have a nice and clean lens!
While the unit was opened and as a last resort I started spinning the spurs that drive the lens radially, it is a worm gear. With the lens assembly mid-way I plugged the unit back in, lo and behold, it is now working again! I have no idea as to why it stopped working. My best guess is that the lens for some reason passed its end point and its position could not be determined, therefore it was not not moving.
Kinda far fetched, but if anybody else have similar problem, this might help. Don't forget to clean your lens while your at it!
#3
#5
Thread
Thread Starter
Forum
Replies
Last Post
legend
Volvo S70
0
07-04-2010 06:45 PM


