
HOWTO: Roof Rack / Rails Install on a 2004 V70 (modification)


Thread Starter
|
Junior Member
Joined: Apr 2016
Posts: 2
Likes: 0
Hey everyone,
So I wanted to add a roof rack / roof rails to my stock 2004 V70. It has none of the XC70 bells and whistles so I've been slowly adding them myself for a while. I found a roof rack at the auto yard for $35 this week so I grabbed it and went to work. Note, if you get one used, make sure all the rubber seals on the bottom are there. These fall off easily since the glue is weak from age. They go under the screws to keep water from leaking in.
Step 0: Tools and Parts
Order Trim Clips. (called moulding or roof trim moulding clips). They WILL break when you do this, even if you are super careful. This is because they have been exposed to the elements for 10 years now and are brittle and weak. You can do without this step if you are OK with caulking the trim, which is what I did. But you are essentially gluing parts down. Also, now would be a good time to get more weather proof lining for the trim, if you can find it (I didn't do this though).
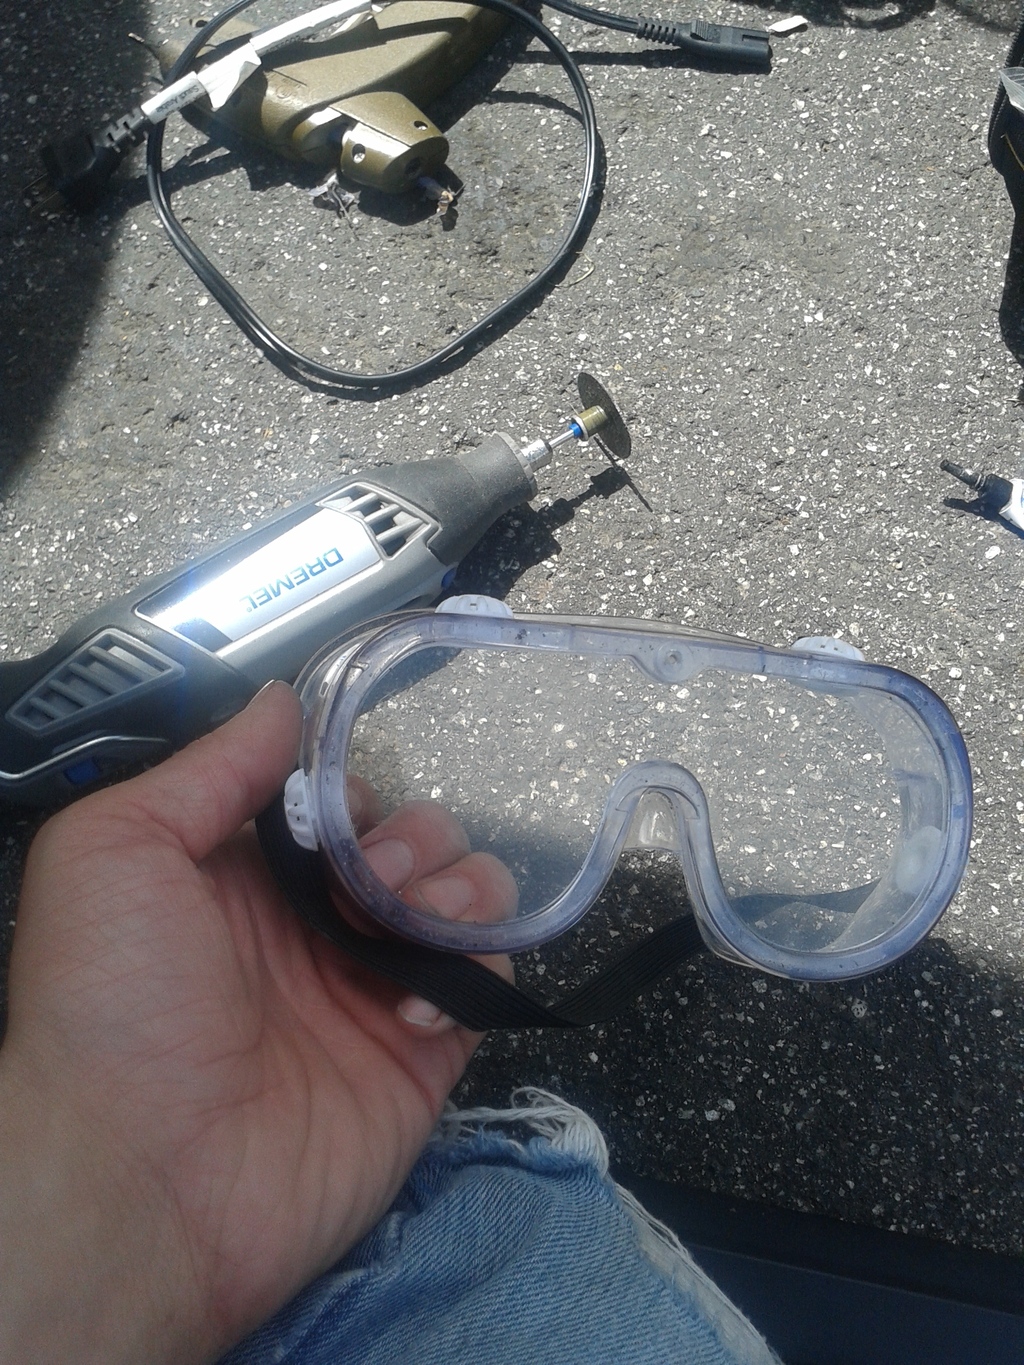
You will also need a size 25 star bit with a driver, small bottle of super glue for rubber seals, caulking sealant (if you don't order the clips), a rotary tool with metal saw bit, and safety goggles the cover the sides of your eyes (important! I almost went blind in one eye from drilling metal years ago).
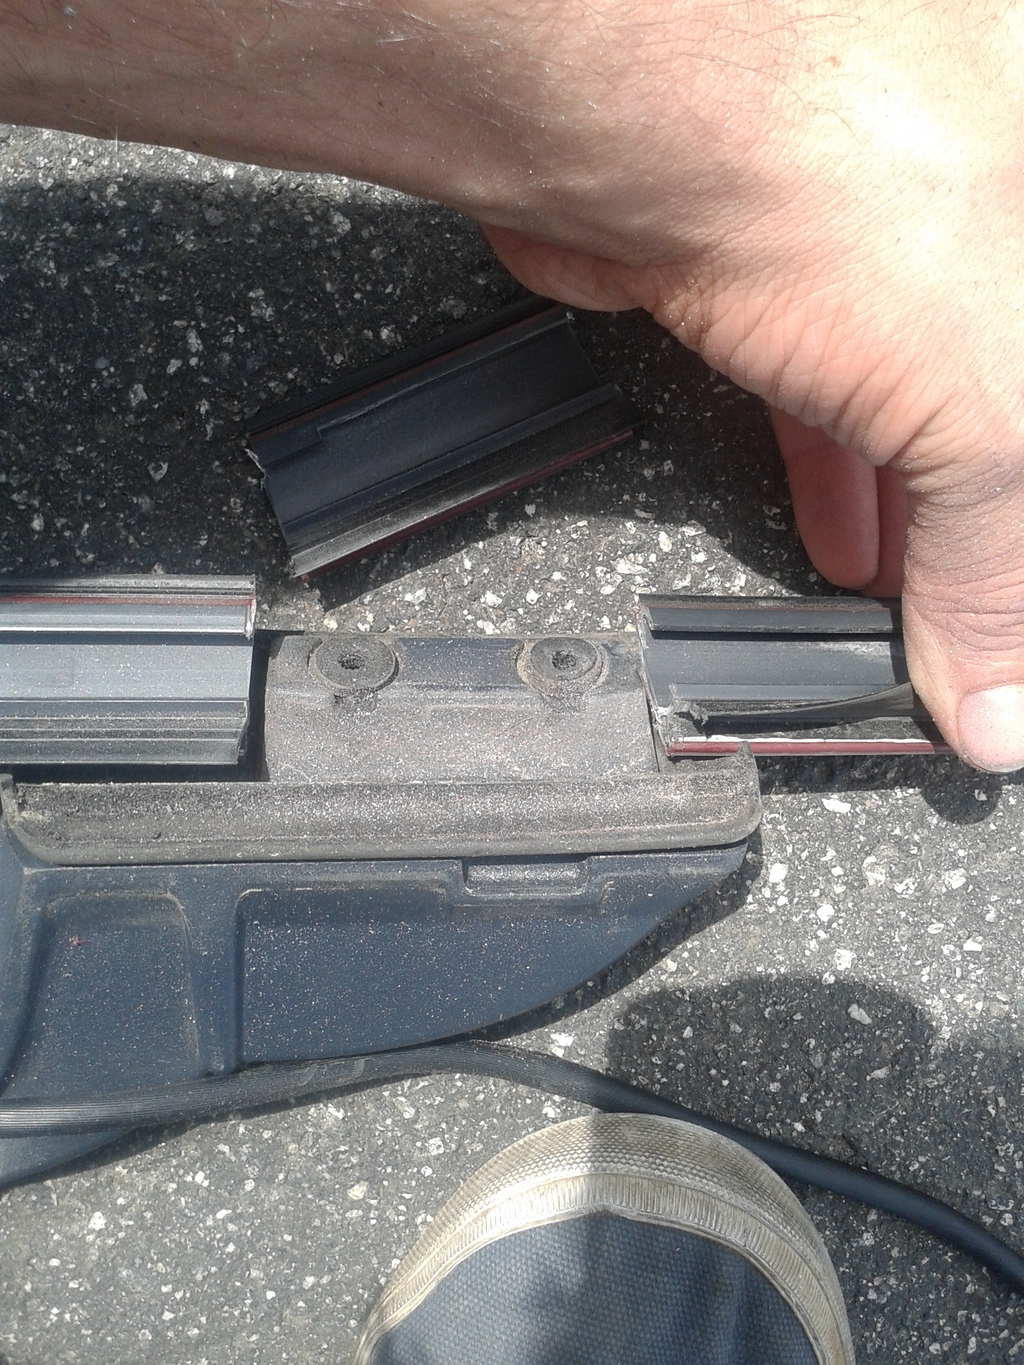
Step 1: Removing Trim
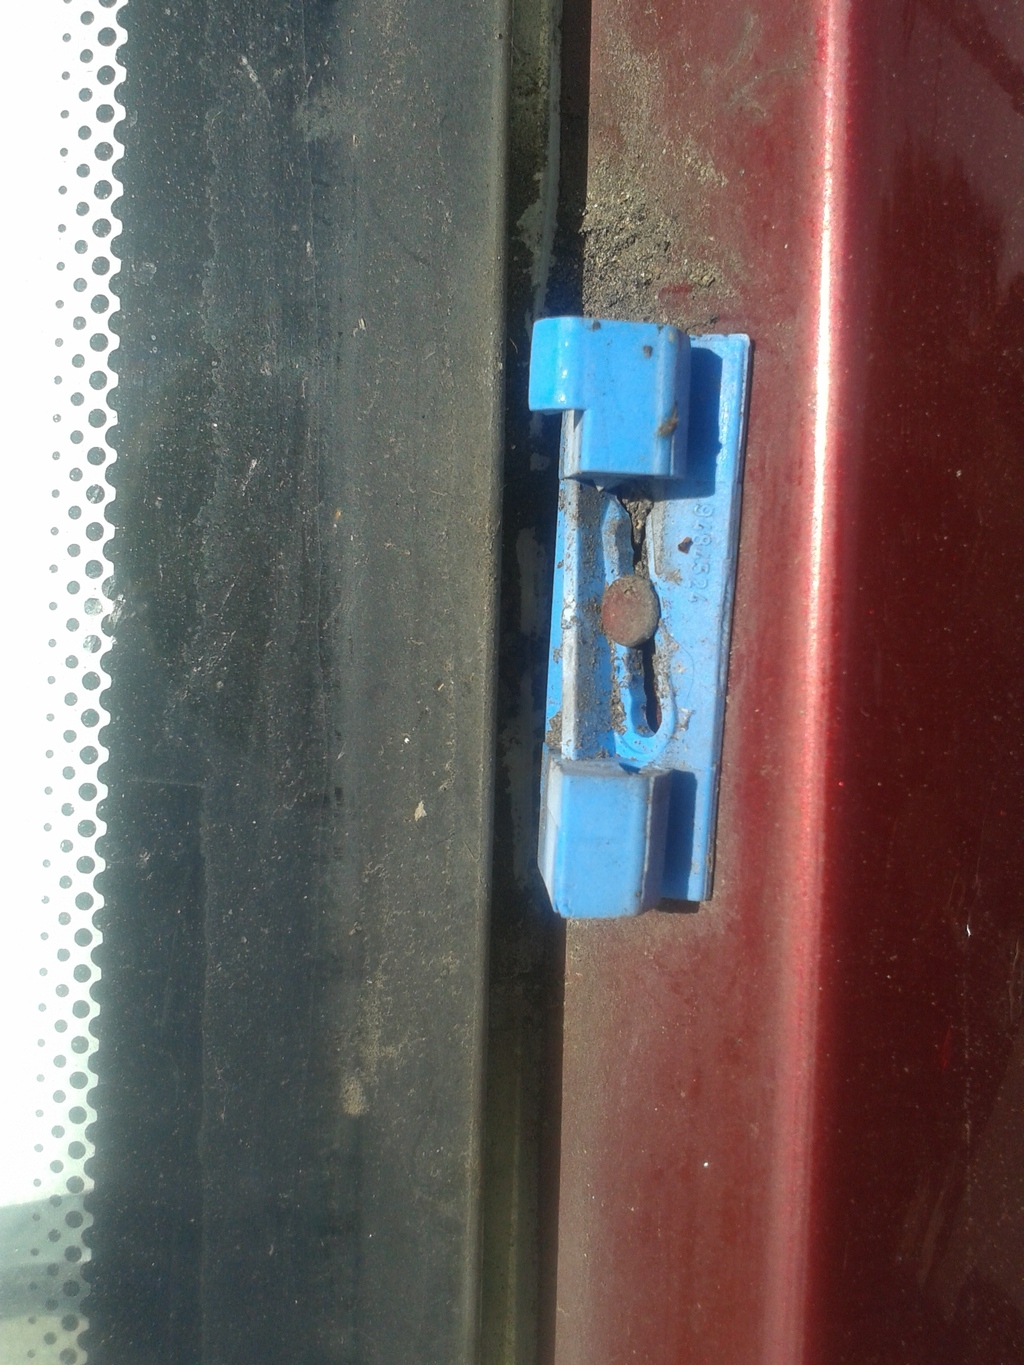
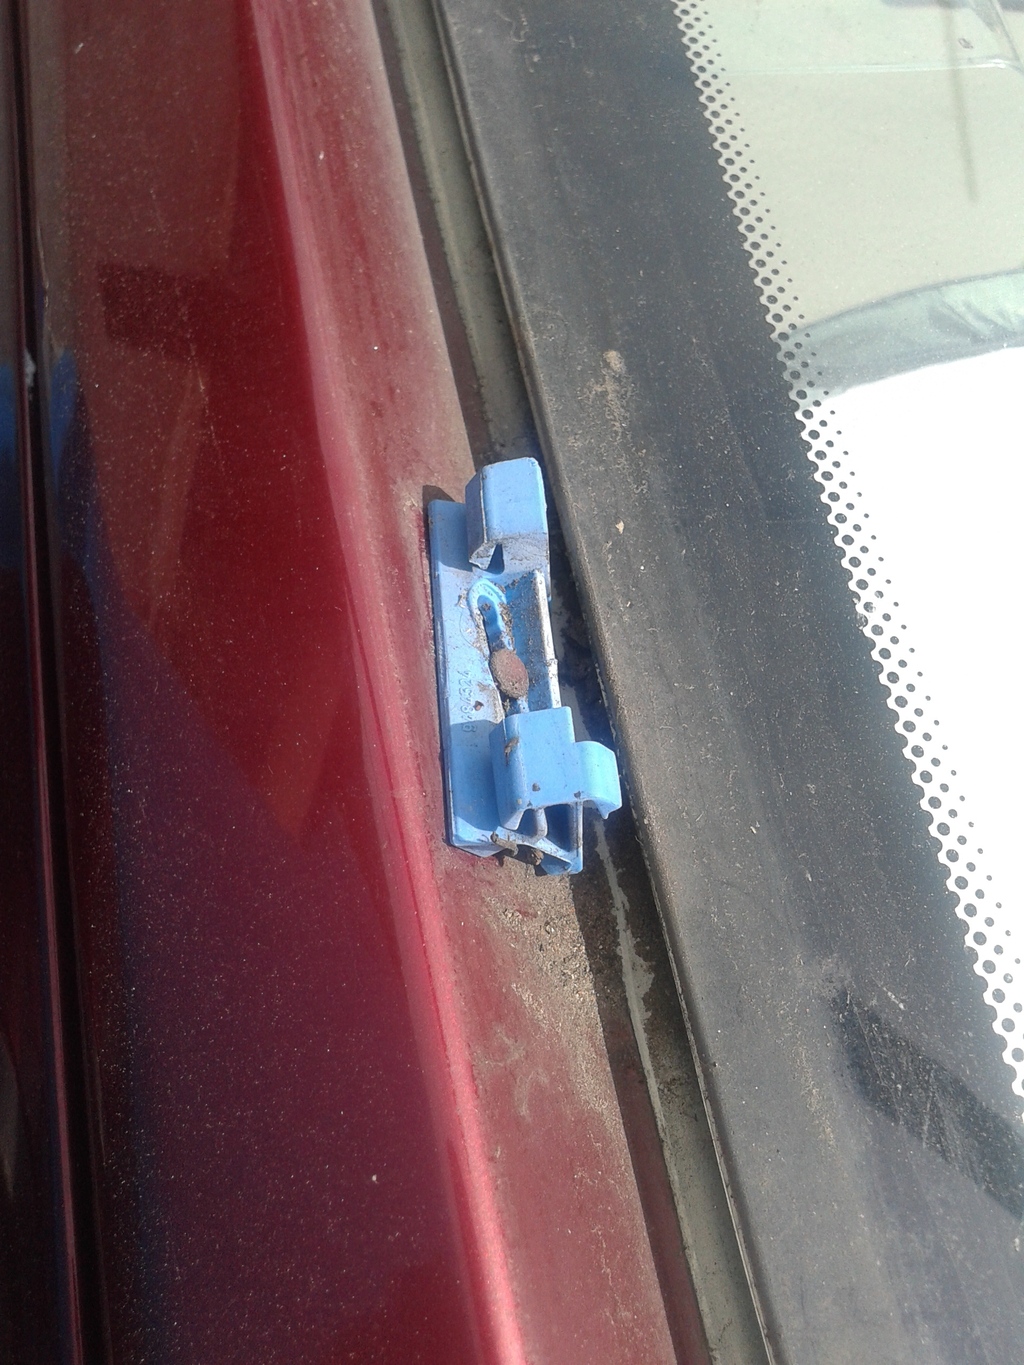
Very carefully grab the top of the trim that runs the length of where your racks will go. You will need to remove this and drill the needed holes to install your roof rack. Starting from the back or front, pull at the top gently while keeping your palms on the bottom of the trim. This will help keep the clips from breaking. Pull up along the trim and you will hear some snap sounds. Work your way all the way down with special care to the windshield portion - these clips are the most fragile and hardest to find.
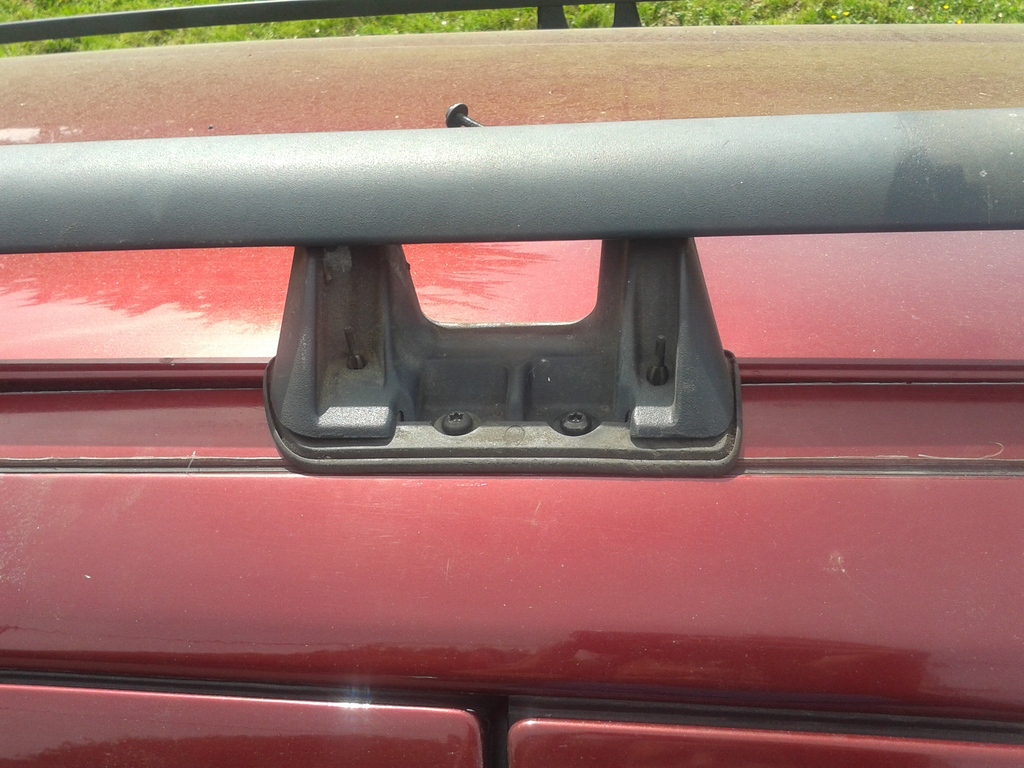
(this picture was after the rack was put on for measuring purposes)
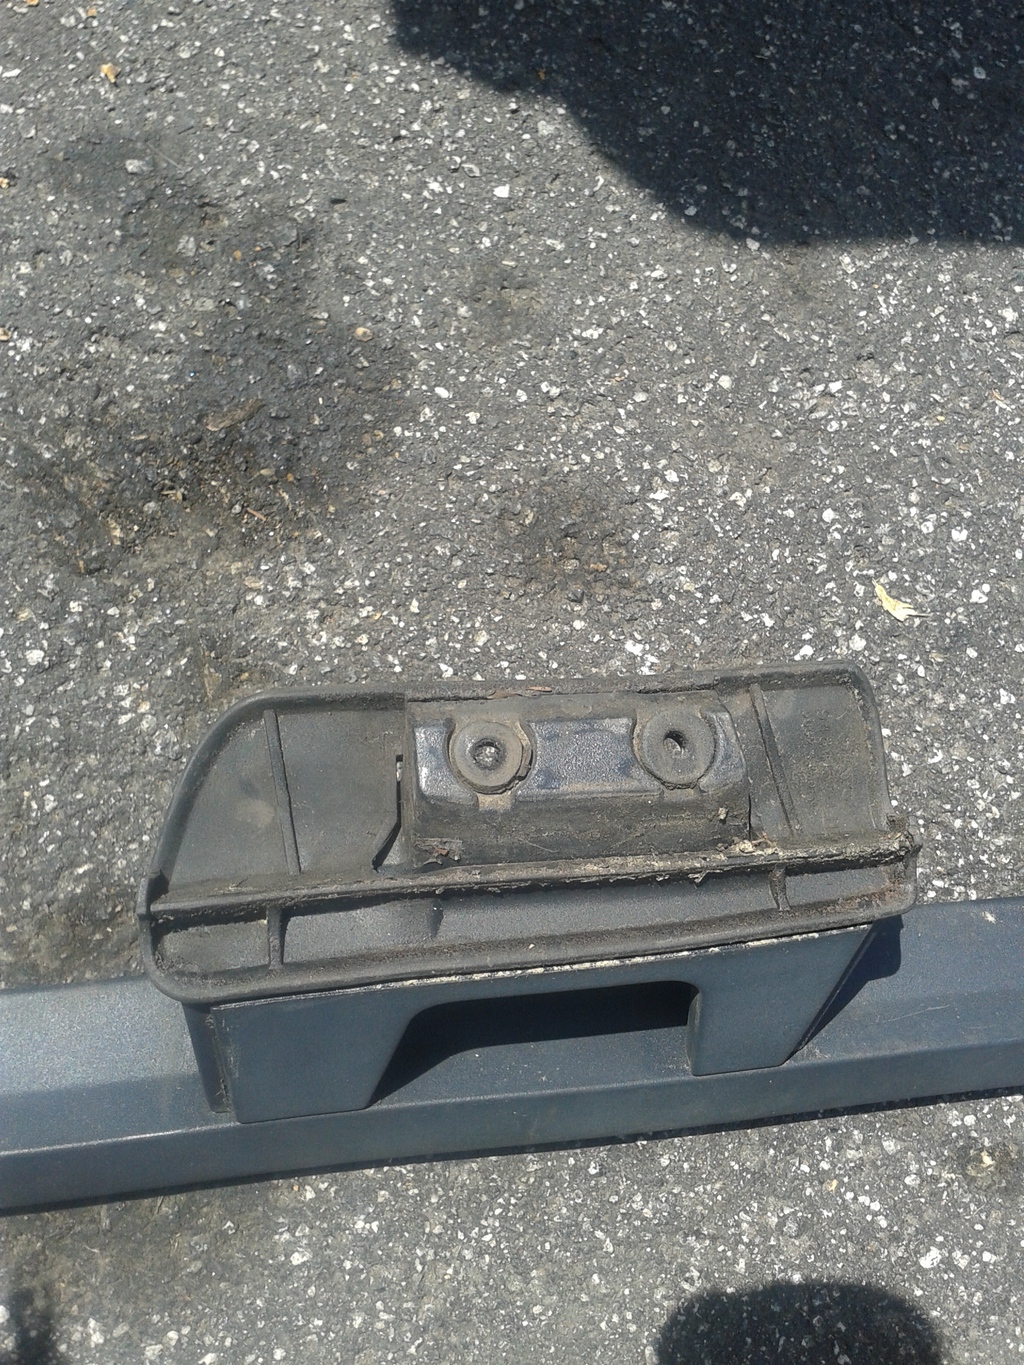
Step 2: Removing Old Hardware
Remove the 8x screws using a size 25 star screw bit (each side). Remove the metal plates they attach to and the rubber washers. These won't be needed for the rest of the upgrade.
Step 3: Glue Rubber Washers On Used Rack
This only applies to a used roof rack. The rubber washers on each side (8x) fall off from age and wear. I used a dab of super glue on all of them to keep them in place. You will go crazy otherwise during the install, because these are important and will keep falling off while you measure and secure things.
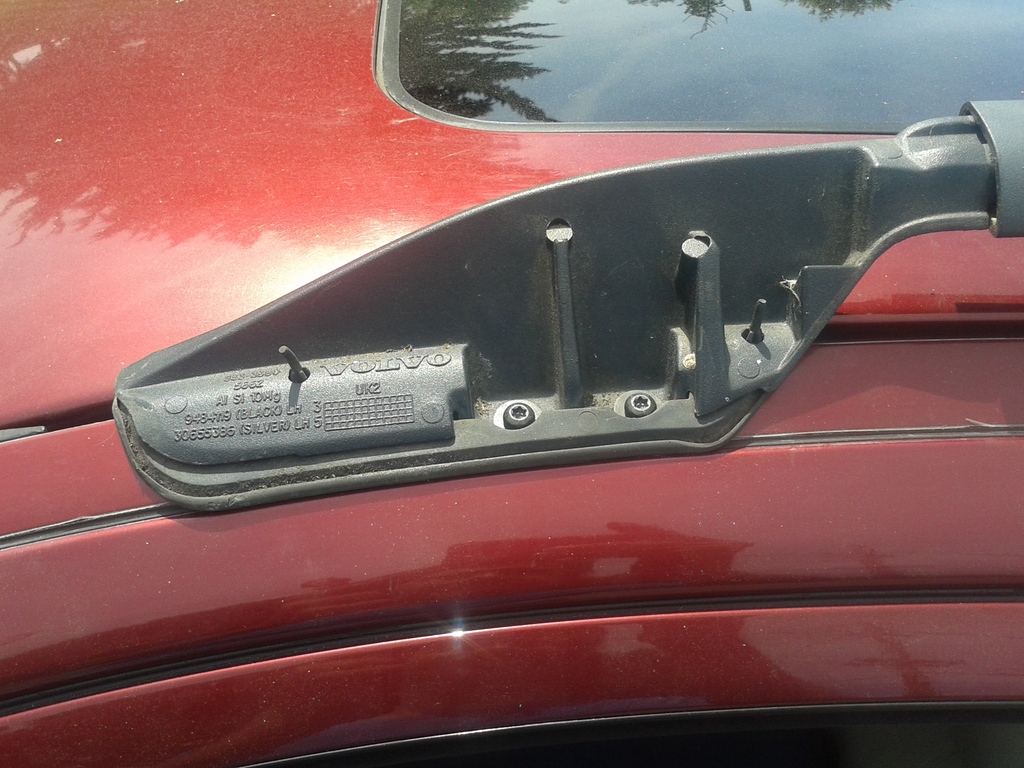
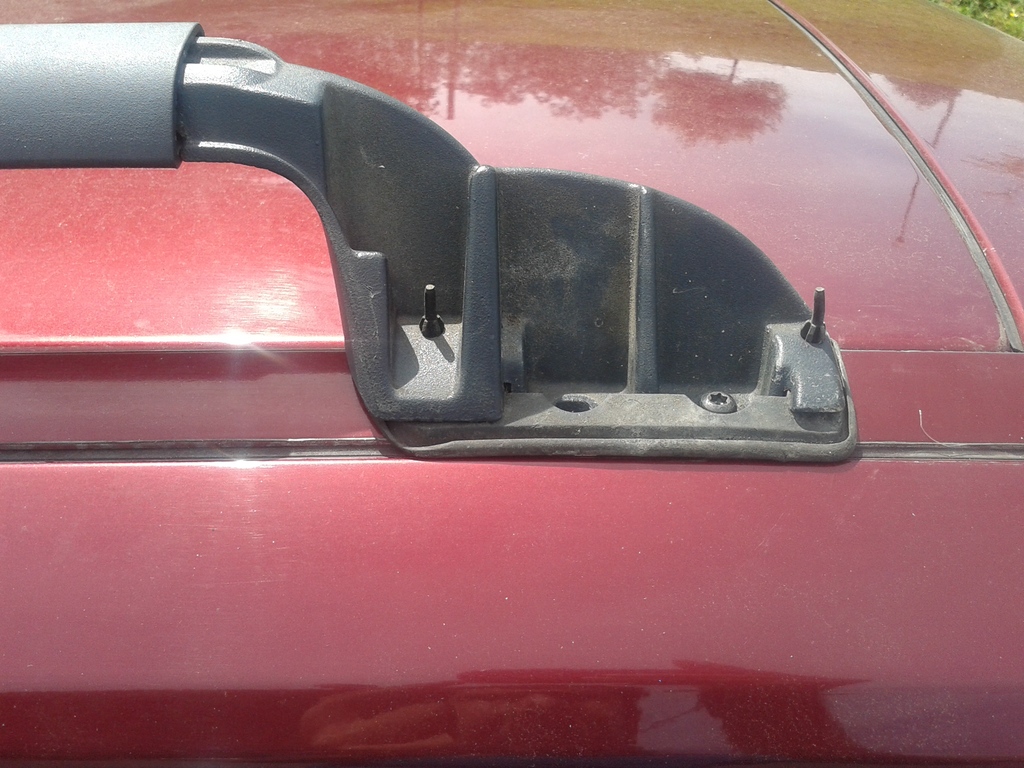
Step 4: Mark Your Trim
You can do this two ways: one is use your roof rack bolts to secure it on without the trim and then hold the trip adjacent to it and make markings. The other is to do it on the ground and aligning them next to each other. I did both methods to check my work. Make sure that you look under the rack bars to see the angle of the cuts you will be making. And the most useful thing you can do is mark dots for the screw holes. This will help immensely in the next step.
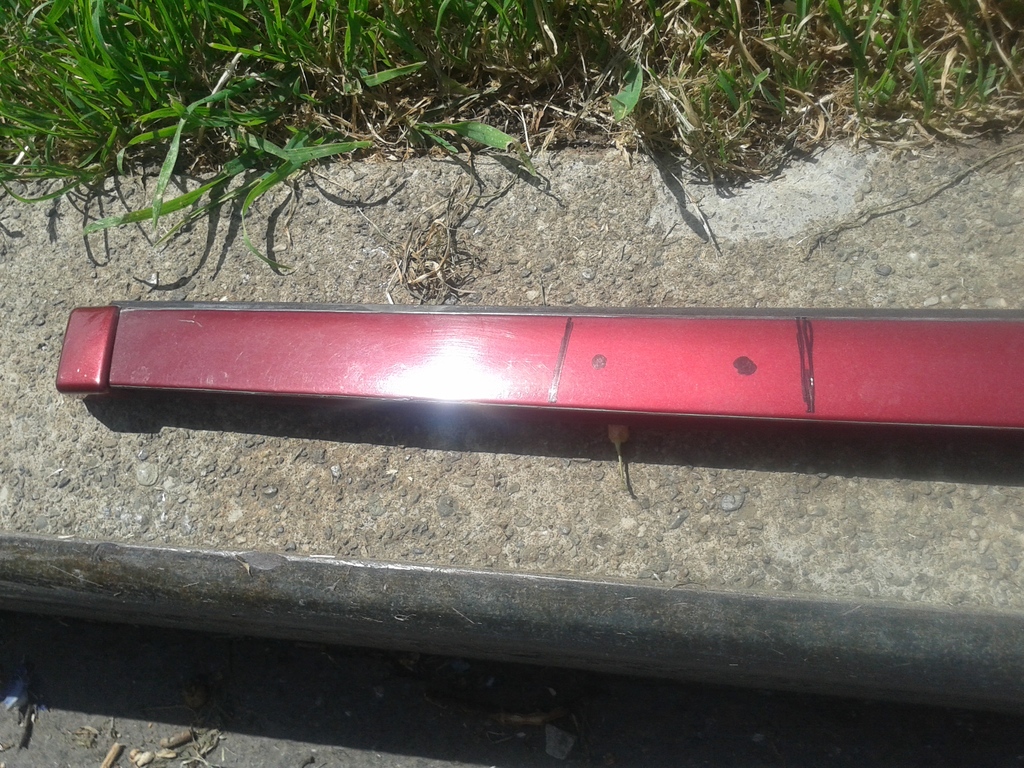
Step 5: Drilling the Trim
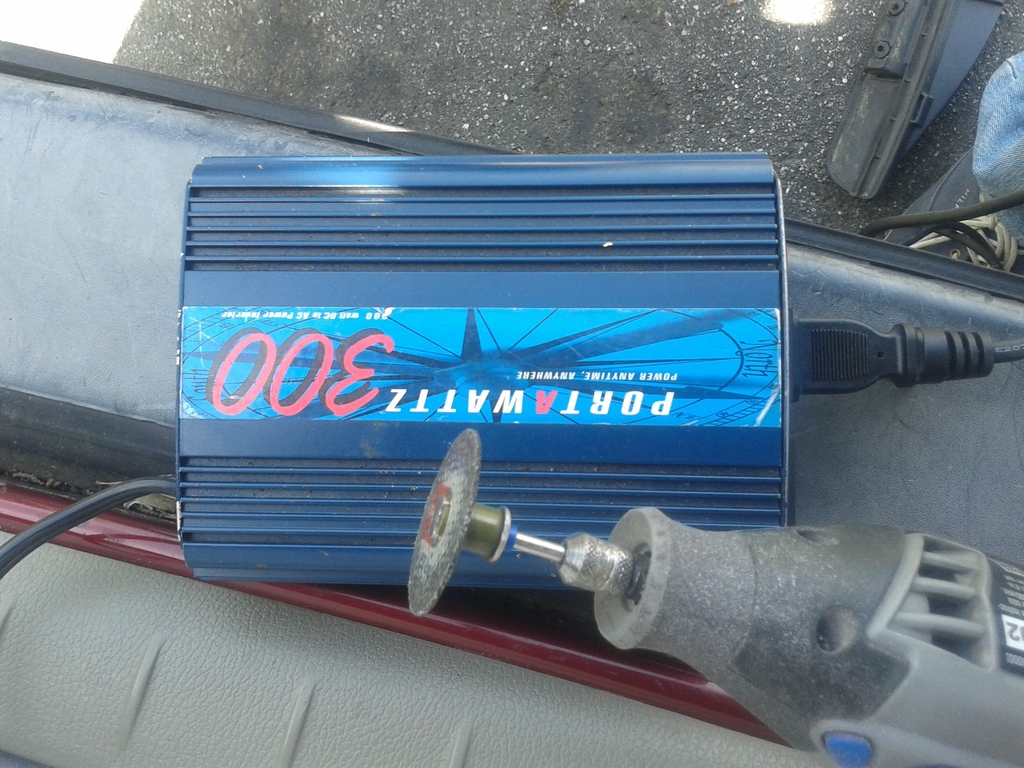
Using your Dremel or Rotary Tool of choice AND safety goggles, cut through the trim. I used a replaceable saw bit meant for metals and it cut through nicely. You can do this at your car with a 300W inverter or in your garage / work space. I worked my way from the back and found that leaving about 1/4" clearance space was adequate. The center trim pieces you can fit between the rack when it is on the ground to make sure the sizing is right. The ones to worry about most are the end pieces.

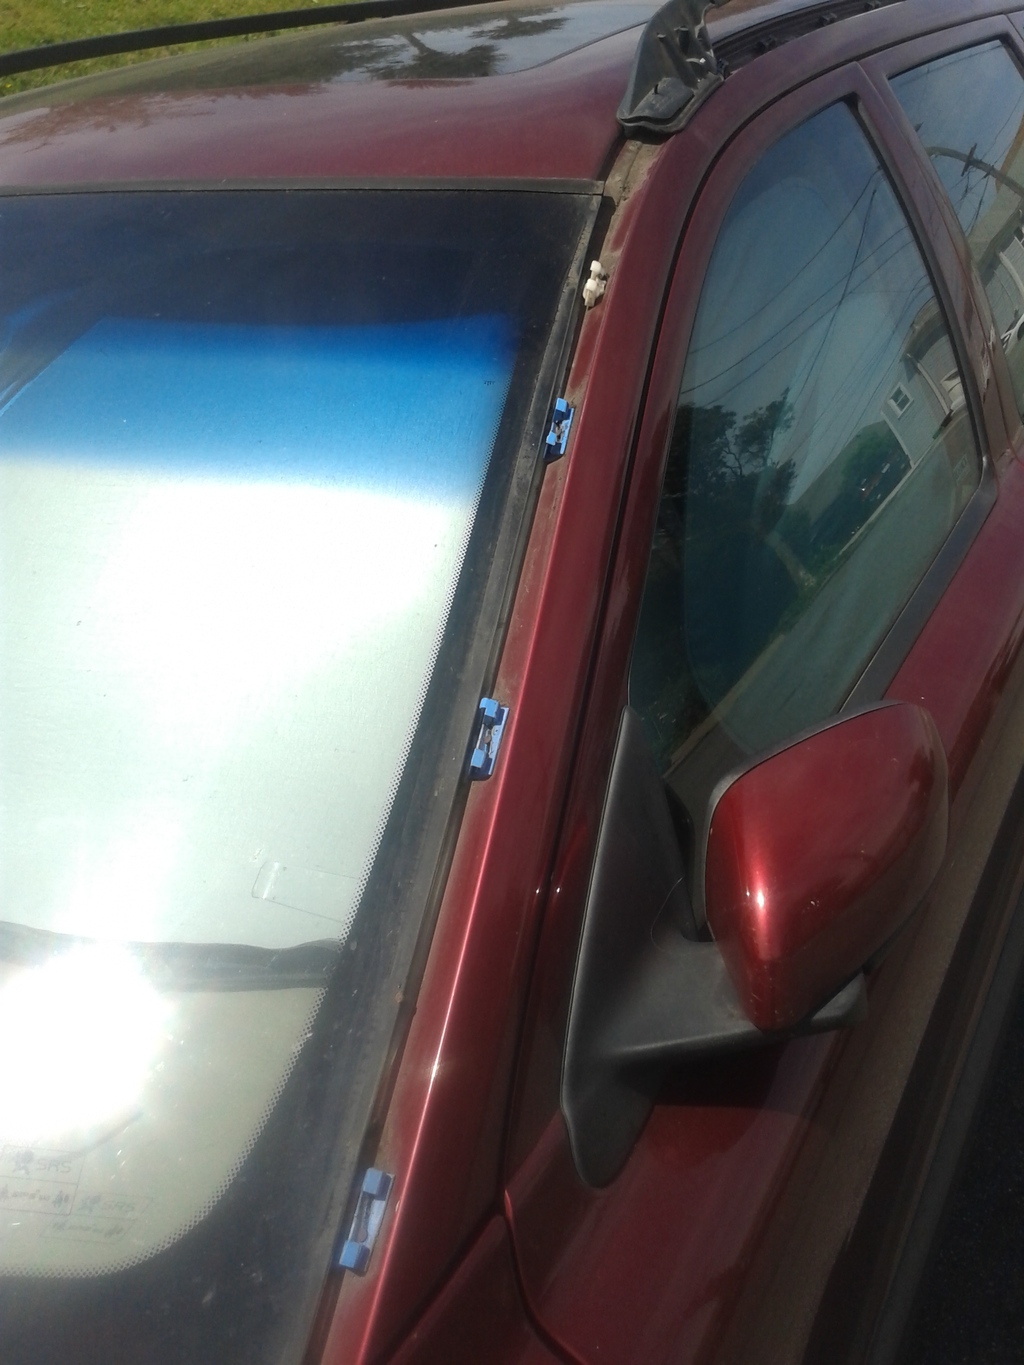
Step 6: Pre-Install
Place the trim back on WITHOUT snapping it in. Remember, we don't want to be pulling this off and on a bunch, breaking more clips. Seat your roof rack gently on top and see if it aligns correctly. Look especially at the screw holes, making sure they match perfect with the rubber washers underneath the rack in place.
Step 7: Install
With one or two screws lightly installed to keep the rack in place, start snapping your trim in, back side first. Once it is all in correctly I used the side of my fist to "punch" the clips back in, using a little force. Note: the windshield part clips in higher than you would expect, so compare the other side with it to make sure its location is correct.

Step 8: Securing Rack
Using threadlock (optional), screw all your star screws (that came with the rack) back in tightly for a snug fit. Place plastic covers over everything.
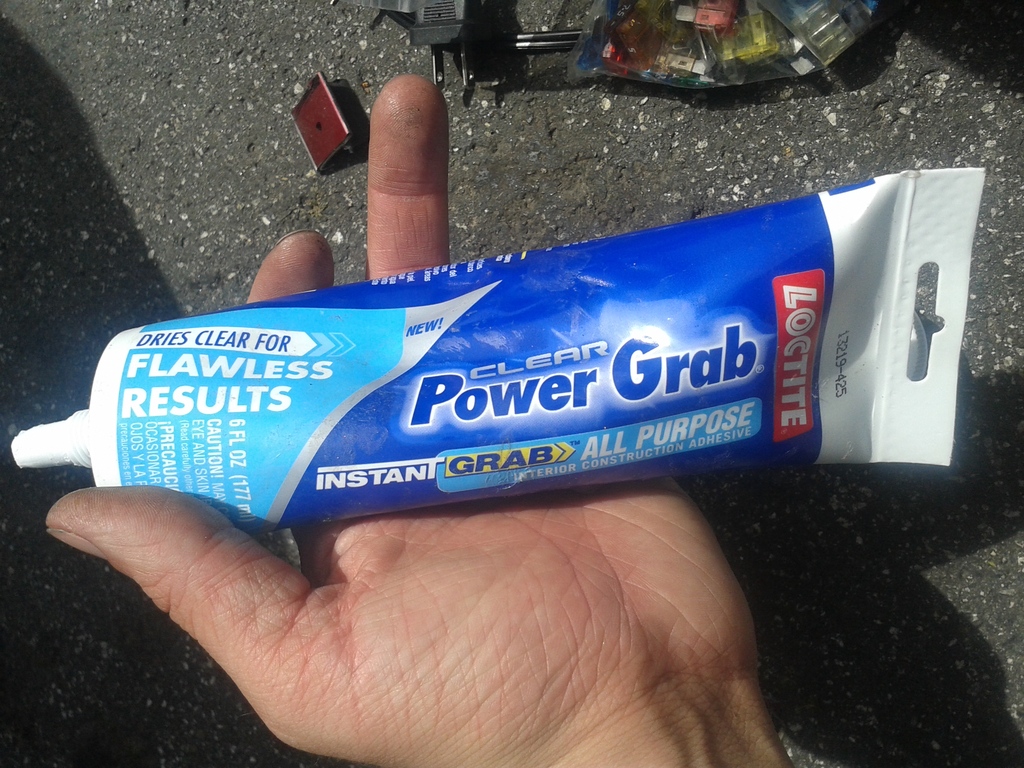
Step 9: Caulking (optional)
If you didn't pre-order replacement clips like me, and parts of the trim are not flush, then you can use caulking sealant to secure them. I highly recommend the small squeeze bottle they sell of this (CLEAR color, not white). Run a bead of it along the needed area (windshield for me) and give it 48 hours to dry. It will start white but dry clear.


Do all the steps for the other side and you are done! Enjoy

So I wanted to add a roof rack / roof rails to my stock 2004 V70. It has none of the XC70 bells and whistles so I've been slowly adding them myself for a while. I found a roof rack at the auto yard for $35 this week so I grabbed it and went to work. Note, if you get one used, make sure all the rubber seals on the bottom are there. These fall off easily since the glue is weak from age. They go under the screws to keep water from leaking in.
Step 0: Tools and Parts
Order Trim Clips. (called moulding or roof trim moulding clips). They WILL break when you do this, even if you are super careful. This is because they have been exposed to the elements for 10 years now and are brittle and weak. You can do without this step if you are OK with caulking the trim, which is what I did. But you are essentially gluing parts down. Also, now would be a good time to get more weather proof lining for the trim, if you can find it (I didn't do this though).
You will also need a size 25 star bit with a driver, small bottle of super glue for rubber seals, caulking sealant (if you don't order the clips), a rotary tool with metal saw bit, and safety goggles the cover the sides of your eyes (important! I almost went blind in one eye from drilling metal years ago).
Step 1: Removing Trim
Very carefully grab the top of the trim that runs the length of where your racks will go. You will need to remove this and drill the needed holes to install your roof rack. Starting from the back or front, pull at the top gently while keeping your palms on the bottom of the trim. This will help keep the clips from breaking. Pull up along the trim and you will hear some snap sounds. Work your way all the way down with special care to the windshield portion - these clips are the most fragile and hardest to find.
(this picture was after the rack was put on for measuring purposes)
Step 2: Removing Old Hardware
Remove the 8x screws using a size 25 star screw bit (each side). Remove the metal plates they attach to and the rubber washers. These won't be needed for the rest of the upgrade.
Step 3: Glue Rubber Washers On Used Rack
This only applies to a used roof rack. The rubber washers on each side (8x) fall off from age and wear. I used a dab of super glue on all of them to keep them in place. You will go crazy otherwise during the install, because these are important and will keep falling off while you measure and secure things.
Step 4: Mark Your Trim
You can do this two ways: one is use your roof rack bolts to secure it on without the trim and then hold the trip adjacent to it and make markings. The other is to do it on the ground and aligning them next to each other. I did both methods to check my work. Make sure that you look under the rack bars to see the angle of the cuts you will be making. And the most useful thing you can do is mark dots for the screw holes. This will help immensely in the next step.
Step 5: Drilling the Trim
Using your Dremel or Rotary Tool of choice AND safety goggles, cut through the trim. I used a replaceable saw bit meant for metals and it cut through nicely. You can do this at your car with a 300W inverter or in your garage / work space. I worked my way from the back and found that leaving about 1/4" clearance space was adequate. The center trim pieces you can fit between the rack when it is on the ground to make sure the sizing is right. The ones to worry about most are the end pieces.
Step 6: Pre-Install
Place the trim back on WITHOUT snapping it in. Remember, we don't want to be pulling this off and on a bunch, breaking more clips. Seat your roof rack gently on top and see if it aligns correctly. Look especially at the screw holes, making sure they match perfect with the rubber washers underneath the rack in place.
Step 7: Install
With one or two screws lightly installed to keep the rack in place, start snapping your trim in, back side first. Once it is all in correctly I used the side of my fist to "punch" the clips back in, using a little force. Note: the windshield part clips in higher than you would expect, so compare the other side with it to make sure its location is correct.
Step 8: Securing Rack
Using threadlock (optional), screw all your star screws (that came with the rack) back in tightly for a snug fit. Place plastic covers over everything.
Step 9: Caulking (optional)
If you didn't pre-order replacement clips like me, and parts of the trim are not flush, then you can use caulking sealant to secure them. I highly recommend the small squeeze bottle they sell of this (CLEAR color, not white). Run a bead of it along the needed area (windshield for me) and give it 48 hours to dry. It will start white but dry clear.
Do all the steps for the other side and you are done! Enjoy

Thread
Thread Starter
Forum
Replies
Last Post
hovonogila
Volvo V70
17
May 16, 2019 02:28 AM
brooklynV70
Volvo V70
17
Aug 24, 2011 10:48 AM