
1982 244T Mods and Upgrades


Thread Starter
|
Got Boost?
Joined: May 2008
Posts: 3,473
Likes: 4
Well, classes start up monday, so the car will get done even slower now 
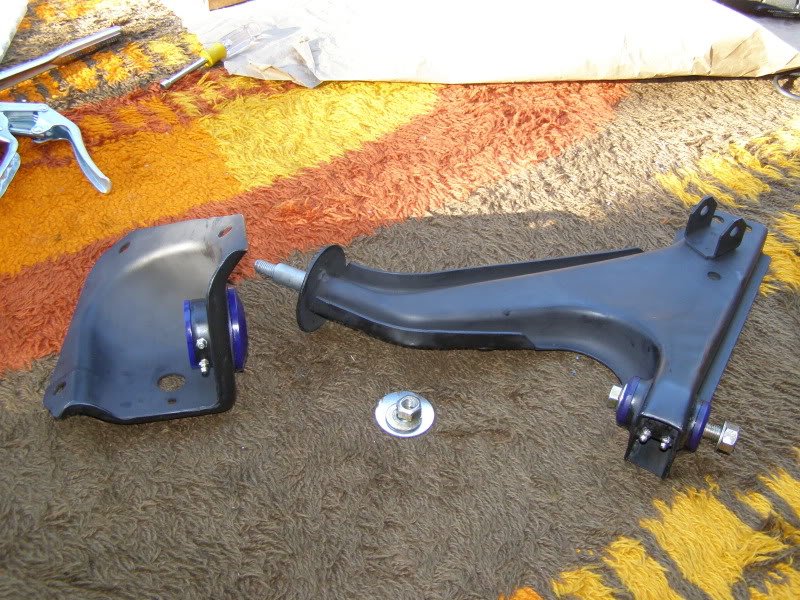
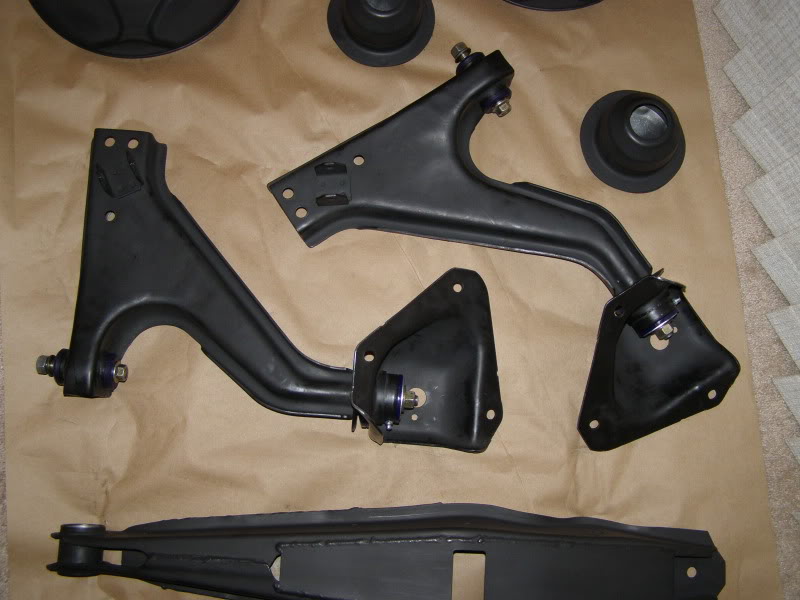
Sandblasted some parts again today, and painted them.

Terrible pic.
Tomorrow, the bushings get modified and then they get pressed in, then the arms go on the car.
Oh, and RSI really stepped up to the plate. Called them on friday, and got a new "correct" set of bushings in today! Highly recommend them.
The only things left to come in is the new correct ball joint, and the roll center/ quick steer spacers. then the car gets done!
Sandblasted some parts again today, and painted them.
Terrible pic.
Tomorrow, the bushings get modified and then they get pressed in, then the arms go on the car.
Oh, and RSI really stepped up to the plate. Called them on friday, and got a new "correct" set of bushings in today! Highly recommend them.
The only things left to come in is the new correct ball joint, and the roll center/ quick steer spacers. then the car gets done!
Last edited by TIPSP; Aug 21, 2010 at 10:28 PM.

Thread Starter
|
Got Boost?
Joined: May 2008
Posts: 3,473
Likes: 4
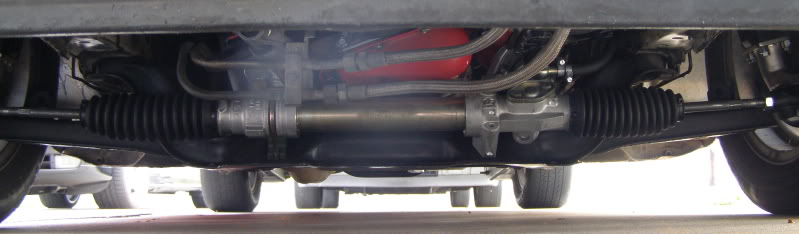
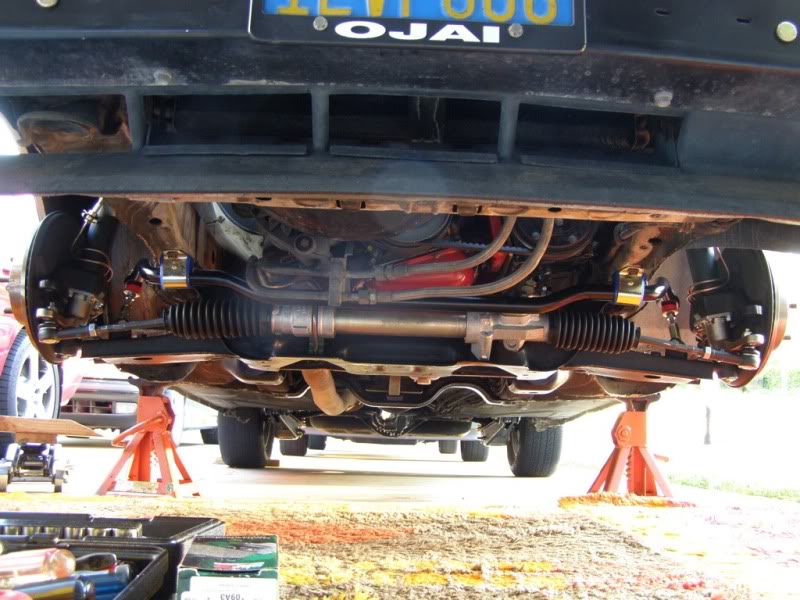
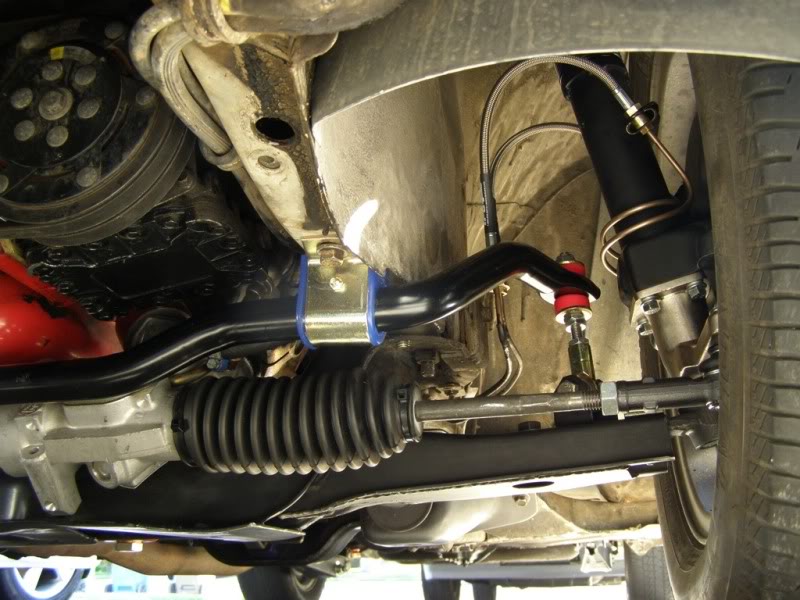
Okay, been really busy lately since classes started, and have everything ready for the car expect the roll center space to fix the front suspension/steering geometry.
To get the HOA off of my back for a while, I installed only the nessessary componets to drop the car off the stands. control arms, shocks/ struts etc. everything is only tightened for the lowering. new hardware will go on one side at a time now when I have some free time. there is no brake calipers or ebrakes hooked up.
Some things that haven't been posted yet...
There is more stuff that can get posted, but this is the best part:
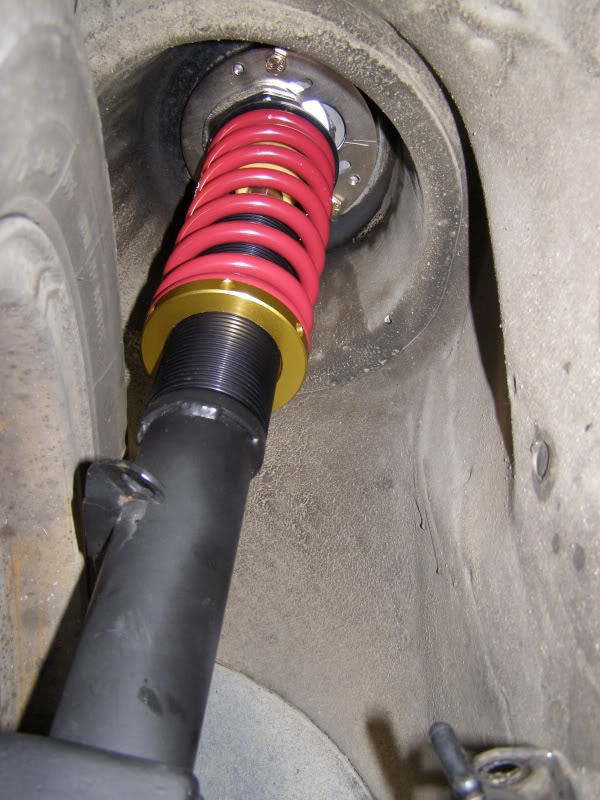

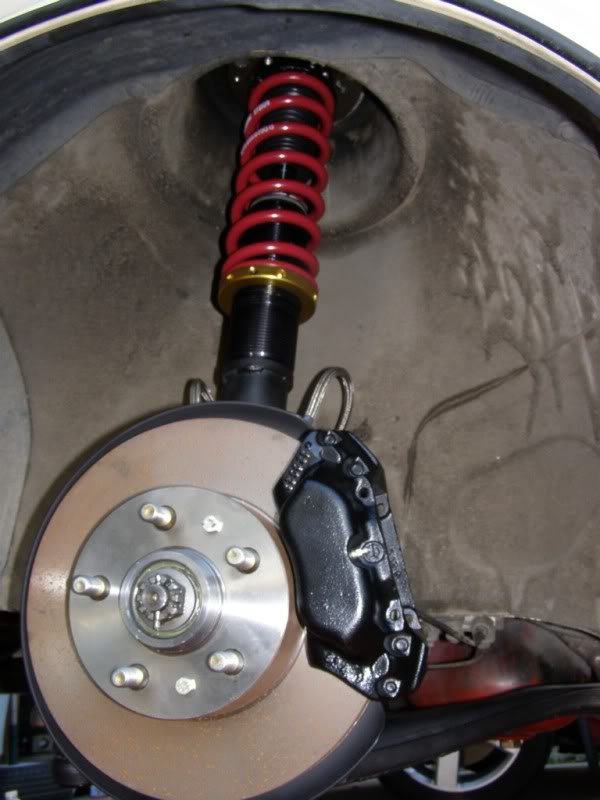
The front is perfect. I might lower it .3-.5" more, but At that ride height, the strut is almost in the middle of it's travel. I can lower it maybe another inch in front to be at the very middle of the strut travel range. Plus, the spring is fully unloaded at full droop which is great. The rear on the other hand is still too tall. One problem, is the lower adjustable spring perch is all the way to the bottom, and the rear shock is not in the middle of it's travel range. I can lower the car another 1"-1.5" in the rear to get to the middle of the travel range, and it will be level with the front of the car. I need to get new rear springs about 2" shorter than the current ones to achieve this, and be able to use the lower adjustable perch to it's full advantage.
Okay, so the push test... It is definitly stiffer that the bilsteins on the wagon. it really doesn't want to move when pushing down on it. Very similar to my dad's 540i setup.
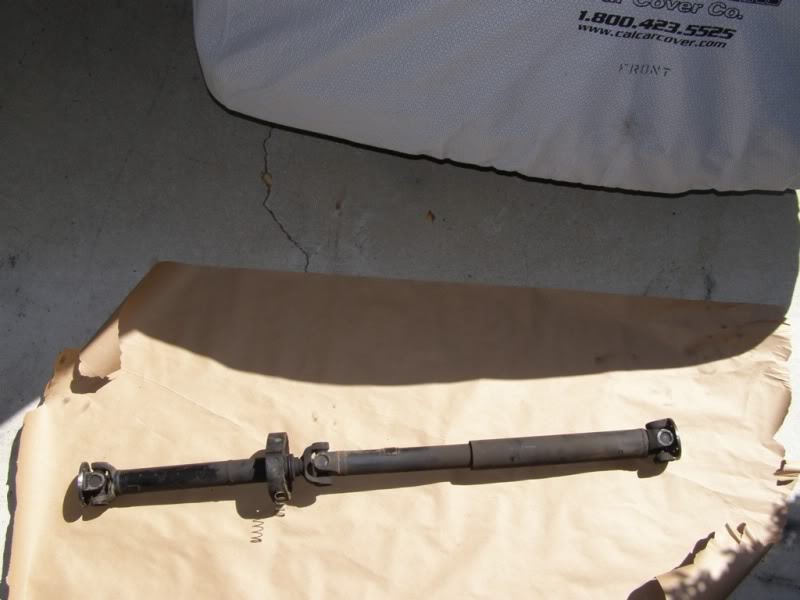
Sofar, Everything is working out great. I just need to determind where I want the camber plates, and I still need to install a new center support for the driveshaft before I can measure the pinion angle.
Edit://
I think it is time for a race jack...
To get the HOA off of my back for a while, I installed only the nessessary componets to drop the car off the stands. control arms, shocks/ struts etc. everything is only tightened for the lowering. new hardware will go on one side at a time now when I have some free time. there is no brake calipers or ebrakes hooked up.
Some things that haven't been posted yet...
There is more stuff that can get posted, but this is the best part:
The front is perfect. I might lower it .3-.5" more, but At that ride height, the strut is almost in the middle of it's travel. I can lower it maybe another inch in front to be at the very middle of the strut travel range. Plus, the spring is fully unloaded at full droop which is great. The rear on the other hand is still too tall. One problem, is the lower adjustable spring perch is all the way to the bottom, and the rear shock is not in the middle of it's travel range. I can lower the car another 1"-1.5" in the rear to get to the middle of the travel range, and it will be level with the front of the car. I need to get new rear springs about 2" shorter than the current ones to achieve this, and be able to use the lower adjustable perch to it's full advantage.
Okay, so the push test... It is definitly stiffer that the bilsteins on the wagon. it really doesn't want to move when pushing down on it. Very similar to my dad's 540i setup.
Sofar, Everything is working out great. I just need to determind where I want the camber plates, and I still need to install a new center support for the driveshaft before I can measure the pinion angle.
Edit://
I think it is time for a race jack...
Last edited by TIPSP; Aug 31, 2010 at 01:24 AM.


Thread Starter
|
Got Boost?
Joined: May 2008
Posts: 3,473
Likes: 4
Well, not much has been done lately.
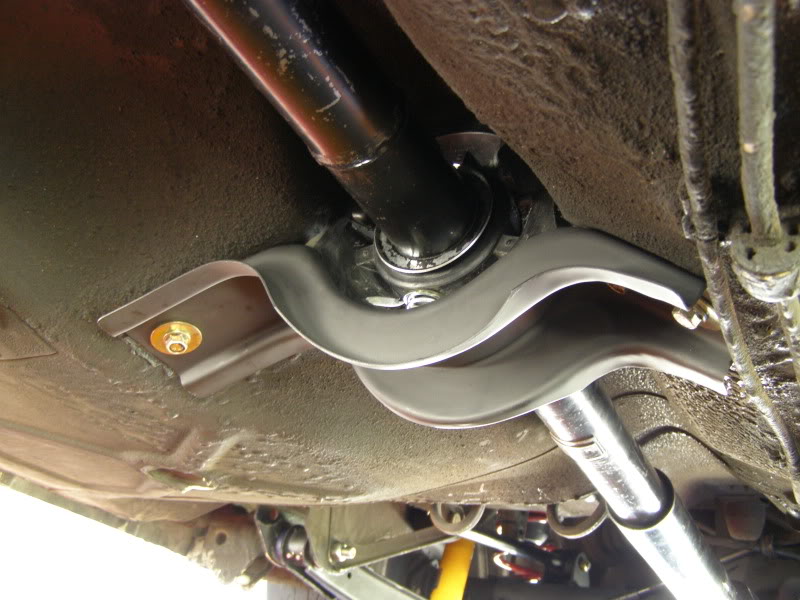
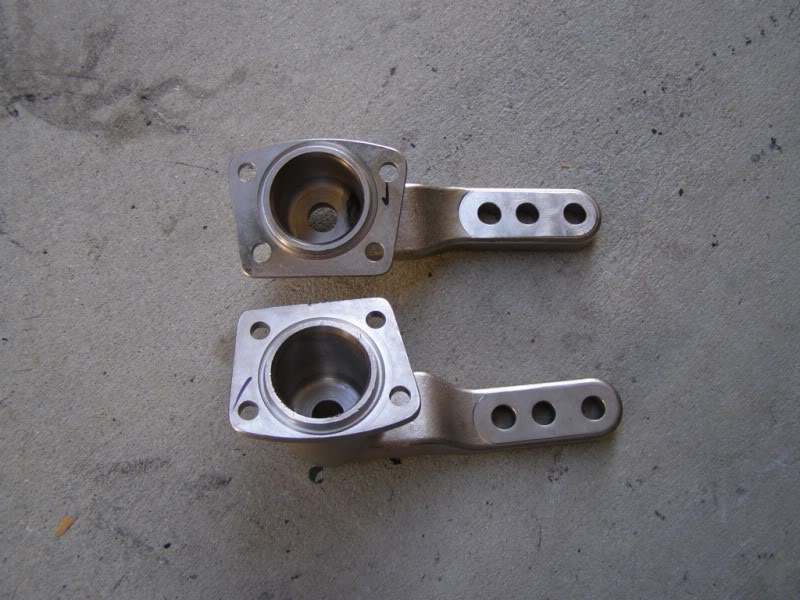
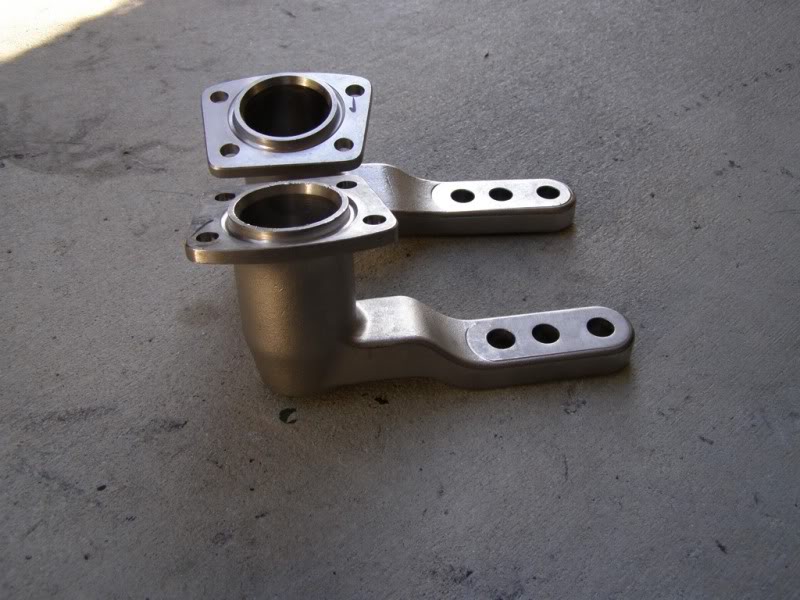
Panhard bar was put in and the diff is now centered.
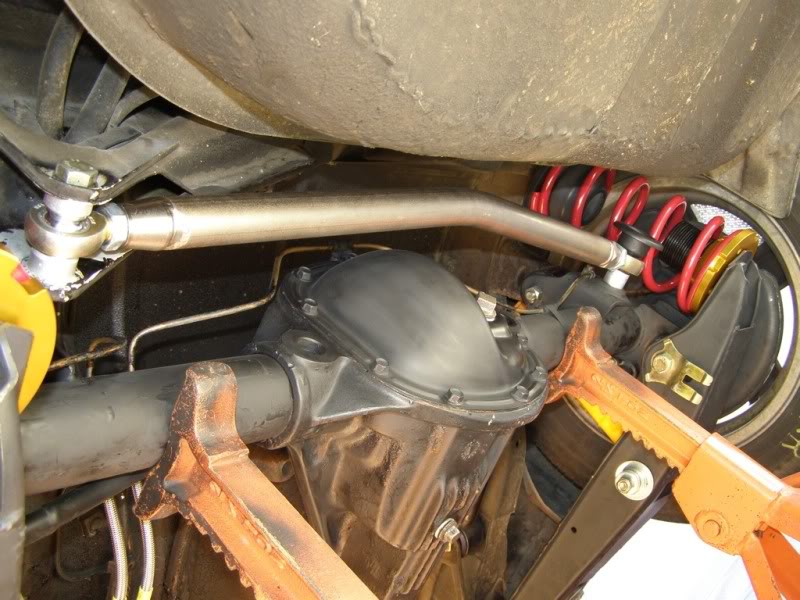
Center support bearing was replaced this weekend. Cleaned the driveshaft and Bracket.
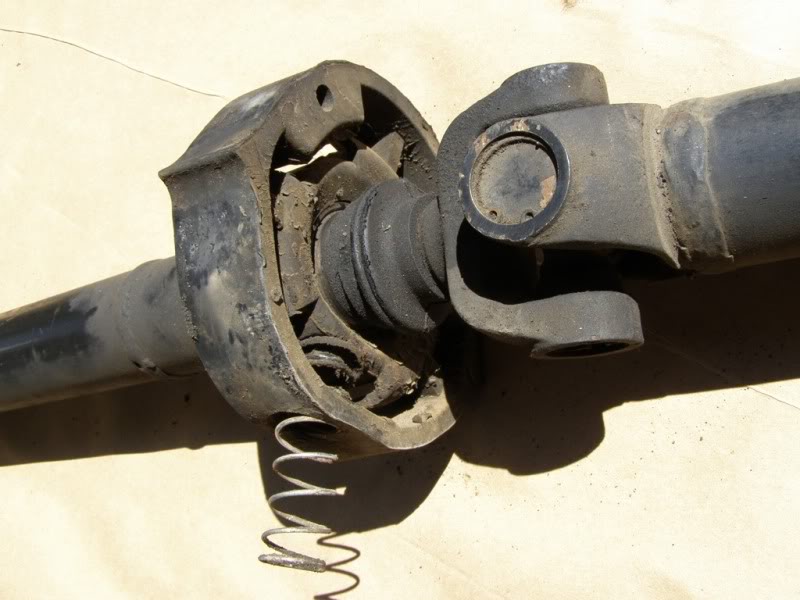

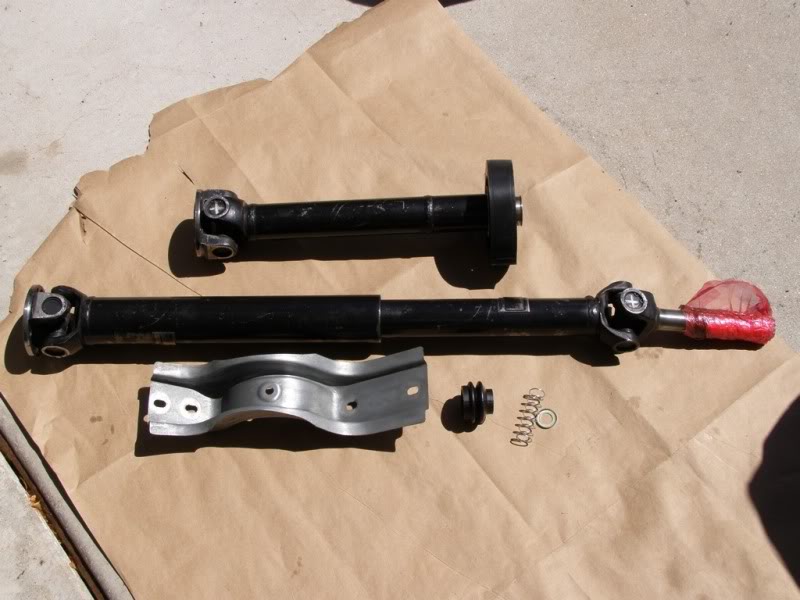
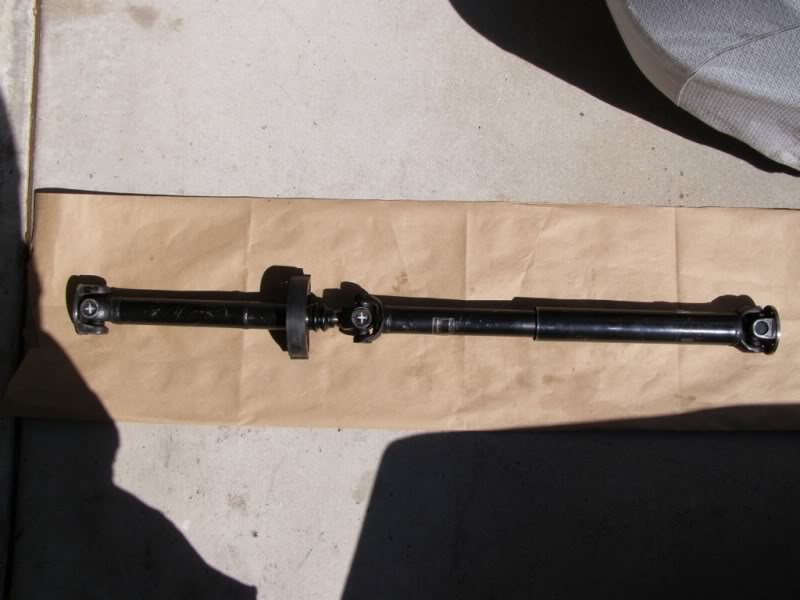
Painted the bracket black and everything is clean ready to go back on, once the new bolts get here.
Then the torque rods can go in so I can check the pinion angle.
Panhard bar was put in and the diff is now centered.
Center support bearing was replaced this weekend. Cleaned the driveshaft and Bracket.
Painted the bracket black and everything is clean ready to go back on, once the new bolts get here.
Then the torque rods can go in so I can check the pinion angle.
Thread Starter
|
Got Boost?
Joined: May 2008
Posts: 3,473
Likes: 4
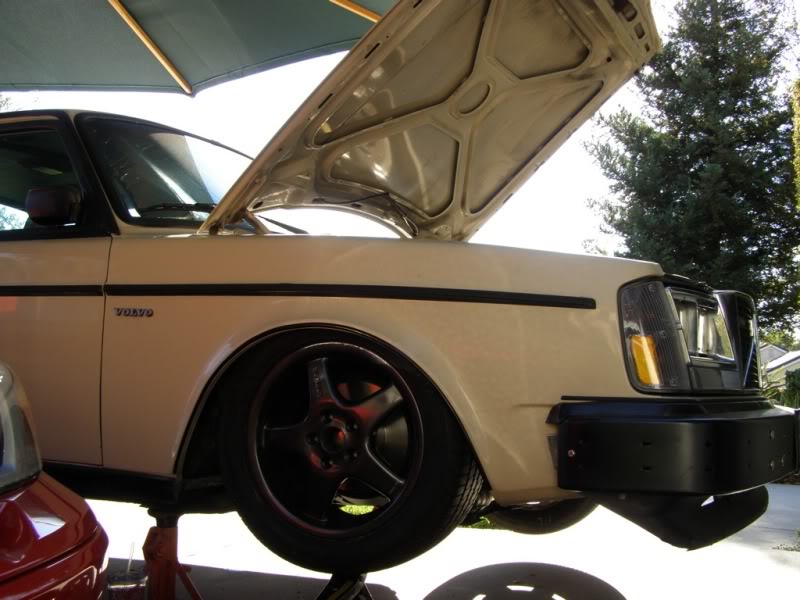
Drive shaft is in, and the rear brakes are done. Almost finished with the rear end.

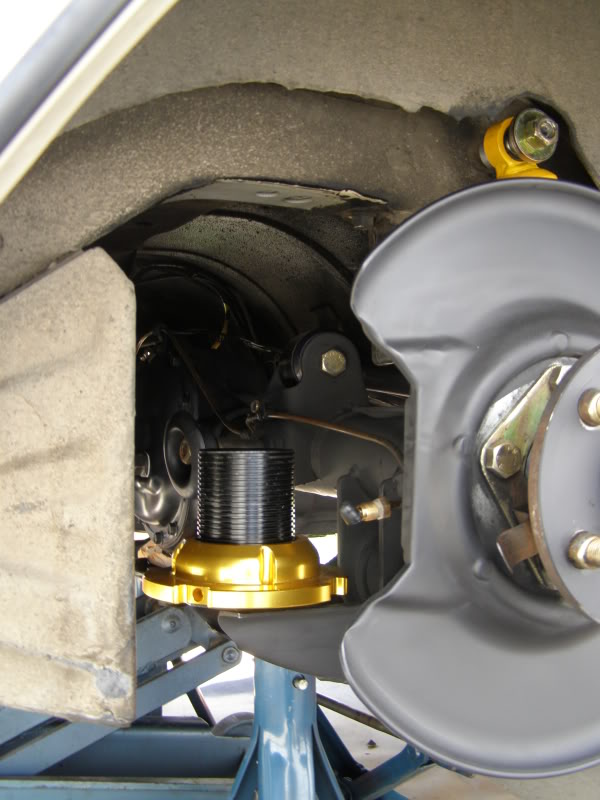
Front strut travel...
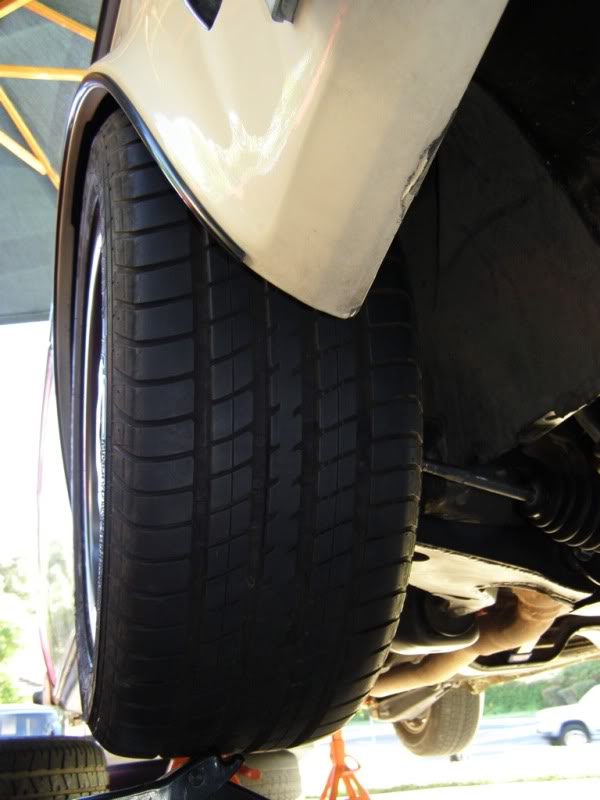
These wheels just fit with like no room to spare on the front. Have to get some test rubber on these for fitment, and spacer layout... A couple things might help... Like using an 8" front spring to move the lower perch out of the tire's way. Problem with that is the spring travel on that small of a spring is about the same as the strut. This is not ideal for the spring will reach it's block height before the bumpstop is half way compressed. Major problem there... can't go to wide with a spacer either in the front because of the fender.
They dont fit on the rear because of the rear collision bracket on the calipers. Options: remove the rear brackets and other crap to fit wide *** meat tires, or just get spacers. I like option 1 for it removes some more weight from the car. problem is the risk. Spaces will probably be ordered...
A fender roll is on it's way as this is being typed so, this will help get rid of that stupid metal in the rear, and hopefully I will only have to modify the front liners.
Ben should be sending out the front quick steer/ roll spacers as well as some 8" rear springs to try out this week. WOOT.
Finaly started the car for the first time since it was parked. Only the downpipe with stock cat is on. It is pretty quiet. I will leave the rest off till I need to get a new one.
Front strut travel...
These wheels just fit with like no room to spare on the front. Have to get some test rubber on these for fitment, and spacer layout... A couple things might help... Like using an 8" front spring to move the lower perch out of the tire's way. Problem with that is the spring travel on that small of a spring is about the same as the strut. This is not ideal for the spring will reach it's block height before the bumpstop is half way compressed. Major problem there... can't go to wide with a spacer either in the front because of the fender.
They dont fit on the rear because of the rear collision bracket on the calipers. Options: remove the rear brackets and other crap to fit wide *** meat tires, or just get spacers. I like option 1 for it removes some more weight from the car. problem is the risk. Spaces will probably be ordered...
A fender roll is on it's way as this is being typed so, this will help get rid of that stupid metal in the rear, and hopefully I will only have to modify the front liners.
Ben should be sending out the front quick steer/ roll spacers as well as some 8" rear springs to try out this week. WOOT.
Finaly started the car for the first time since it was parked. Only the downpipe with stock cat is on. It is pretty quiet. I will leave the rest off till I need to get a new one.
Thread Starter
|
Got Boost?
Joined: May 2008
Posts: 3,473
Likes: 4
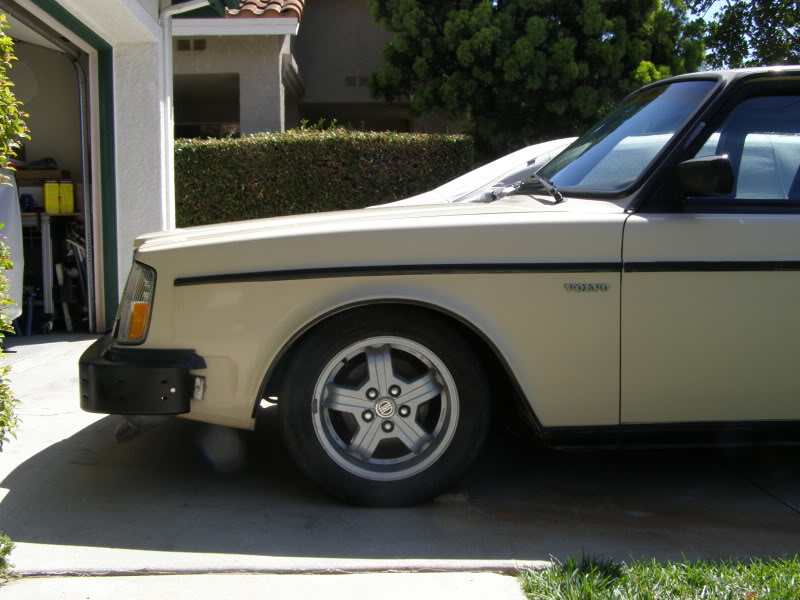
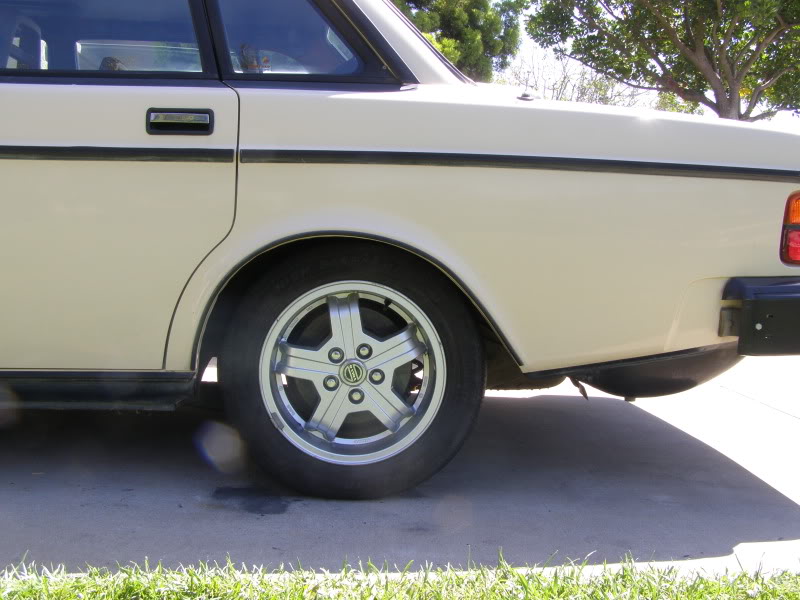
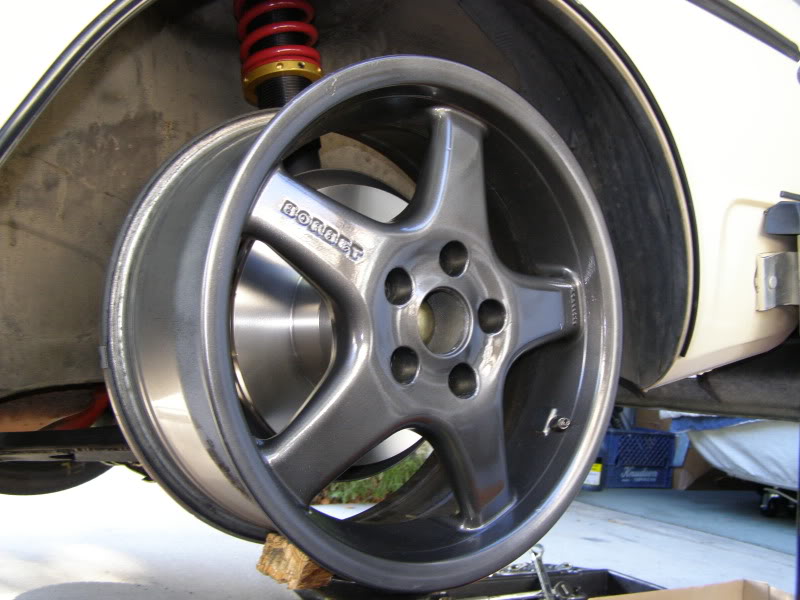
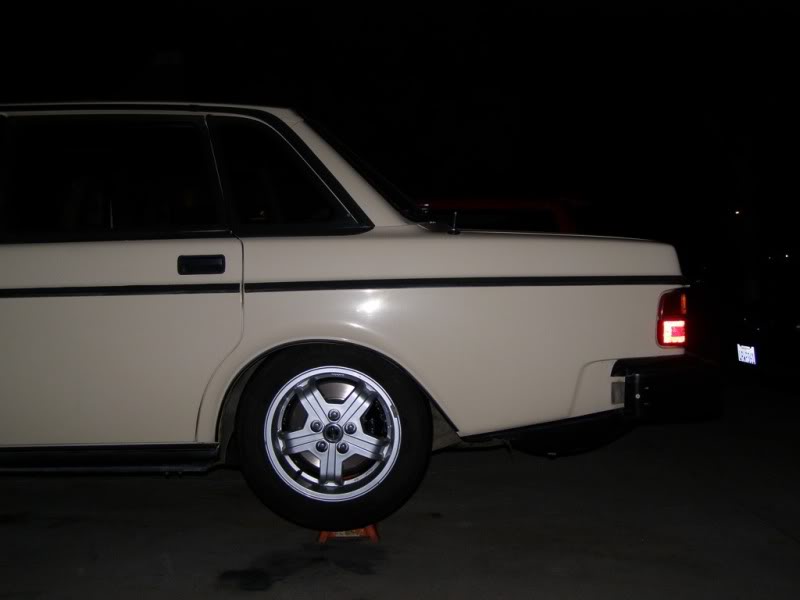
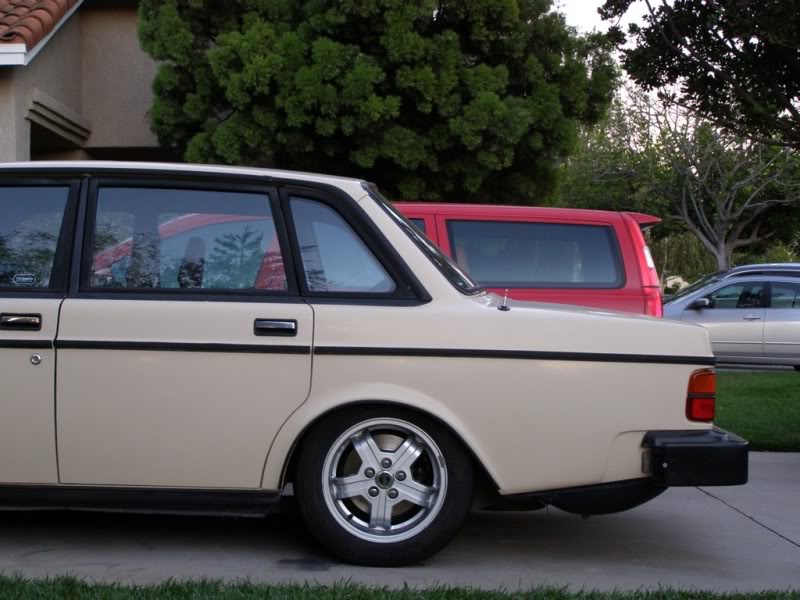
Well.. was checking fitment today with a 225/50 16 in front and rear.
Things will be done to make these wheels work, but it would be soo much simpler to put 205/50/15s on the stock rims and just drive the car.
here is what would be nice.
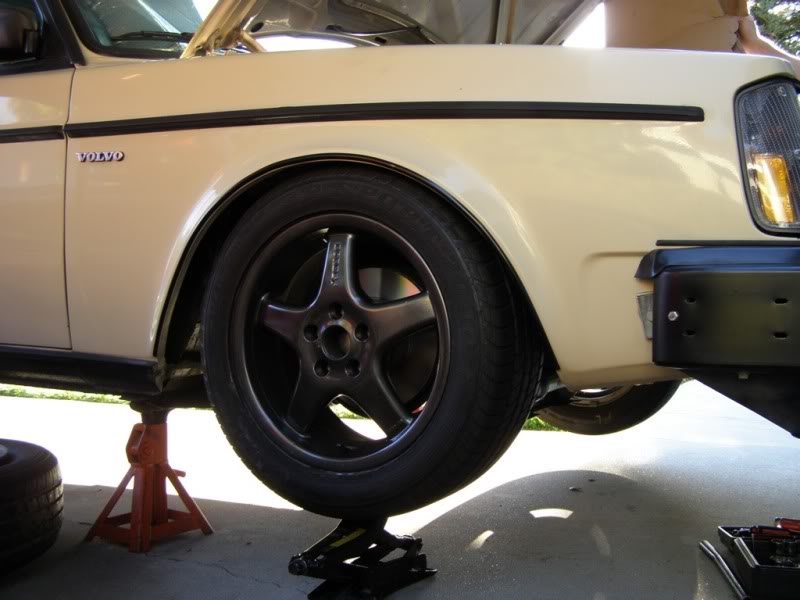
wheel liner will have to modified to make these work as well as roll the fenders, and maybe an 8" front springs, but that might not even be possible to run because of the spring travel....really need a 9" spring to work perfect but they dont make that size sring.
Also got the spacers and the 8" springs in today to try out.
Rear spings installed. still need to lower the car to see the full effect:
 \
\
Well.. A few issues that are now present. Have to figure whats going to actually work for tire size in the front. also, the rear spring issues. not sure yet on how to solve this, so time to start a threard on turbobricks to see what other people are doing interms of rear setups.
More delays...
Things will be done to make these wheels work, but it would be soo much simpler to put 205/50/15s on the stock rims and just drive the car.
here is what would be nice.
wheel liner will have to modified to make these work as well as roll the fenders, and maybe an 8" front springs, but that might not even be possible to run because of the spring travel....really need a 9" spring to work perfect but they dont make that size sring.
Also got the spacers and the 8" springs in today to try out.
Rear spings installed. still need to lower the car to see the full effect:
\Well.. A few issues that are now present. Have to figure whats going to actually work for tire size in the front. also, the rear spring issues. not sure yet on how to solve this, so time to start a threard on turbobricks to see what other people are doing interms of rear setups.
More delays...
Last edited by TIPSP; Sep 26, 2010 at 01:48 AM.
Thread Starter
|
Got Boost?
Joined: May 2008
Posts: 3,473
Likes: 4
Thanks tech.
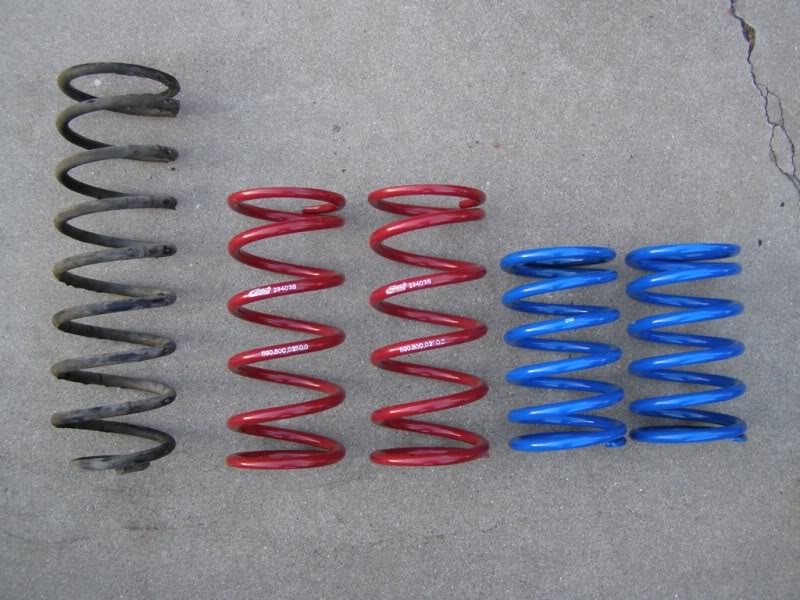
Looks like the 8" rear springs will not work.
They do provide a 3.25" drop though, which is rediculous.

The 11" springs will go back in and I will call it done for now. Eibach is releasing a 9.5" rear spring which might work a lot better.
Now, if only they made a freaking 9" front spring also. The car really want 9" in both the front and the rear.
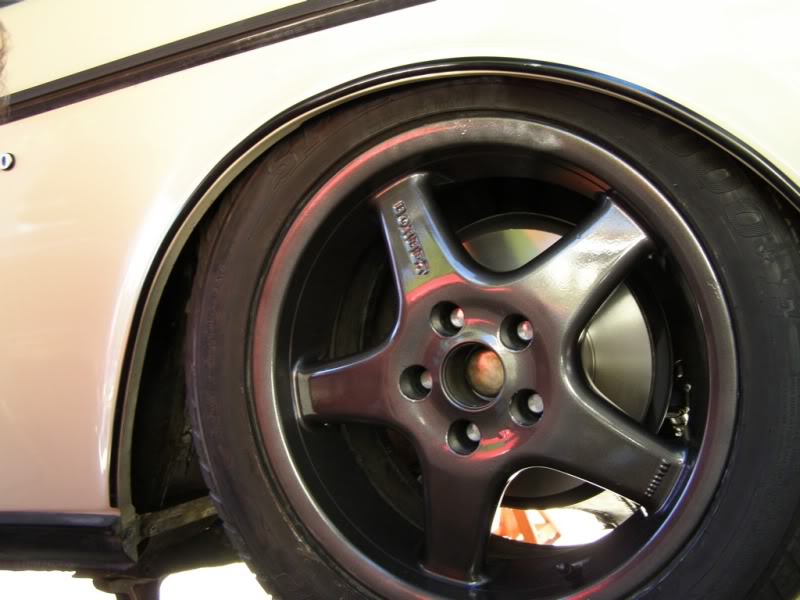
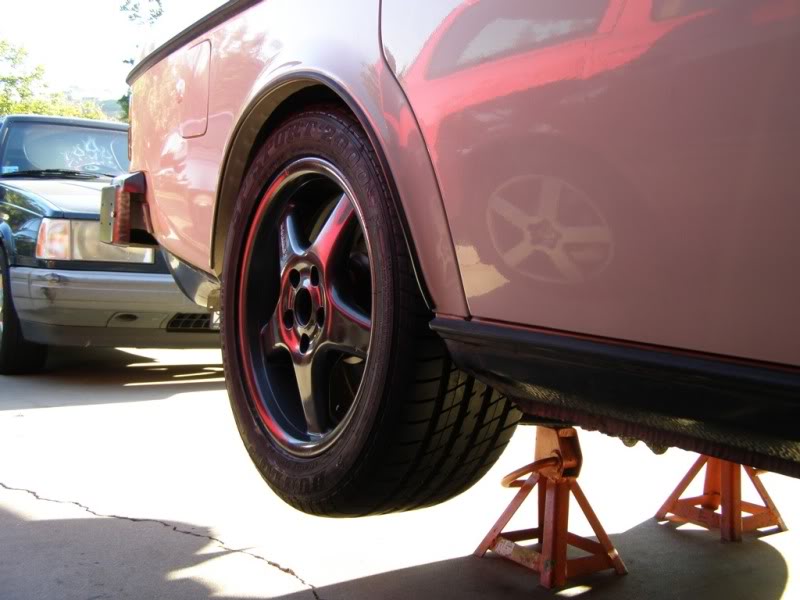
Got one spacer on for testing. Should work out really nicely.

There is still alittle angle in the wrong direction, but I will have to run this to see if it will need another .5" spacer for a better rc.
Looks like the 8" rear springs will not work.
They do provide a 3.25" drop though, which is rediculous.
The 11" springs will go back in and I will call it done for now. Eibach is releasing a 9.5" rear spring which might work a lot better.
Now, if only they made a freaking 9" front spring also. The car really want 9" in both the front and the rear.
Got one spacer on for testing. Should work out really nicely.
There is still alittle angle in the wrong direction, but I will have to run this to see if it will need another .5" spacer for a better rc.

Administrator
Joined: Mar 2009
Posts: 15,736
Likes: 36
From: Albuquerque, NM
Man, you are really trying to get that thing low. My 850 is not low and the tire was rubbing the wheel lining for a few weeks. This cut right into the sidewall of my tire, flat. No rub is any good.
Also, if you go with lower profile tires on the stock rim, that will throw your speedo way off. I think you should go up one size on the wheel, go lower profile, and keep the car at a height that will keep it clear of the tires. The 850's go from 15" to 17" wheels. The smaller the wheel, the higher the profile. Basically the tire is the same height all the way across. Example, the 15" tire at the highest point is the same as the 17" tire.
Also, if you go with lower profile tires on the stock rim, that will throw your speedo way off. I think you should go up one size on the wheel, go lower profile, and keep the car at a height that will keep it clear of the tires. The 850's go from 15" to 17" wheels. The smaller the wheel, the higher the profile. Basically the tire is the same height all the way across. Example, the 15" tire at the highest point is the same as the 17" tire.
Last edited by rspi; Sep 27, 2010 at 11:15 AM. Reason: addition
Thread Starter
|
Got Boost?
Joined: May 2008
Posts: 3,473
Likes: 4
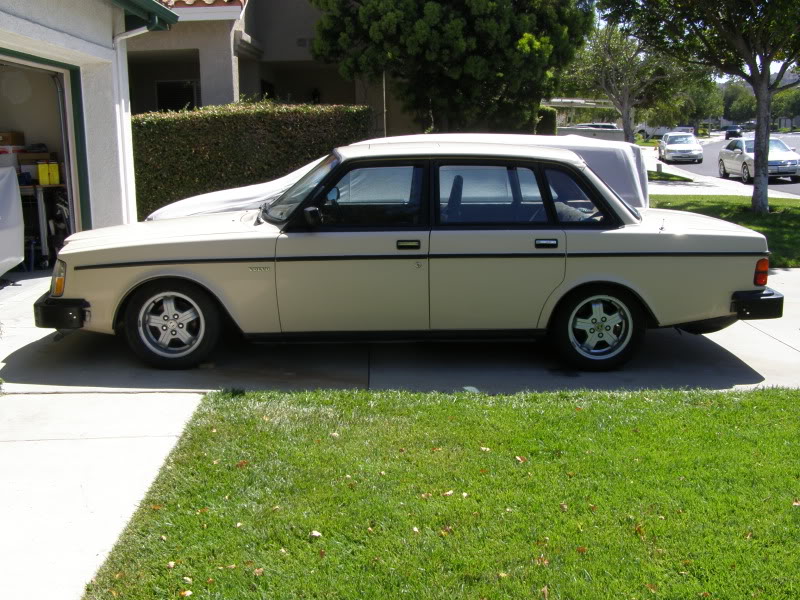
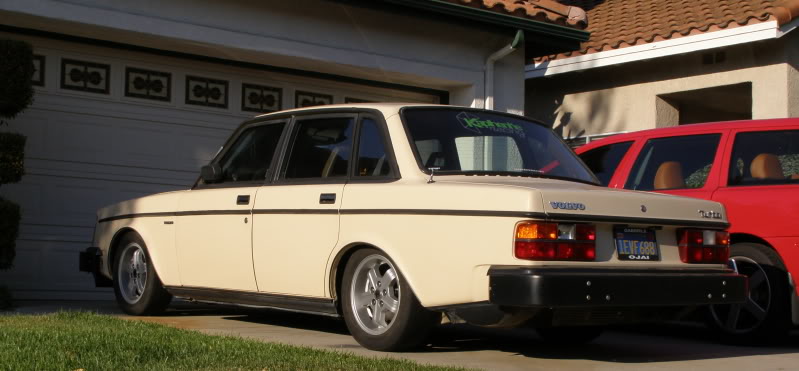
Not trying to go super low, just to where the tires are right near the fender. I wish these where 17's but they're not. I will run these or the stock rims with a new tire for now. And a smaller diameter tire would be great here for quicker acceleration and better braking and they will handle better. The 225/50s are slightly taller then the stock size 195/60s.
We just got this thing so there will be no rub anywhere when I am done.

Theses fenders have way too much lip and need to go bye bye.
We just got this thing so there will be no rub anywhere when I am done.
Theses fenders have way too much lip and need to go bye bye.
Thread Starter
|
Got Boost?
Joined: May 2008
Posts: 3,473
Likes: 4
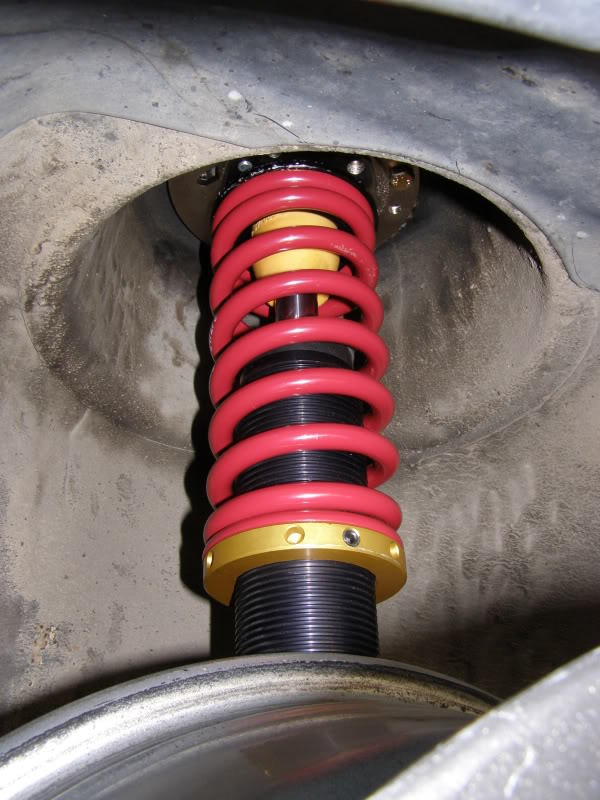
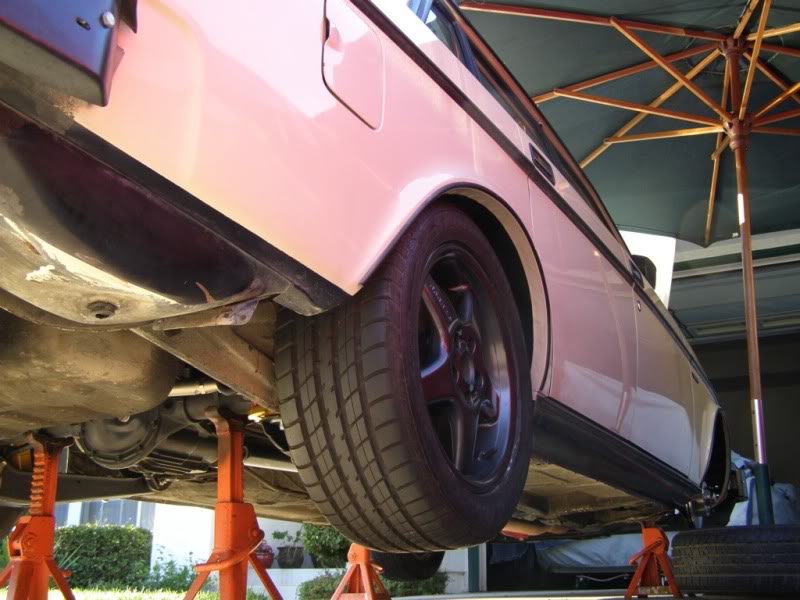
Fitted the 11" springs back into the rear.
Also, test fitted the other spacer. The front is almost done.
I think 3more weekends of work and it can be taken out for a test drive
Here it is with the 8" springs:
I am getting very excited...
Also, test fitted the other spacer. The front is almost done.
I think 3more weekends of work and it can be taken out for a test drive
Here it is with the 8" springs:
I am getting very excited...
Last edited by TIPSP; Dec 28, 2010 at 02:42 PM.
Thread Starter
|
Got Boost?
Joined: May 2008
Posts: 3,473
Likes: 4
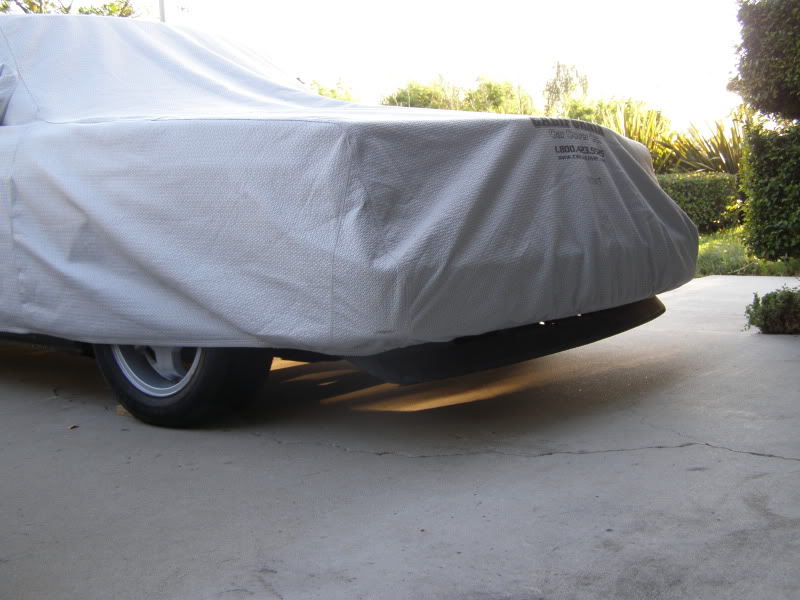
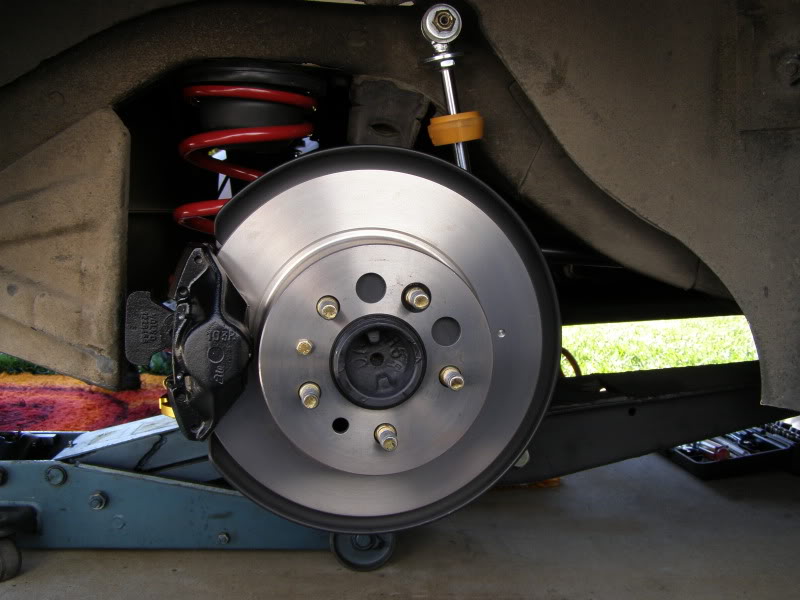
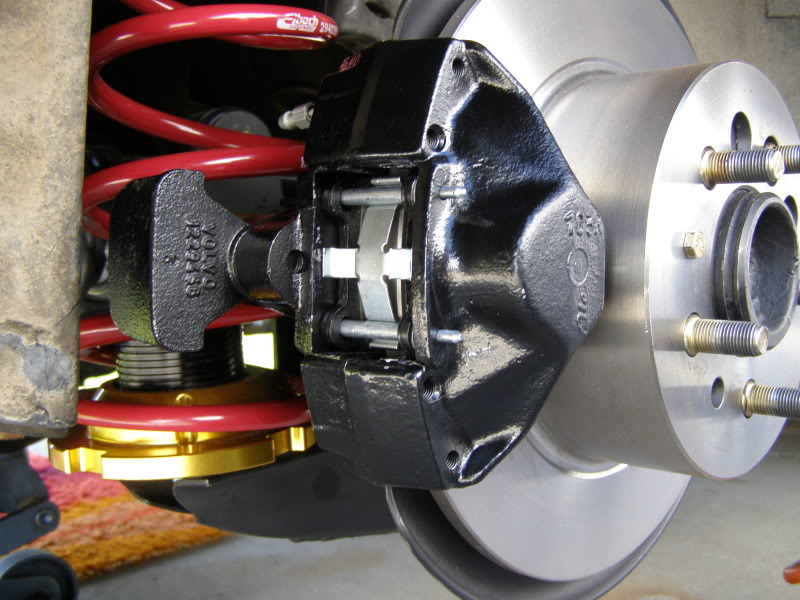
Well, it is almost done. The front is basiclly finished. Just need to insert brake pads, torque the brake lines, new caliper bolts, and then I can bleed the system. The rear has basically been finished also. Just need to swap the old nuts for the new lock nuts, and install the read bar.

Got spacers for the rear. I might be able to test drive this weekend.
Got spacers for the rear. I might be able to test drive this weekend.