
S90 Breather Box and Intake Manifold


Thread Starter
|
Junior Member
Joined: Jan 2016
Posts: 11
Likes: 0
I finally got funding to work on my S90! I knew the PCV system was clogged so I looked up some information and ordered a new breather box kit from FCPEuro. I didn't realize that the box was buried under the intake manifold, so I went to the internet once again. I couldn't seem to find pictures or videos on how to do this, so I followed the FCPEuro video on a Volvo 850. The video was pretty helpful, except for a few steps that could have really saved some time. This isn't a step-by-step tutorial, but it is a few pictures and tips that should save YOU some time.
First, make sure you have a ratchet extension (like 10") and a universal joint. I couldn't have done this without them.
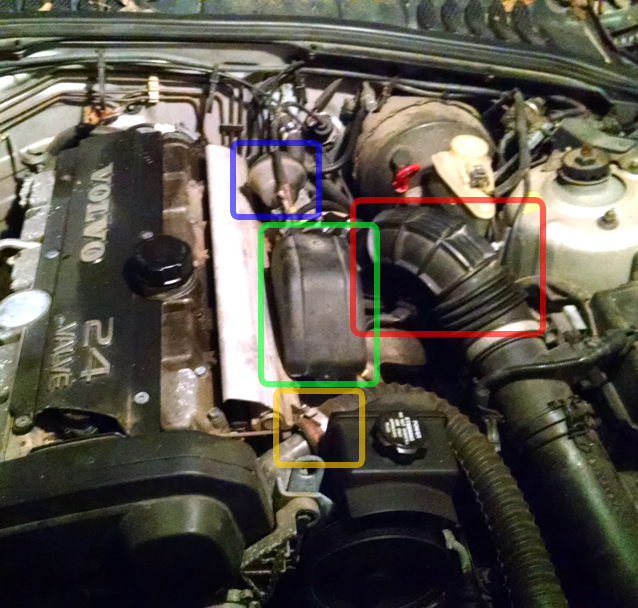
Red box is the air tube. It's easy to remove, and the flame trap is attached. There is also one connector on it to disconnect.
Green box is easy to remove too. Disconnect the throttle lines once it's removed.
Blue box is now free to take off. Don't just remove the nut on the back. Go ahead and remove the bracket that's holding it on or it will get in the way later.
Yellow box is a coolant line. Remove the line or it will get in the way when you try to remove the manifold.
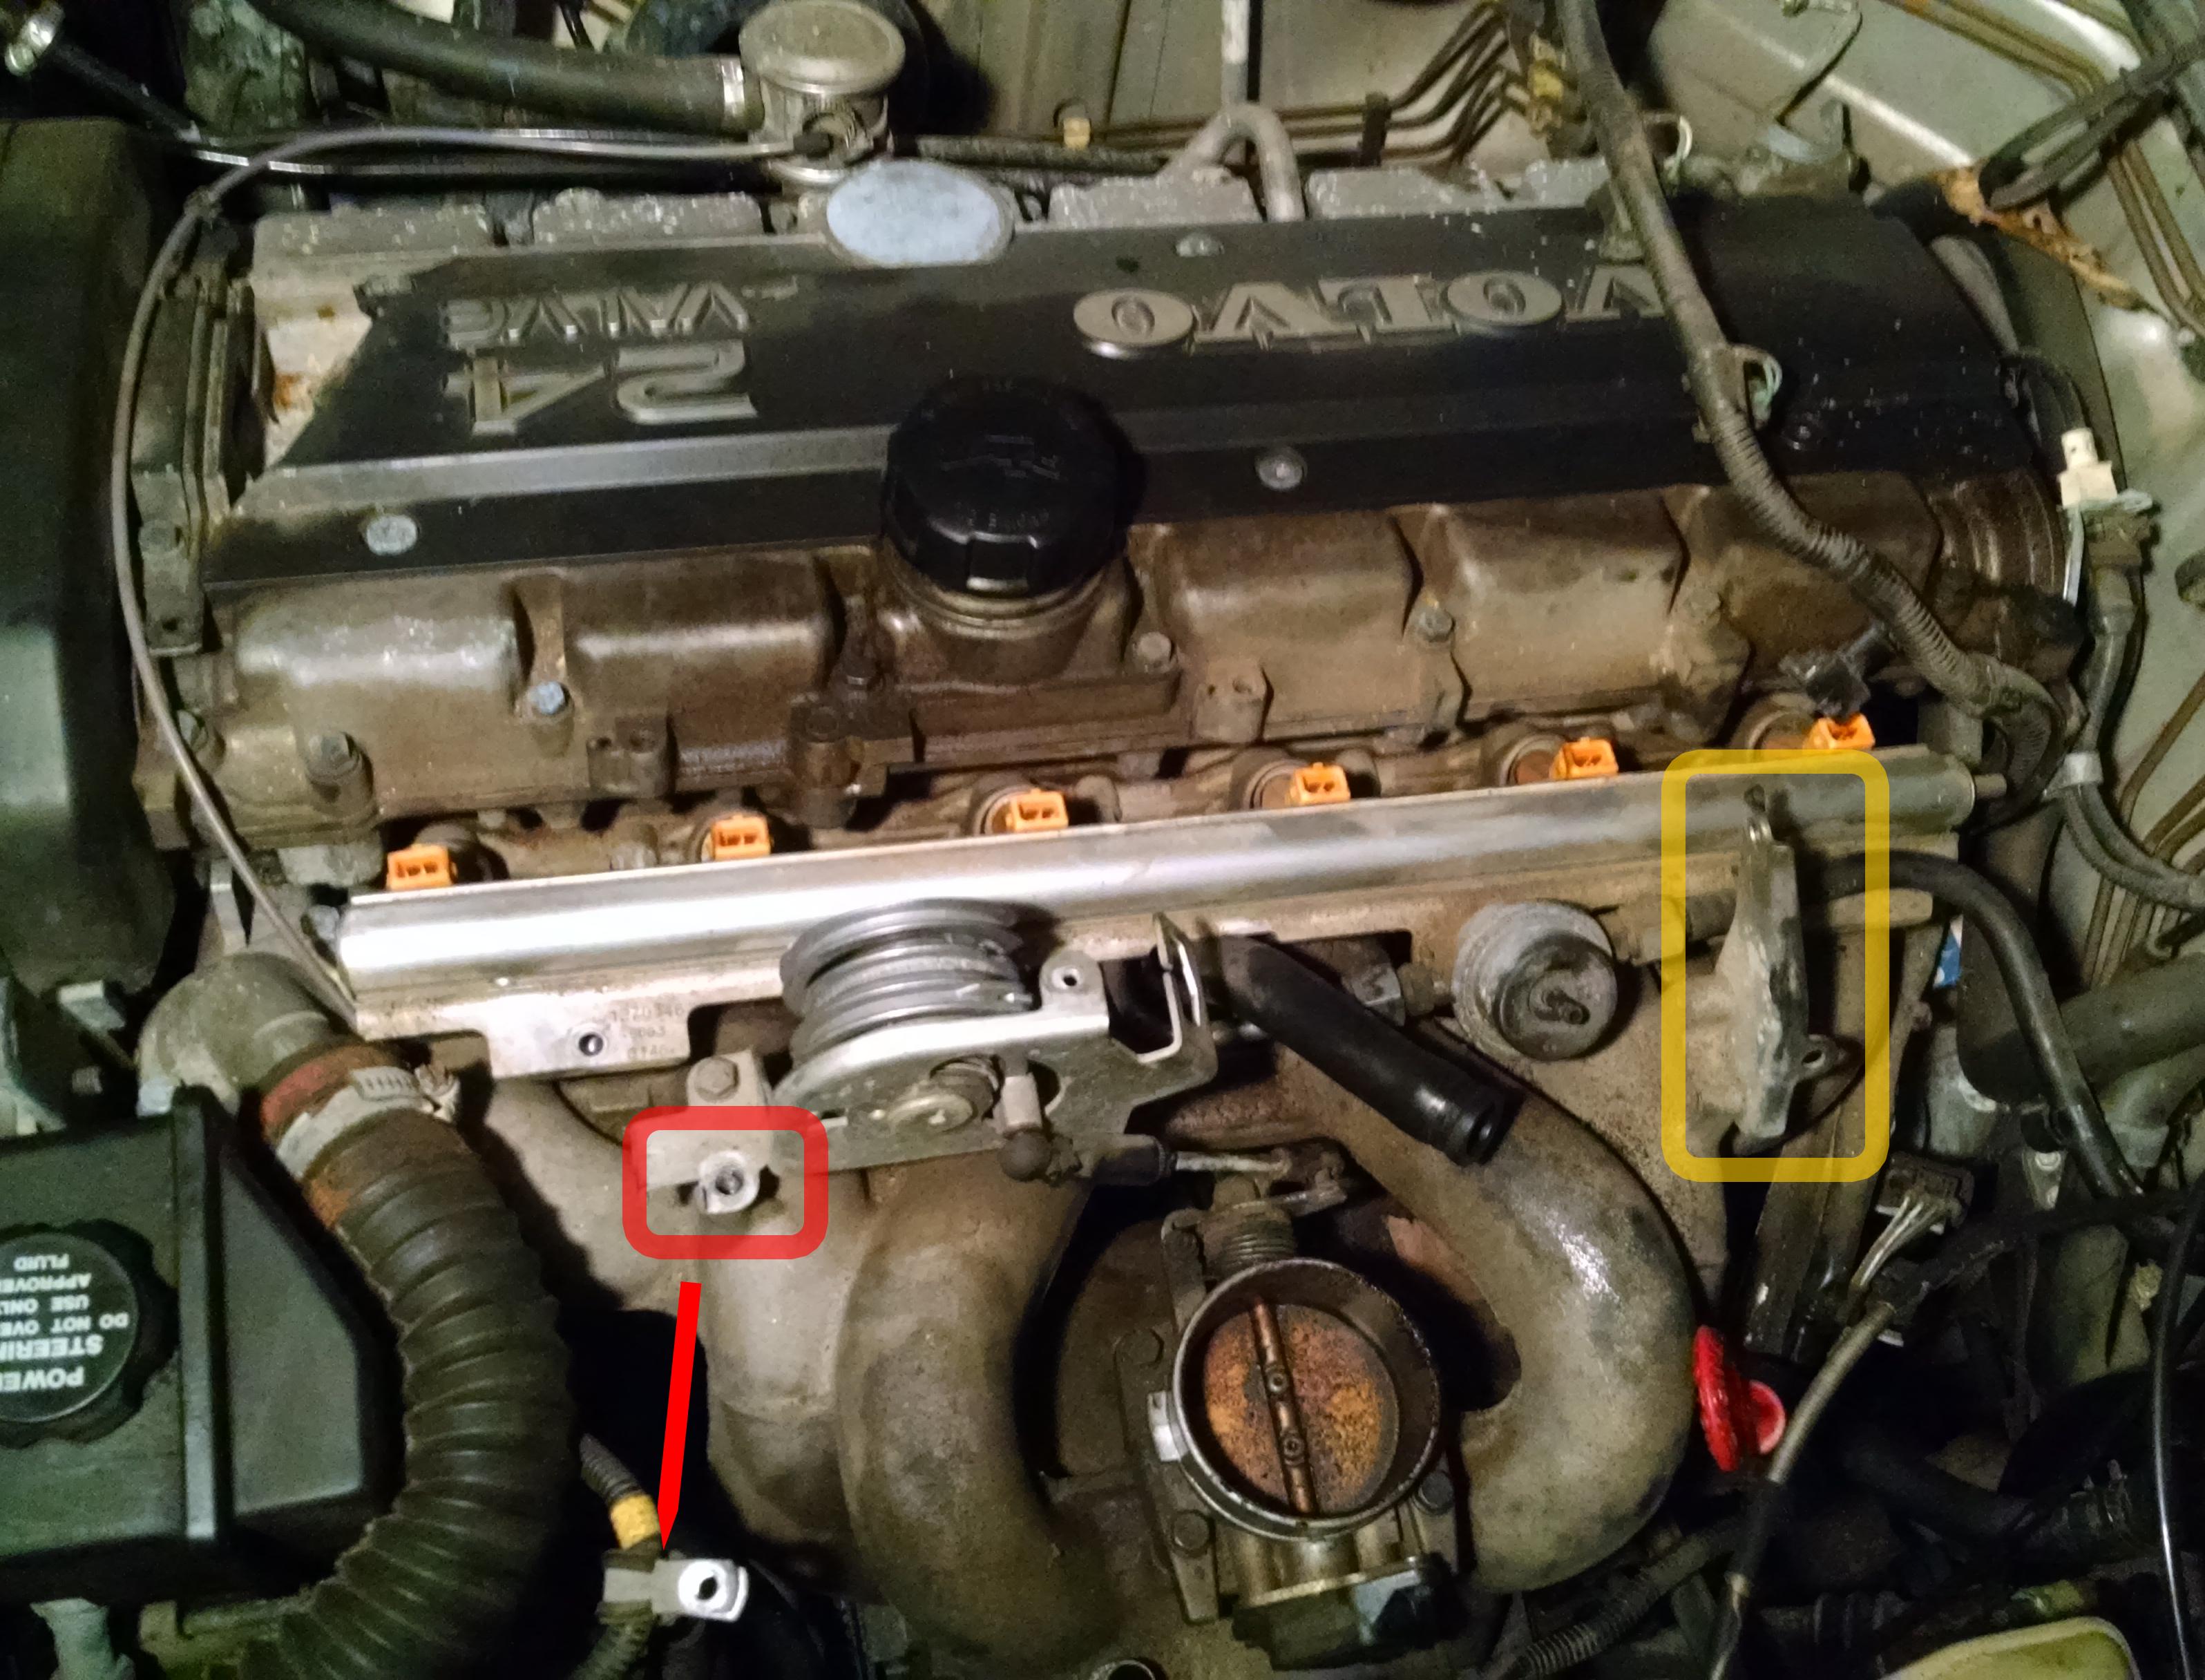
Yellow box is the bracket you should have removed. I didn't at first, so I had to remove it now.
Red box is the connector that went on the air tube. Removing the bolt here makes it easier to move out of the way.
Once you remove the fuel rail with all the injectors, it's time to remove the intake manifold. First, disconnect three connectors on the manifold. If you are standing on the driver's side of the engine bay, there is a connector on the side nearest to you and one on either side (pics below).
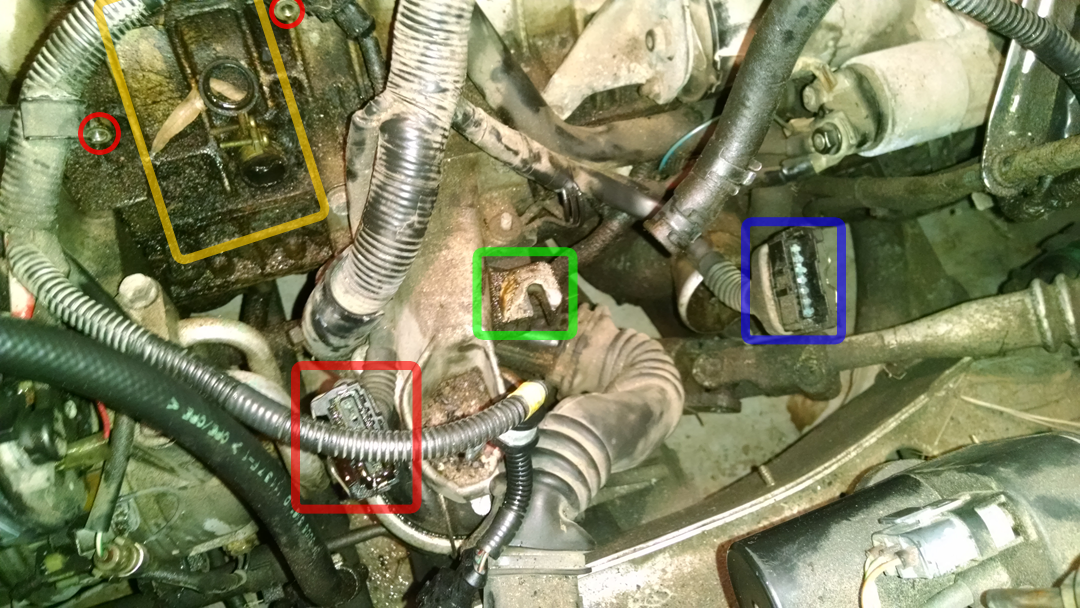
Red and Blue boxes are two of the connectors. In order to remove the manifold, you'll have to remove the bolts on the engine block (next pic) and one super secret bolt on the very bottom (green box). I was able to reach it by reaching around to the right of the manifold (still standing at the driver's side of the engine bay) to get to the bolt. It was 12mm and barely accessible.
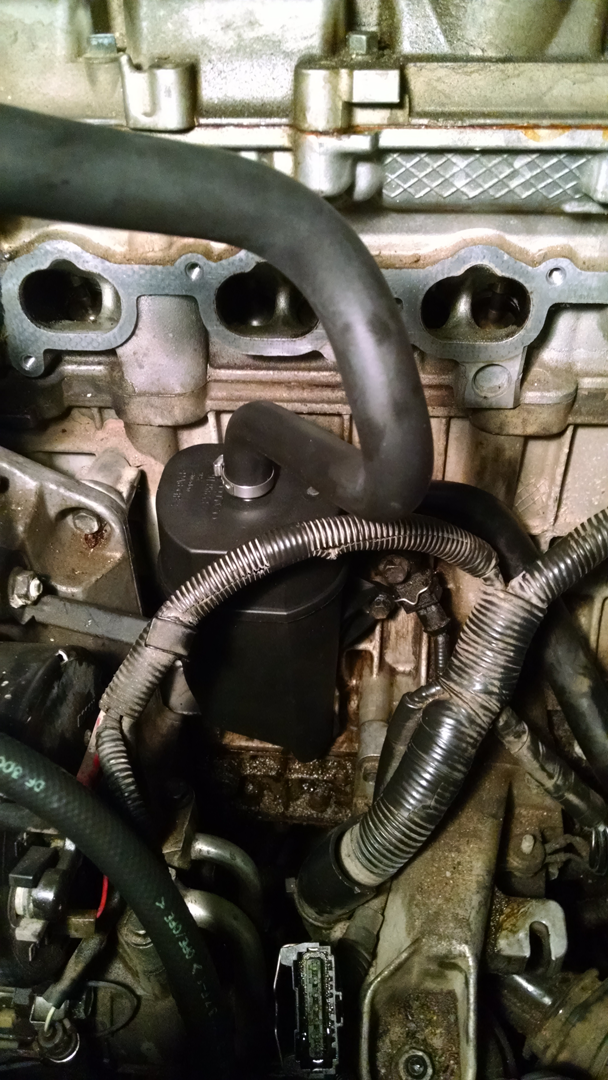
Yellow box is where the breather box is located. Two bolts and it's out. As you can see, one of the gaskets was totally off the hole, causing oil or whatever to leak all over the place (by the way, this is expected, right? is there a lot of gunk going through that box?).
Also, on that right side there is a vacuum tree. I'll post a link to the video where I cover where they are supposed to go, but there is a larger tube right below it. Don't take it off at the manifold, follow it up and remove it from it's connection point. That thing would be a b**** to re-attach if it was back in the bay.
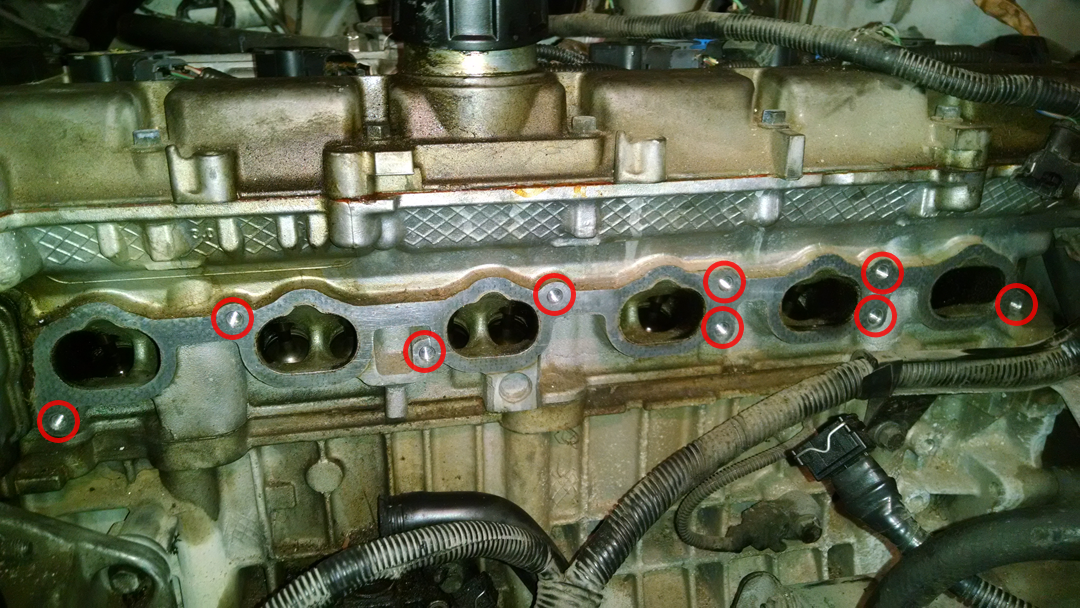
Here are the bolts going into the engine block. Some of these are super hard to see. Some suggest loosening the bottom ones and taking out the top ones, but that one over on the left MUST come out, and I really couldn't get the manifold off unless I removed them all. I had to use a universal joint and an extension on my ratchet to get that left bolt.
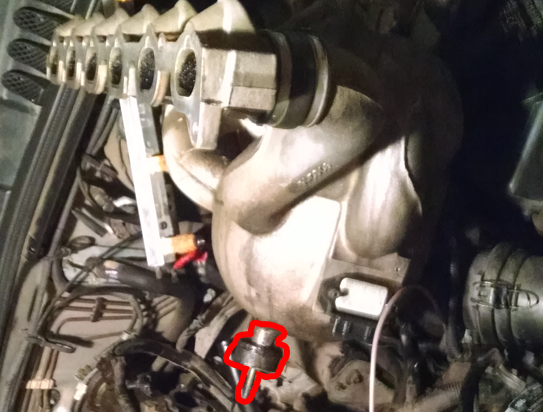
There is the bottom of the manifold and the bolt/nut I was talking about earlier.
New box installed! After that, just re-assemble and you should be good!
Here's the video of the vacuum tree. I wasn't planning on posting it or people...
If I've missed anything or done something wrong, please let me know. I'm still learning. I should be tackling the timing belt and other minor repairs soon!
First, make sure you have a ratchet extension (like 10") and a universal joint. I couldn't have done this without them.
Red box is the air tube. It's easy to remove, and the flame trap is attached. There is also one connector on it to disconnect.
Green box is easy to remove too. Disconnect the throttle lines once it's removed.
Blue box is now free to take off. Don't just remove the nut on the back. Go ahead and remove the bracket that's holding it on or it will get in the way later.
Yellow box is a coolant line. Remove the line or it will get in the way when you try to remove the manifold.
Yellow box is the bracket you should have removed. I didn't at first, so I had to remove it now.
Red box is the connector that went on the air tube. Removing the bolt here makes it easier to move out of the way.
Once you remove the fuel rail with all the injectors, it's time to remove the intake manifold. First, disconnect three connectors on the manifold. If you are standing on the driver's side of the engine bay, there is a connector on the side nearest to you and one on either side (pics below).
Red and Blue boxes are two of the connectors. In order to remove the manifold, you'll have to remove the bolts on the engine block (next pic) and one super secret bolt on the very bottom (green box). I was able to reach it by reaching around to the right of the manifold (still standing at the driver's side of the engine bay) to get to the bolt. It was 12mm and barely accessible.
Yellow box is where the breather box is located. Two bolts and it's out. As you can see, one of the gaskets was totally off the hole, causing oil or whatever to leak all over the place (by the way, this is expected, right? is there a lot of gunk going through that box?).
Also, on that right side there is a vacuum tree. I'll post a link to the video where I cover where they are supposed to go, but there is a larger tube right below it. Don't take it off at the manifold, follow it up and remove it from it's connection point. That thing would be a b**** to re-attach if it was back in the bay.
Here are the bolts going into the engine block. Some of these are super hard to see. Some suggest loosening the bottom ones and taking out the top ones, but that one over on the left MUST come out, and I really couldn't get the manifold off unless I removed them all. I had to use a universal joint and an extension on my ratchet to get that left bolt.
There is the bottom of the manifold and the bolt/nut I was talking about earlier.
New box installed! After that, just re-assemble and you should be good!
Here's the video of the vacuum tree. I wasn't planning on posting it or people...
If I've missed anything or done something wrong, please let me know. I'm still learning. I should be tackling the timing belt and other minor repairs soon!
Thread Starter
|
Junior Member
Joined: Jan 2016
Posts: 11
Likes: 0
I checked a notification on my phone when someone replied to this post, but it wasn't you perroflojo. But when I got to my laptop to respond the post was gone... Did they remove their post? Did you answer them with your post perroflojo?

Junior Member
Joined: Jun 2014
Posts: 8
Likes: 0
I did not remove my response. Maybe, the moderator does not like my log in id which translates to lazy dog.

Thread
Thread Starter
Forum
Replies
Last Post