
XC90 Cabin Air Filter replacement


Thread Starter
|
Junior Member
Joined: Dec 2009
Posts: 20
Likes: 1
I recently replaced the cabin filter on my 2005 XC90 and thought I'd practice writing up a procedure to post here. I expect that most people could figure this out on their own, but perhaps it's of use to someone.
I used to do quite a few of these for the Mitsu. Eclipse modding community, we called them VFAQs for "Visual Freq. Asked Question", but it's been a while.
So, here goes:
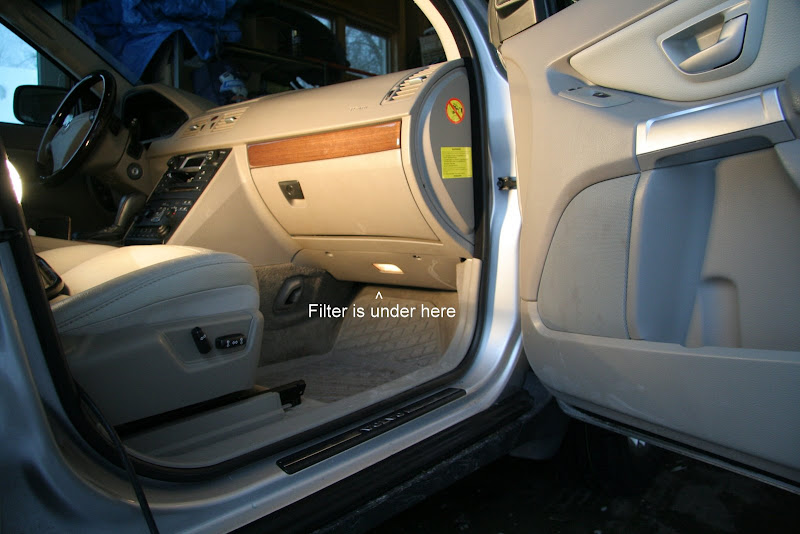
1. The cabin filter is located under the glove compartment, behind the trim panel there.
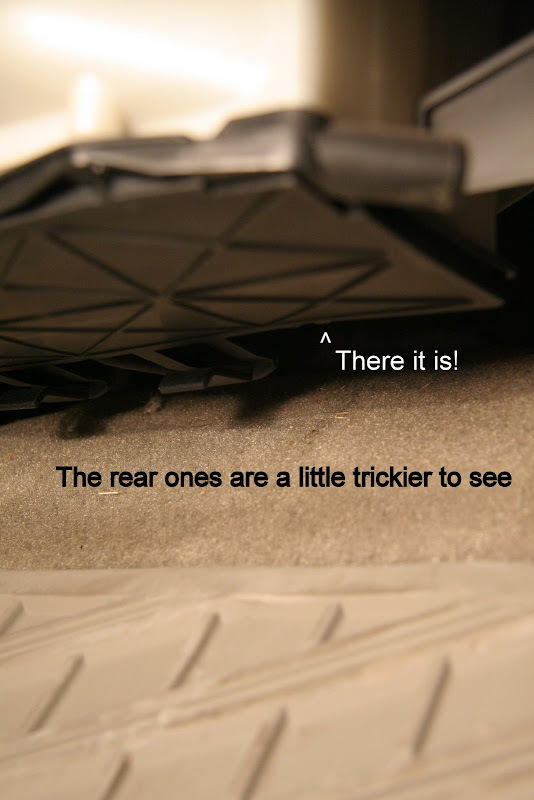
2. Remove the 2 Torx T25 screws located here.
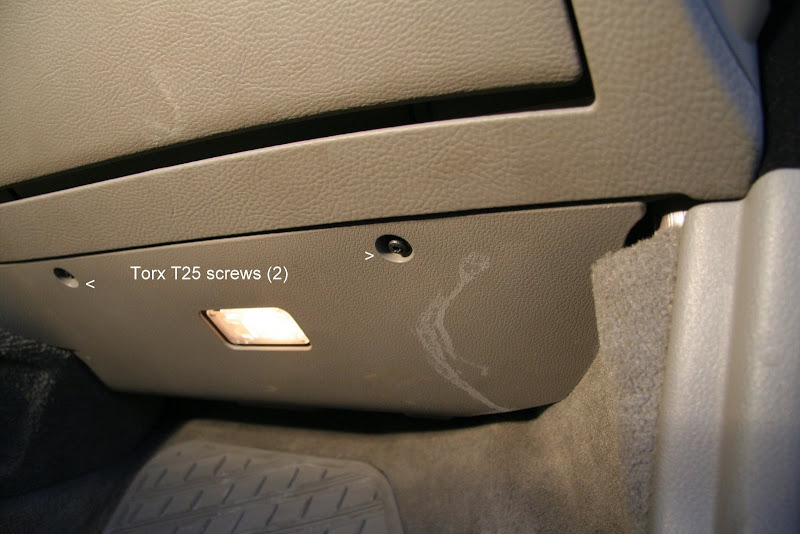
(Torx is the bit shaped like a star and typically have their size stamped like this one. If you own a Volvo, it seems, a set of Torx drivers is important)

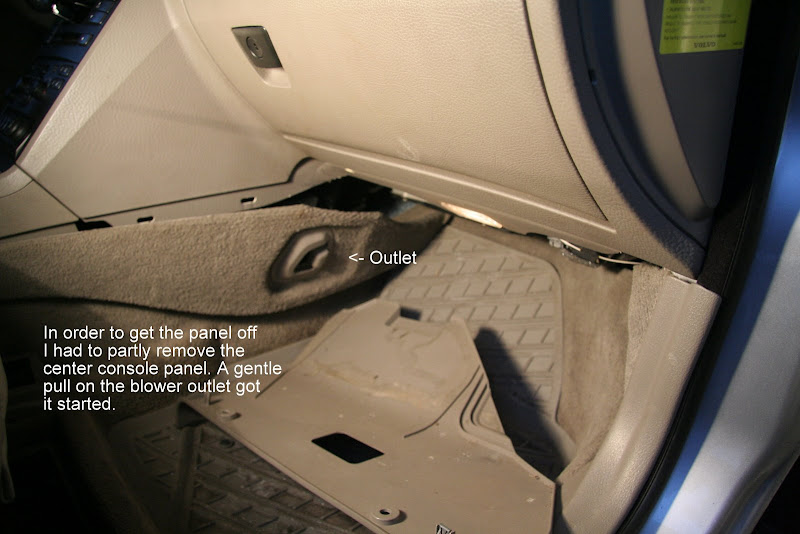
3. Remove the cover panel.
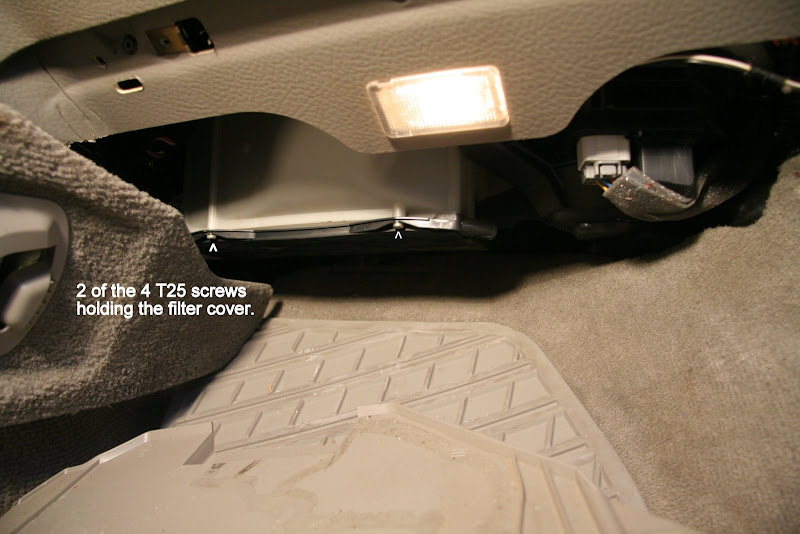
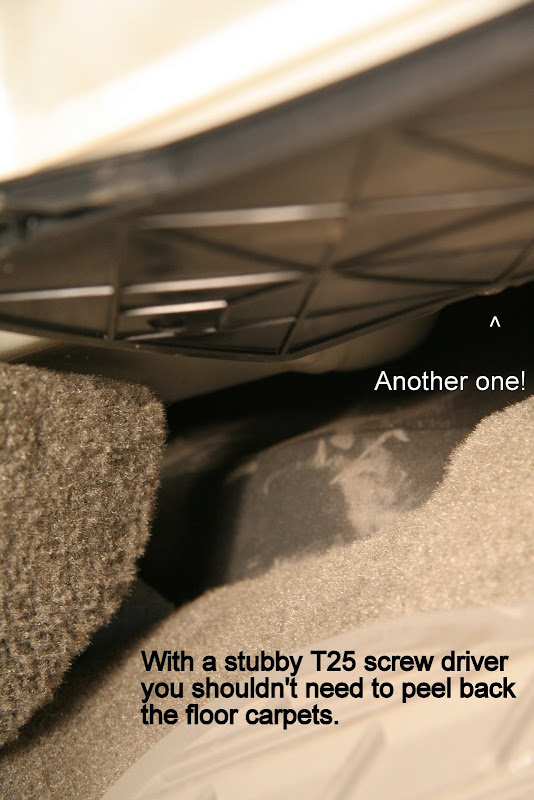
4. Remove the 4 Torx T25 screws holding the bottom of the filter enclosure in place.
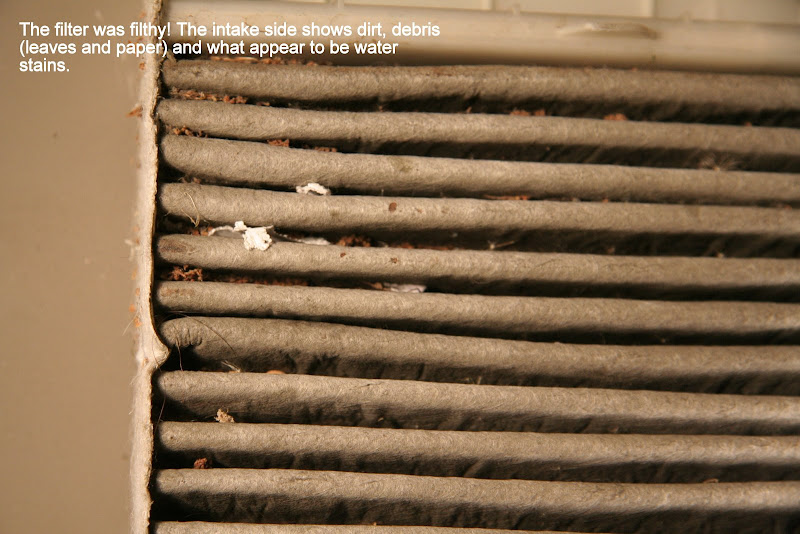
5. Withdraw the filter. It appears the charcoal backed filters have relief cuts in the sides, so you can pull it down and bend it outward. Then, pull down the next section and bend it out, etc.
6. The filters do a pretty good job as evidenced by the gunk I found on the inside.

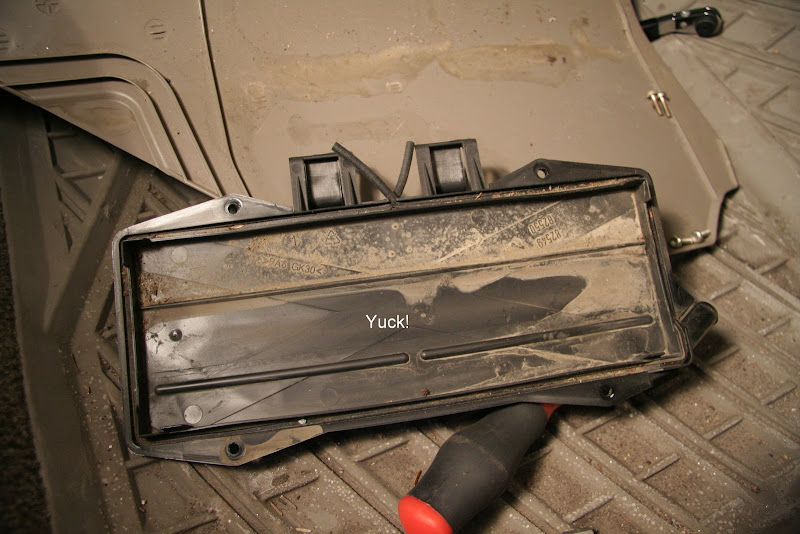
6. Clean up the filter cover. (Might as well, anything left there will just gunk up the new filter)
7. Insert the new filter. In my case, the replacement was just a plain pleated paper unit, with no pre-cut relief bends. I oriented the filter to fit the same way as the one I pulled out and crammed it in there trying to do as little mashing as possible. Once it got past a certain point, it slid right in.
8. Close up the air filter lid and re-affix the cover panel being careful not to crack any mounting clips or tabs on the center console cover.
Done. You'll soon be breathing daisy fresh air, feeling better and looking sexier. (and be somewhat richer for having done it yourself...)
Dirk
I used to do quite a few of these for the Mitsu. Eclipse modding community, we called them VFAQs for "Visual Freq. Asked Question", but it's been a while.
So, here goes:
1. The cabin filter is located under the glove compartment, behind the trim panel there.
2. Remove the 2 Torx T25 screws located here.
(Torx is the bit shaped like a star and typically have their size stamped like this one. If you own a Volvo, it seems, a set of Torx drivers is important)
3. Remove the cover panel.
4. Remove the 4 Torx T25 screws holding the bottom of the filter enclosure in place.
5. Withdraw the filter. It appears the charcoal backed filters have relief cuts in the sides, so you can pull it down and bend it outward. Then, pull down the next section and bend it out, etc.
6. The filters do a pretty good job as evidenced by the gunk I found on the inside.
6. Clean up the filter cover. (Might as well, anything left there will just gunk up the new filter)
7. Insert the new filter. In my case, the replacement was just a plain pleated paper unit, with no pre-cut relief bends. I oriented the filter to fit the same way as the one I pulled out and crammed it in there trying to do as little mashing as possible. Once it got past a certain point, it slid right in.
8. Close up the air filter lid and re-affix the cover panel being careful not to crack any mounting clips or tabs on the center console cover.
Done. You'll soon be breathing daisy fresh air, feeling better and looking sexier. (and be somewhat richer for having done it yourself...)
Dirk


Junior Member
Joined: Sep 2010
Posts: 2
Likes: 0
From: United States
Thanks to this great and very reliable post. My brother is also planning to change on his Volvo's acc cabin filter but he don't know how to do it. Luckily, I found this post with great shots and instructions to do it. Thanks again for sharing it.


Thread Starter
|
Junior Member
Joined: Dec 2009
Posts: 20
Likes: 1
@mge_1: Bad smells are usually from mold or mildew which has formed in the ducting. It's odd that it goes away when the A/C is on, but it's possible that the cold air is diminishing the odor. I've had good luck, and a couple of people I've recommended it to have also, with spraying a disinfectant (like Lysol) into all the air vents and letting it sit overnight. This seems to kill a lot of the mold spores which, I think, cause the stink. The filters I got were from Volvo Parts, Accessories and Performance Specialist Since 1963. (I think this is the one Cabin Pollen Air Filter Element P2 S60 V70 XC70 S80 XC90)
@stonepa: I think so. My dad has a 2008 XC70, but I haven't replaced that filter. The filter I linked doesn't show that it's compatible with the '08+ MY, though.
@stonepa: I think so. My dad has a 2008 XC70, but I haven't replaced that filter. The filter I linked doesn't show that it's compatible with the '08+ MY, though.


Member
Joined: Dec 2017
Posts: 69
Likes: 5
What a great write up! Luv the pictures!!!! So many neglected cabin air filters,...personally I believe that neglected cabin air filters lead to overheated blowers and that e module that controls the blower motor itself. I would also add that a flexible shaft works (Generally about 3 bucks in the 1/4 inch size at any auto store.) really well with removing those cabin air filter screws. AND I would add don't retighten them too much, sometimes you can feel them hit, kind of like where they used to be or some kind of set in the plastic, try too give em just a little snugness too much and the cover will break. If any doubts too loose is safer. And remember to check the drain tube, cause moving stuff around in that area can easily dislodge the tube. And again speaking of that tube, blow out any critters that have made it their home, as well as the battery vent tube is easily blocked by critters as well! Thanks!!!!!!
Member
Joined: Dec 2017
Posts: 69
Likes: 5
Bad smells are usually from collected stuff. Unfortunately all Volvos can collect crap from the outside in the bottom of the air box and then resulting in a blocked drain and or collected water also under the carpets as well. Cleaning out the air box is a real pain, high pressure air, small tubes connected to the end of the wifes Electrolux or m�l�e, don't get caught,.... I recently purchased a 01 XC70 and it had about a full inch of putrefied pine needles and leaves in the air box, was able to get most of it out when I removed the blower. But what surprised me the most was when I removed the front screen and the other plastic things near the windshield wipers were the inlets were fully plugged up as well. Only visible from the outside after the cover was removed. Fortunately I was able by working from the outside and removing the blower again from the inside,...to get the majority of crap out. I still know some stuff got stuck in the heater radiator, but I live with that as compared with removing the whole air box, which is a pain considering the age of the plastic and everything likes to break if it gets tweaked the wrong way.

Thread
Thread Starter
Forum
Replies
Last Post
edahlgren
Volvo S80
7
Oct 21, 2010 06:24 PM