
Rebuild Progress


Thread Starter
|
Senior Member
Joined: May 2005
Posts: 230
Likes: 0
From:
Hey...it's been a few months since I've posted on here. I ended up needing to have the block bored out, ended up going to OS2 pistons, and finally got the block back from the shop just last weekend. Spent most of last week painting everything in my house...coffee tables are perfect for painting a block i've learned! So did pretty much everything using POR15 engine enamal.
Before
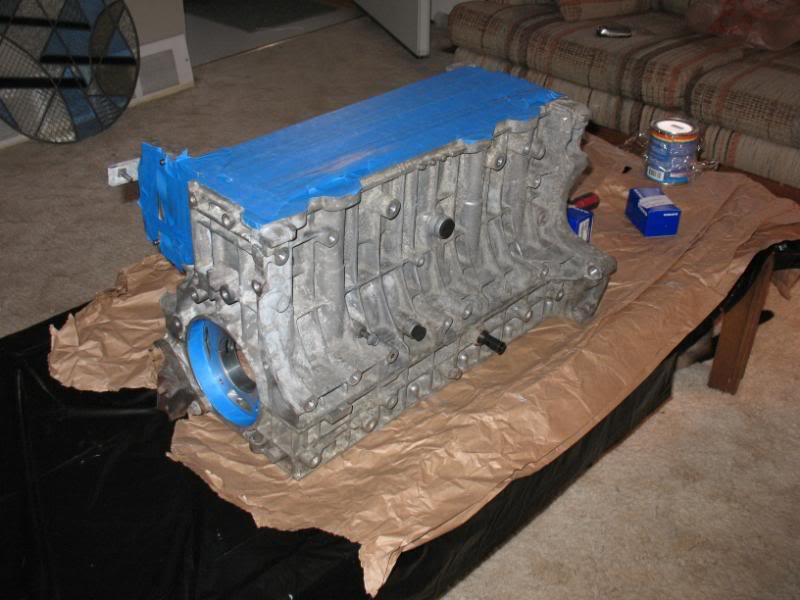
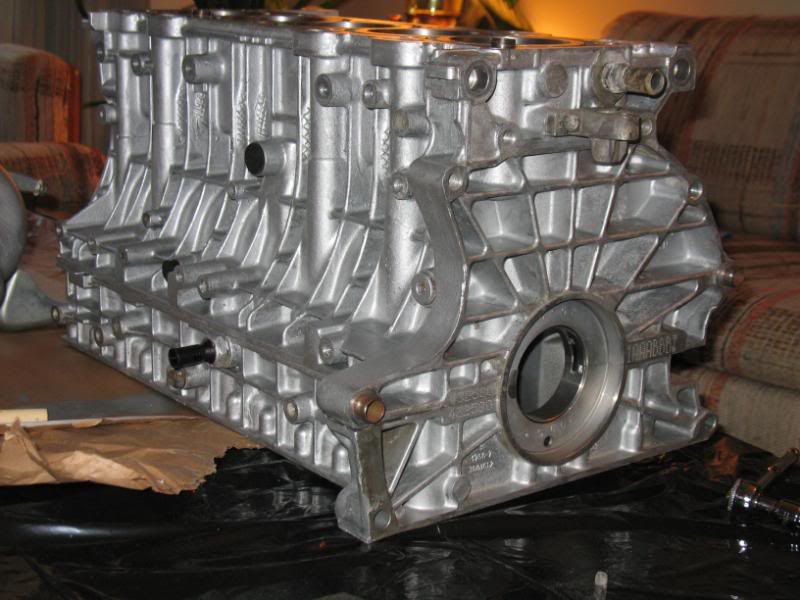
After Paint
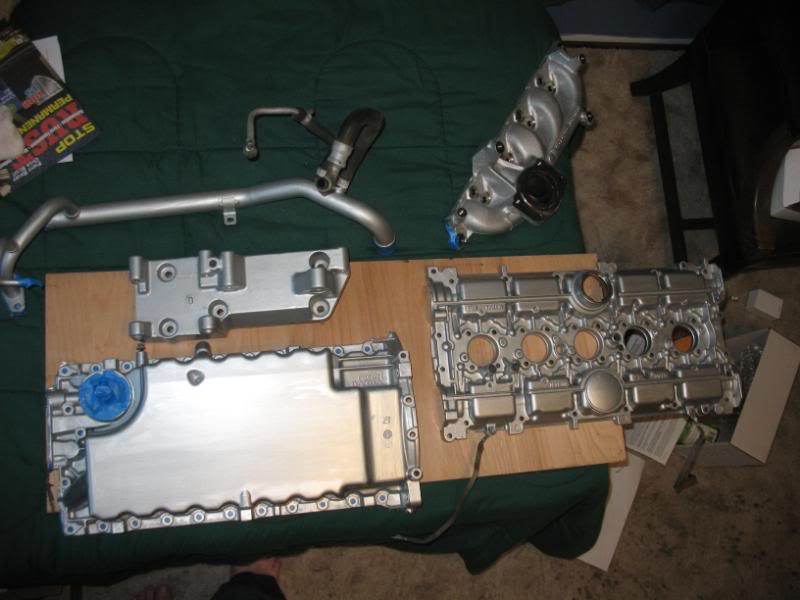
So this weekend is time to make some progress actually putting stuff backtogether for a change... It's taken waaay too long...mostly to save up cash for all the unexpected stuff that's popped up, but i think I have most of what i need now...just a matter of time.
Last night, I got the main bearings and crank put in, as well as sealing the 2 halfs of the block. I'm hoping i used enough of the gasket material...it said a thin layer put on w/ a foam roller would work... Guess i'll find out soon enough
Lower half w/ new bearings
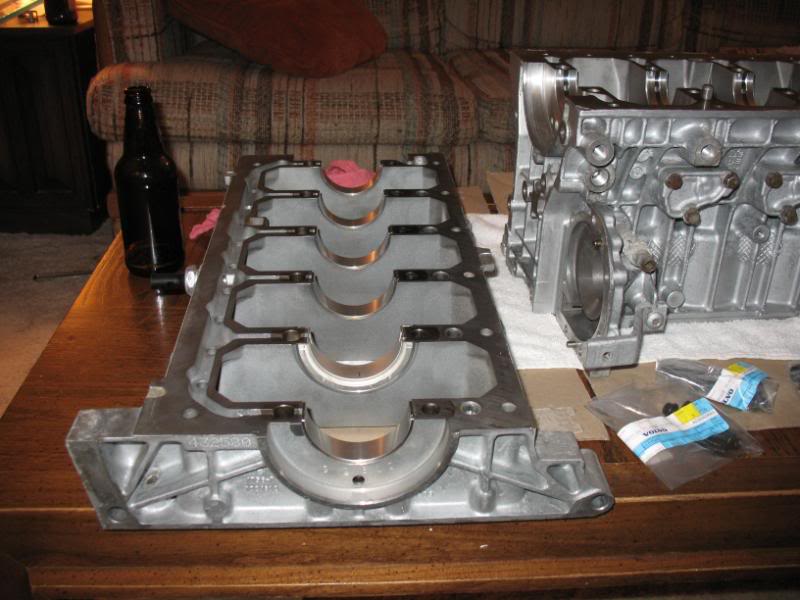
Upper half...new bearings w/ assembly lube gunked on...
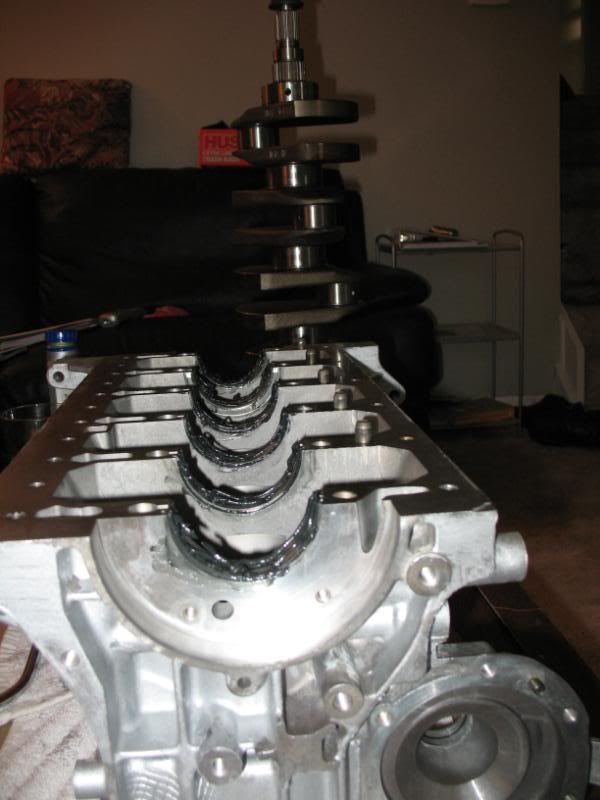
Ready to go back out into the garage...
Today, i opened and cleaned up the oil pump then installed that with new seals and gasket...
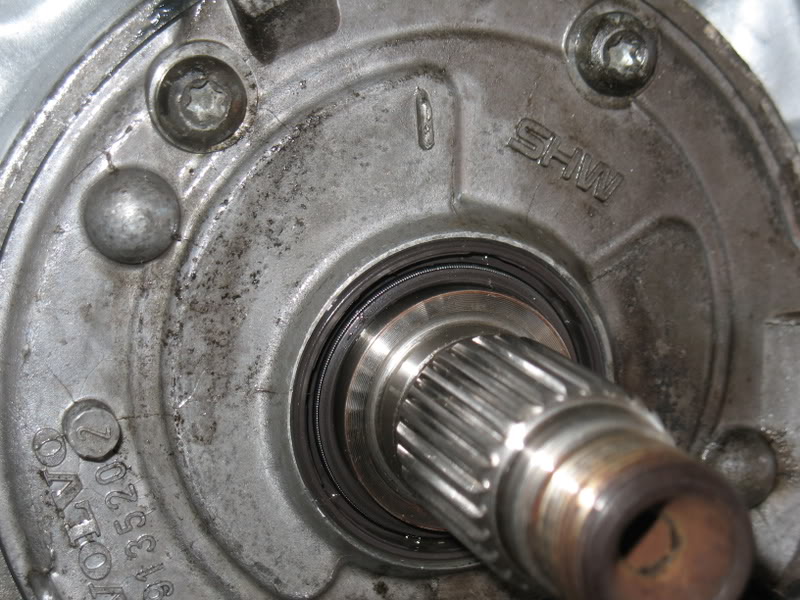
Not sure if i put the Front Crankshaft oil seal on the right way...I'm pretty sure i have it flipped around the wrong direction. Anyone know if the section that is flat OR the section that you can see the spring should be facing away from the engine?
I think this is wrong...you can see the spring inbetween the seal grooves facing away from the engine...
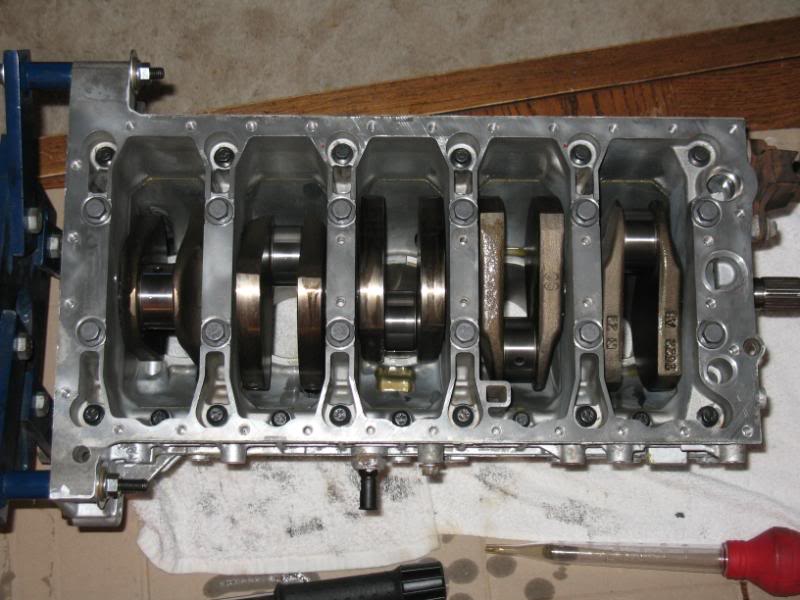
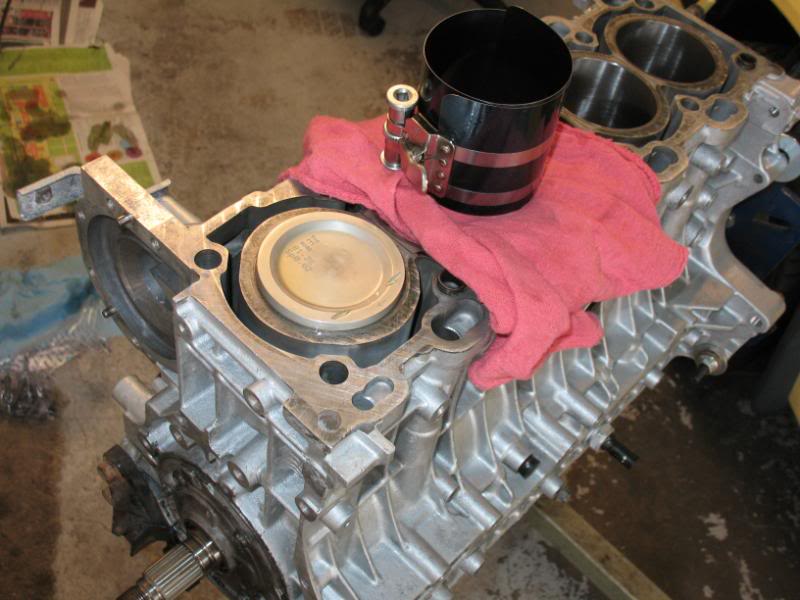
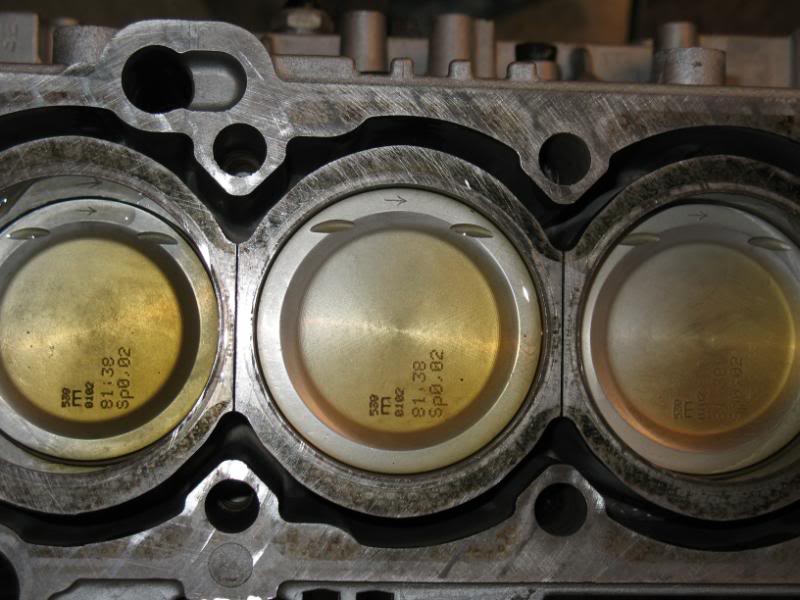
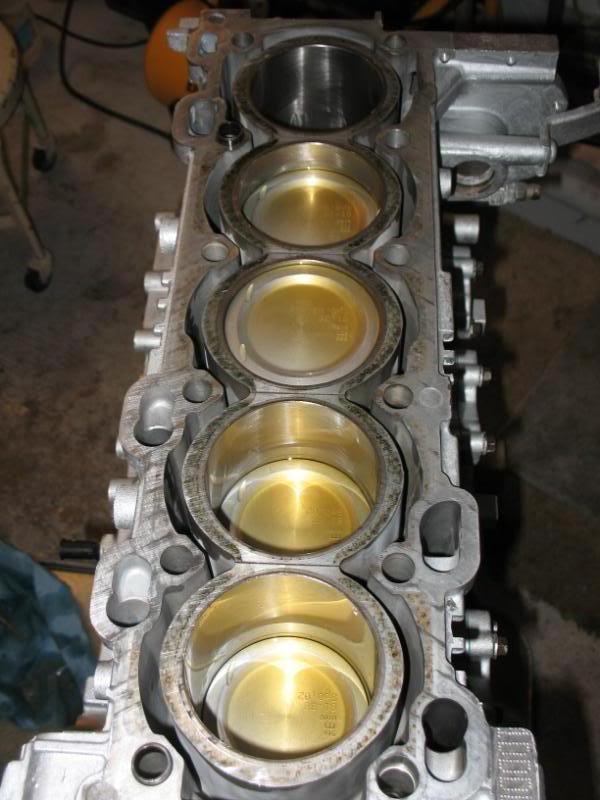
I figure that's easy enough to fix, so moved onto putting the new pistons in, along w/ new bearings for those too. T
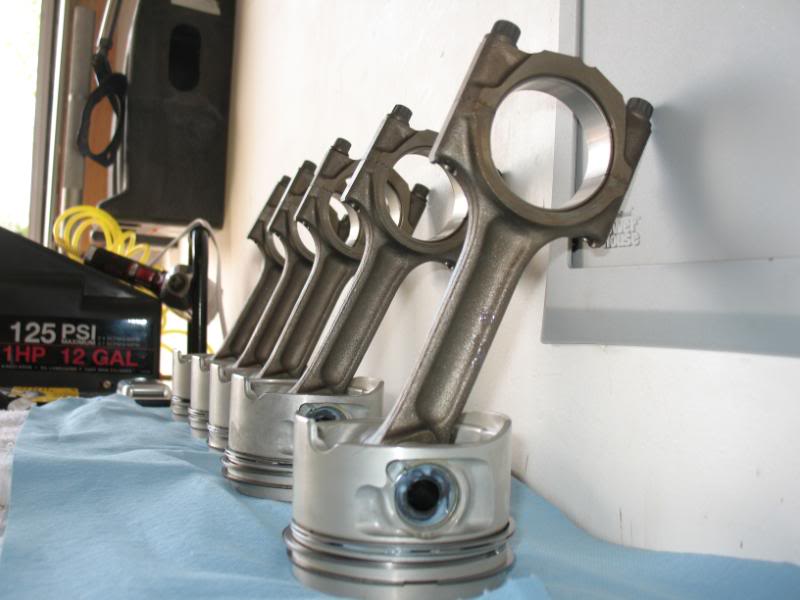
his is the first time i've ever installed a piston, so took me a while to figure out how to use the ring compressor correctly, but after doing the first, the last 4 were cake.
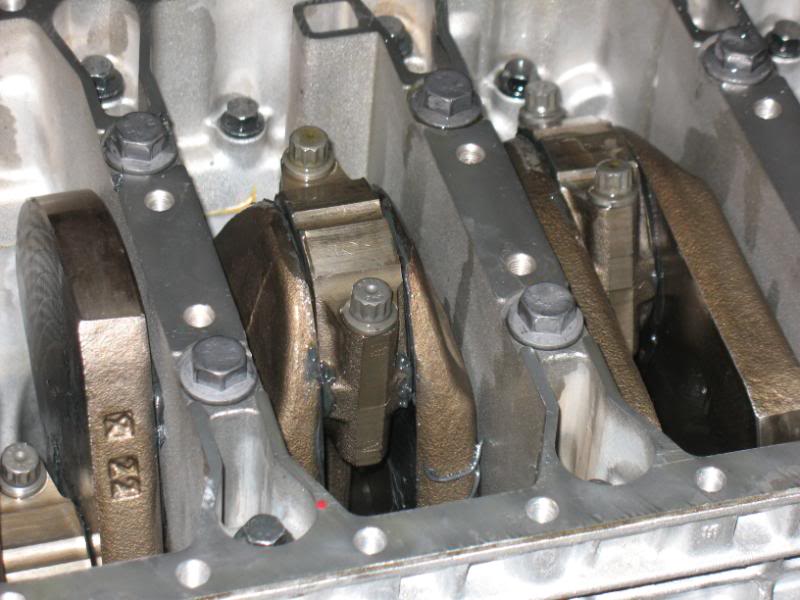
Connecting rods w/ assembly lube
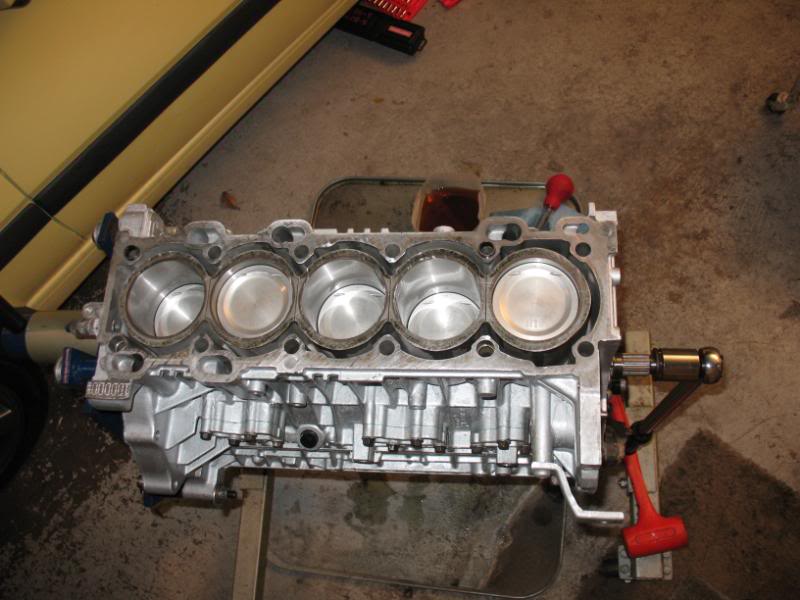
So tomorow gonna tackle the oil pan, and probably put the head back on if i can get someone to help hold it to torque it down. Oh yea..also wanted to double check piston/valve clearance... had the head decked when i had the valve job done...the block didn't need decking...just wanna be extra sure nothing crashes on the first startup.
More to come later...
Before
After Paint
So this weekend is time to make some progress actually putting stuff backtogether for a change... It's taken waaay too long...mostly to save up cash for all the unexpected stuff that's popped up, but i think I have most of what i need now...just a matter of time.
Last night, I got the main bearings and crank put in, as well as sealing the 2 halfs of the block. I'm hoping i used enough of the gasket material...it said a thin layer put on w/ a foam roller would work... Guess i'll find out soon enough
Lower half w/ new bearings
Upper half...new bearings w/ assembly lube gunked on...
Ready to go back out into the garage...
Today, i opened and cleaned up the oil pump then installed that with new seals and gasket...
Not sure if i put the Front Crankshaft oil seal on the right way...I'm pretty sure i have it flipped around the wrong direction. Anyone know if the section that is flat OR the section that you can see the spring should be facing away from the engine?
I think this is wrong...you can see the spring inbetween the seal grooves facing away from the engine...
I figure that's easy enough to fix, so moved onto putting the new pistons in, along w/ new bearings for those too. T
his is the first time i've ever installed a piston, so took me a while to figure out how to use the ring compressor correctly, but after doing the first, the last 4 were cake.
Connecting rods w/ assembly lube
So tomorow gonna tackle the oil pan, and probably put the head back on if i can get someone to help hold it to torque it down. Oh yea..also wanted to double check piston/valve clearance... had the head decked when i had the valve job done...the block didn't need decking...just wanna be extra sure nothing crashes on the first startup.
More to come later...

Thread Starter
|
Senior Member
Joined: May 2005
Posts: 230
Likes: 0
From:
ORIGINAL: Maxbaby
Most impressive. Keep up with the posts. What has this cost you so far?
Most impressive. Keep up with the posts. What has this cost you so far?
Labor:
3 angle Valve Job & Porting ~600
Turbo Rebuild ~400
Engine Cleaning/Inspection/Boring/crank polish... 500
Parts:
Main & Rod Bearings ~200
OS2 Pistons w/ Rings ~400
hardware (headbolts, Rod bolts, exhaust studs, nuts, etc...) at least 300 so far could easily be 4 or 450...this has been a big killer
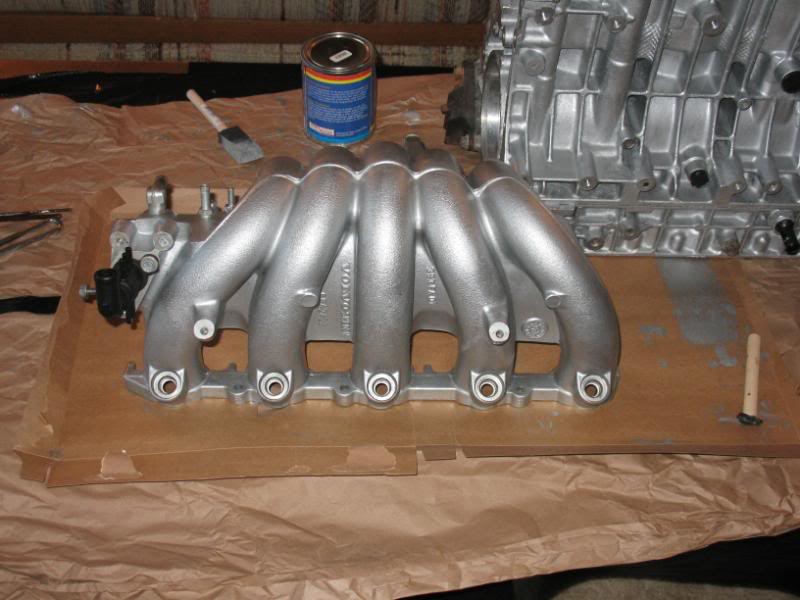
S60 style exhaust Manifold ~300
Seals/gaskets ~ 100
Water pump 80
timing belt stuff (tensioner,pulley,...) 150
i didn't intend on getting this far into it when i first started (originally was just gonna swap an auto for another auto transmission, plus do a few seals)... but it kinda spirialed out of control once i pulled the head and checked my piston and cylinder wall measuremetts.. Figureed if i was going this far, might as well go for broke... So spending all the extra cash definitly slowed the project to a crawl...
At this point i just want to double and triple check everything to make sure there's no stupid mistakes... Not a project i want to do anytime soon again.


Senior Member
Joined: Jul 2006
Posts: 205
Likes: 0
From: Near Ararat, Victoria, Australia
I'm most impressed with your self-belief in tackling a complex job such as this.
It looks to be coming along well - and the photos are great.
Like Tech says, the seal is back to front but, all things considered, I reckon you've really done well to date.
Keep the pictures coming and also keep all of us forumists informed of your progress.
Good luck!
It looks to be coming along well - and the photos are great.
Like Tech says, the seal is back to front but, all things considered, I reckon you've really done well to date.
Keep the pictures coming and also keep all of us forumists informed of your progress.
Good luck!
Thread Starter
|
Senior Member
Joined: May 2005
Posts: 230
Likes: 0
From:
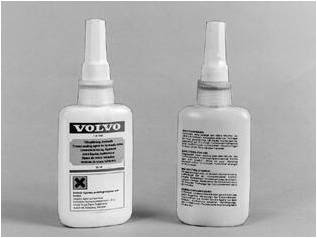
I was just taking a look at the VADIS program, and came across a section on 'sealing micro enclosed screws'. Never heard of this before, and i definitely don't have any of the Thread seal stuff they mention...Unless this is something i can pickup at any auto parts store.
Have you ever used this before Tech?
Here's what it says on the writeup:
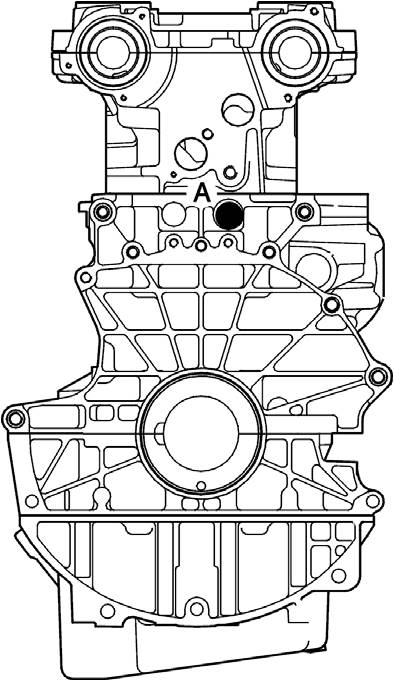
Then it shows the locations of the screws...looks like water or oil connections use this stuff.
Exhaust Side
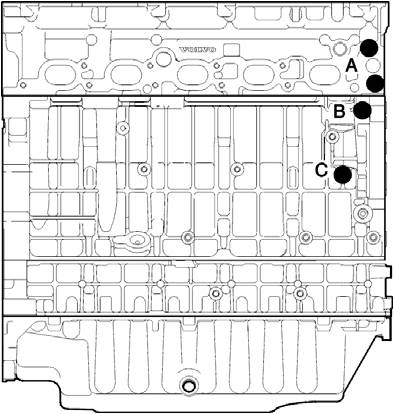
Intake Side
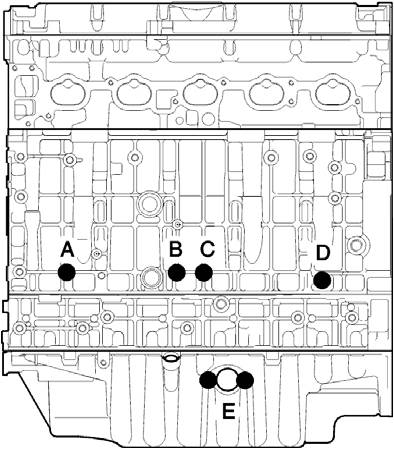
Engine Front
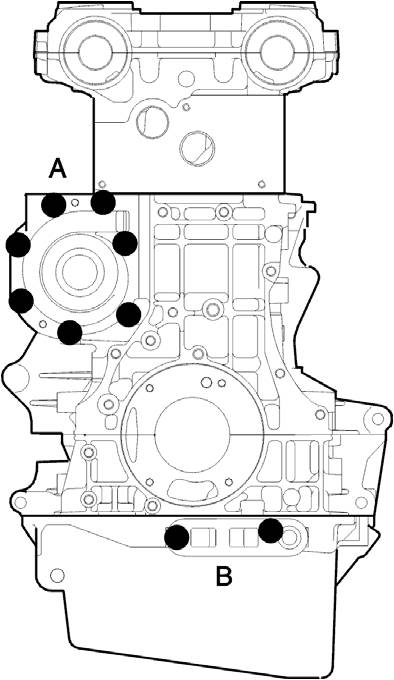
Engine Rear
Have you ever used this before Tech?
Here's what it says on the writeup:
Note! Micro-enclosed screws are used where it is
necessary to have a strong seal. Loose screws
are replaced or sealed with new sealing
compound. Sealing compound "HYDRAULIC
THREAD SEAL" has P/N 11 61 056-5 and sealing
must be carried out according to the instructions
on the packet.
The following pages show the screws to be
sealed with "HYDRAULIC THREAD SEAL" and
their location.
Sealing compound
"Hydraulic thread seal"
P/N 11 61 056-5
Use brush and/or packet spout to apply
sealing compound to screws.
Exhaust Side
Intake Side
Engine Front
Engine Rear
Thread Starter
|
Senior Member
Joined: May 2005
Posts: 230
Likes: 0
From:
So what's the best way to put that front crankshaft seal on? It's a lot harder when installing it the correctway 
I tried putting the seal in the oil pump then installing the oil pump onto the block, but the inner lips just seem to fold over and the spring pops out.
Similar results when i install the oil pump first and try to squeeze the seal inbetween the pump / crank...
Everything is lubed up with plenty of oil...
Gonna try to get something thin inbetween the seal/crank in a little while...need to take a brake for a bit after fighting w/ this for the last 30 minutes...

Senior Member
Joined: Dec 2007
Posts: 517
Likes: 1
From: Renfrew ON.
Hey now,
I'm guessing that it is probally a product that is made by Loctite as the company that I work for makes adhesive tape for a number of other companes, including 3M, and we package their products accordingly.
Appearance is everything.
Chances are if you were to try and purchase this from the dealer [:'(]they would be looking for an arm and a leg $$$$$.
If Loctite is used buy the big 3 on production lines in North America, and the world over for that matter, then I would 'go with what you know' [sm=smiley20.gif].
[sm=icon_cheers.gif]

Senior Member
Joined: Sep 2006
Posts: 5,340
Likes: 11
From: IPS, MA
A superb job indeed, and I found the source of your drive & motivation which I circled in red.
JPN
[IMG]local://upfiles/6892/96708988574A45AF9384531589ACAF07.jpg[/IMG]
JPN
[IMG]local://upfiles/6892/96708988574A45AF9384531589ACAF07.jpg[/IMG]

Thread
Thread Starter
Forum
Replies
Last Post
Jomo1994z71
Volvo 850
11
Jan 28, 2008 09:05 PM